Category: Nail Polish

Dance Legend Velvet 649

14

Dance Legend is still a pretty new brand to me. I previously only had two of their polishes and I recently ordered two more. Here’s the first one of those two, a stunning purple matte, Velvet 649. I love the color and the matte finish of this polish. It’s absolutely gorgeous and goes great with my skin tone.

The application was a bummer though. Balding, dragging, uneven mess. I guess if you take enough polish on your brush you can make this a one coater but it’s easier said than done. I needed two coats on every nail. Even if the second coat evened it out quite nicely you still need to be pretty fast with your application or this will dry thick and lumpy. So my advice is, take enough, not too much polish on your brush and apply the first coat with a few fast and steady strokes. Let dry completely and apply the second coat the same way. What ever you do, don’t go back and try to even it out or you’ll make the polish bald even more and pile up. Just let it dry and the second coat will fix it.

All that being said, this dries super fast and looks surprisingly even when completely dry. So if you’re careful with your application this is totally worth getting. Such an amazing color! I love it!! Totally worth the difficult application.

This is two coats over a a coat of Essie Nourish Me.


***This polish was purchased by me. 


My first look at Mavala Spring 2015

8

There’s still snow on the ground and winter hasn’t really even arrived at full force yet here in Finland. So what would be a better time to look forward to the warmer weather and let those spring collections roll out. Here’s what Mavala came up with for Spring 2015.

Matte polishes are making a big comeback and Mavala is on board with that. This collection has six beautiful and smooth matte shades that are perfect for spring. I did a quick test on a couple of nails and my first impression was that these are a little tricky to apply and they dry fast. I got the best result with one thick coat applied fast (except for Lavender which requires two coats). These bald easily so you don’t want to go over the same spot too many times. You can always use a matte top coat too to smooth out a surface or a shiny one if you don’t love the matte finish. Some of these are so well pigmented that I’m also going to try stamping with them.

All in all I love these soft shades and I already have a few nail art designs in mind.


***This collection was sent for review.  
 

I want a white holo…

12

Another quick post while I have a second to write something. I really need to have some posts ready and scheduled for a couple of weeks ahead :D Been so busy again and on top of all the Holiday madness our little girl turned 3 yrs old and all three kids managed to get a flu. Fun times for everyone…

Sooo to the nails. I’ve been wanting a white holographic polish for a while and haven’t run into one anywhere. After all the Holiday manis and glitter I felt like I needed something fresh and simple and since I didn’t have that pure white holo this is what I did. I applied two coats of F.U.N. Lacquer Diamond holo top coat over Wet n Wild Break the Ice white shimmer and a coat of HK Girl top coat. Not pure white but still a pretty result IMO :)

I wore this manicure for days and now I’m ready for some New Year’s Eve glitter explosion again ;)


***The polishes used for this were purchased by me. I don’t benefit from clicking any of the links on this post.

Holiday nails for the last time this year :D

12

This is the manicure I actually had on for Christmas. The gorgeous green glitter is Jindie Nails A Surprise Inside. This is two coats alone on Glisten & Glow Stuck On Blu and topped with two coats of HK Girl.

Ring finger nail has a tree made with little triangle shape DIY decals I cut out of a watermarble sheet I left drying in the water. I placed some glitter pieces from A Surprise Inside on the tree and added the snow using white acrylic paint. The nail art was inspired by mymaynails and Mucking Fusser in IG.


You can buy Jindie Nails polishes from JindieNails.com or from authorized distributors. You can find the latest news, releases and restock info from their FB and IG.

Now I’m most definitely done, done DONE with all kinds of Holiday manicures :D


A Surprise Inside was sent for review. I don’t benefit from clicking any of the links on this post

Jindie Nails – Through the Eyes of a Child

4

Here’s a quick post of a lovely new Jindie Nails polish, Through The Eyes of a Child. This works perfectly as a glitter topper and one coat is plenty enough. Since there’s so much going on in this polish I chose to wear it alone on a nude base. There’s an insane amount of different kind of glitter on a shimmer-y clear base in this bottle :D Even hearts and candy canes! The shimmery base made it look very beautiful when worn alone but I couldn’t quite capture on the photos all the sparkle it had.

Glitter comes out of the bottle pretty easy but I still recommend turning the bottle upside down for a bit before application. The candy canes take a bit of fishing but everything else comes out quite nice. Application was good considering how packed with glitter this polish is. If you use this as a glitter topper just one coat is enough and normal application will do. If you wear it alone like I did here you’ll need two coats and a little bit of dabbing the glitter here and there. I didn’t experience any difficulties with this polish and I love how it just screams Christmas :D


For this manicure I used Essie Beam Me, Essie Sugar Daddy, two coats of Through The Eyes of a Child and two coats of HK Girl top coat.

You can buy Jindie Nails polishes from JindieNails.com or from authorized distributors. You can find the latest news, releases and restock info from their FB and IG.


***Through The Eyes of a Child was sent for review. I don’t benefit from clicking any of the links on this post.


Delush Polish Glam Squad goes Holiday

18

Today I have a brand new Delush Polish pretty for you. This is Glam Squad from the Nue Collection. My newest order of Delushies arrived yesterday and I just had to wear this one right away and naturally I wanted to you guys too :D

A stunning metallic red. I love this! Excellent application and almost a one coater for me. Dry time was also quick. This didn’t stain my cuticles on clean up. Other than that the jury is still out cos I’m still wearing this manicure :D I’ll update the wear time and other information here in a few days.

For this manicure I used a coat of Sally Hansen Nail Rehab, a coat of Glisten & Glow Stuck On Blu!, two coats of Glam Squad and HK Girl top coat.

The icy details were made using a fine nail art brush and Dance Legend Mountain Snow white texture polish.


***Glam Squad and Mountain Snow were purchased by me.  I don’t benefit from clicking any of the links on this post.

Jindie Nails – O Holo Night and stamping nail art

10

Happy Monday! It’s that magical time of the year and what would be a better polish to paint your nails with than the one that is called O Holo Night :D

“This one is a blackened navy blue linear holo with violet/blue glass fleck shimmer and made with SpectraFlair, the most potent holographic pigment on the market.  This is opaque in 2 coats!”

Formula on this was very good. Easy to apply, no dragging or balding and it was almost opaque already on one coat. Dry time was quick and it didn’t stain my nails. Unfortunately this time of the year there’s not enough sun here in Finland to see the holo effect as amazing as it would be in direct sunlight so I just have to show you how beautiful this looks with just daylight bulbs.

For this manicure I used a coat of Sally Hansen Nail Rehab, a coat of Glisten & Glow Stuck On Blu!, two coats of O Holo Night and HK Girl top coat.


Stamping is done with OPI Love.Angel.Music.Baby, squishy XL stamper and XL stamping plate OB-M. Rhinestones are from Konad Pro Rhinestone Pallet Set 7.

You can buy Jindie Nails polishes from JindieNails.com or from authorized distributors. You can find the latest news, releases and restock info from their FB and IG.


***All the products on this post were sent for review. I don’t benefit from clicking any of the links on this post.

Holiday theme nails with Dollish Polish Redrum

8

It’s December! I love this time of the year :) So now it’s also time for the first Holiday theme manicure!

For this manicure I used Sally Hansen Nail Rehab and Glisten & Glow Stuck On Blu! as my base coats.

For all the nails I used Dollish Polish Redrum, not so Chrismas-sy themed holo polish from the Halloween collection. Unfortunately this is no longer available so you’ll have to wait till next year to see if it makes a return for Halloween then. This was too very easy coats. Dry time was fast and no chipping in three days when I wore this.

For the ring finger I used Chaos & Crocodiles Fireside Nights to get some sparkle.

At last I added some red and gold studs and finished the manicure with HK Girl top coat.


***Redrum and Fireside Nights were purchased by me.  I don’t benefit from clicking any of the links on this post.

Delush Polish – Bitchcraft

18

This beauty is Delush Polish Bitchcraft from the Scream Supreme collection. Every polish on this collection is just stunning and unfortunately I couldn’t afford to buy all of them. I do have three to show you though and this is the first one of those three, Bitchcraft.

This is a gorgeous black jelly glitterbomb. I turned the bottle upside down before application to help the largest dots to come out easier. Cos my nails are quite curvy I did move the biggest glitter pieces to the spots were they laid flat. Other than that no glitter placement was needed. Very good formula that was easy and even to apply and dried quickly. This can be worn alone too but I decided to layer it over a black creme to really make the pink glitters pop.

For this manicure I used a coat of Sally Hansen Nail Rehab, a coat of Glisten & Glow Stuck On Blu!, a coat of Essie Licorice, two coats of Bitchcraft and two coats of HK Girl top coat to smooth out the glitters.


***Bitchcraft was purchased by me.  I don’t benefit from clicking any of the links on this post.

Matching Nails & Makeup – Delush Polish Time To Kill

20

Today I’m trying something that is new to my blog. I take a polish/manicure and match my makeup with it to show you guys. Most of these looks are meant to be your average every day look. Something I can wear when I walk out the door to go shopping or just go to a grocery store. I like to play with colors too so there is going to be everything from nude makeup to a smokey eye. Needless to say, I have a lot of makeup and nail polish to match so I shouldn’t run out of material anytime soon :D It’s just a matter of having the time to do my makeup and take photos too. So when ever I have time to do this, you’ll see the results.

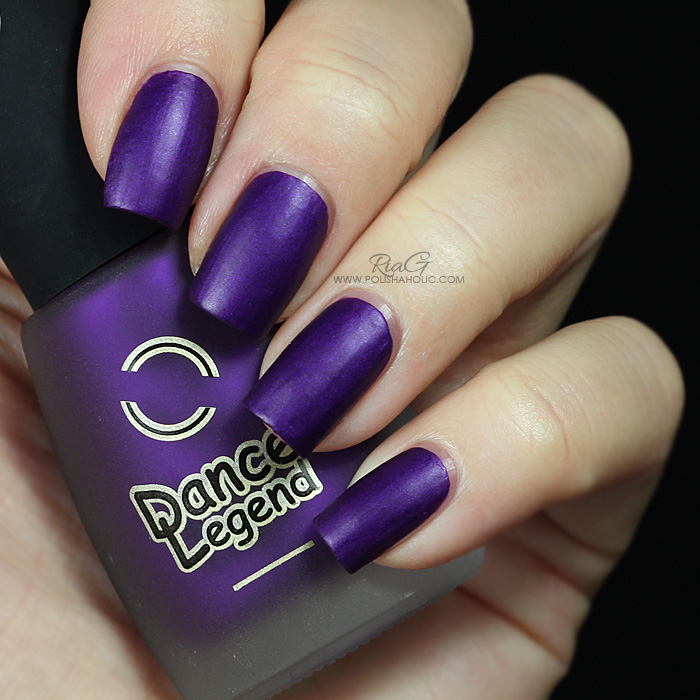
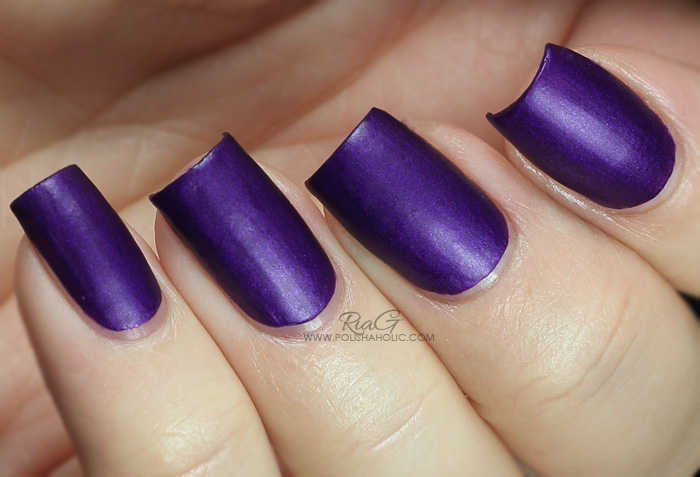
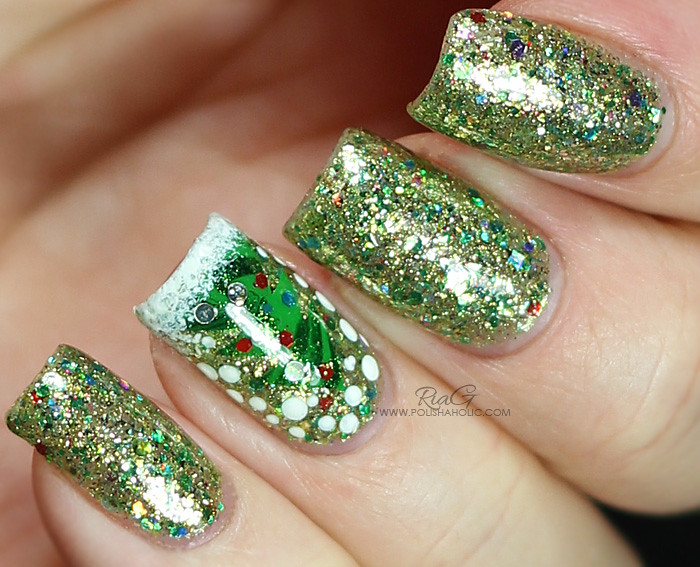
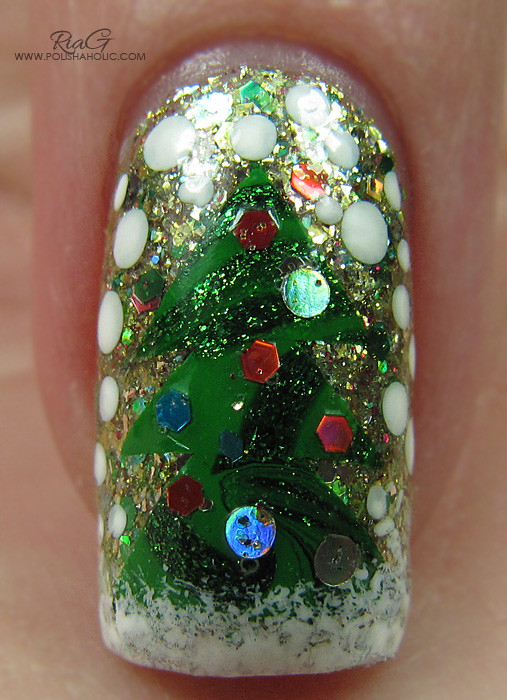
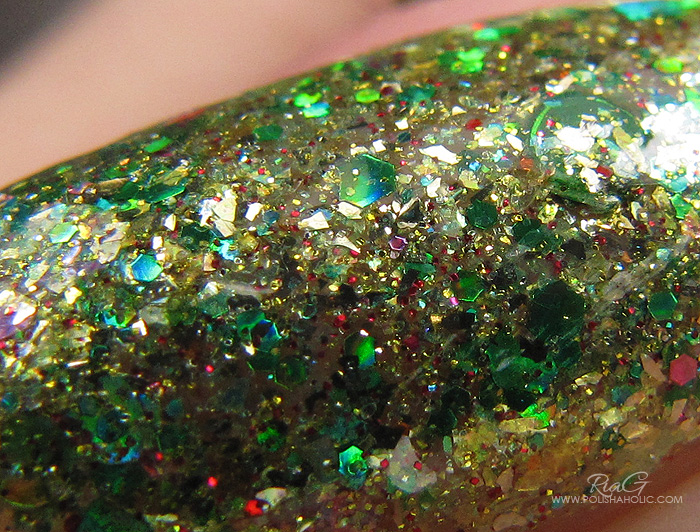
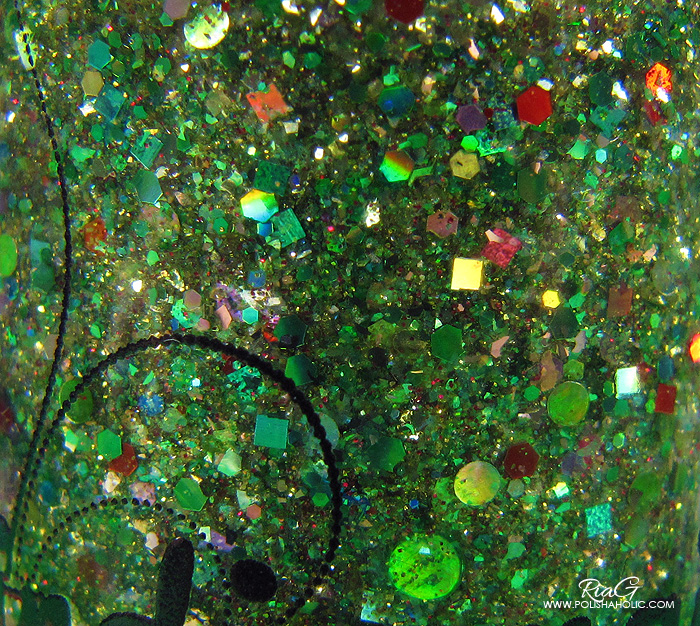
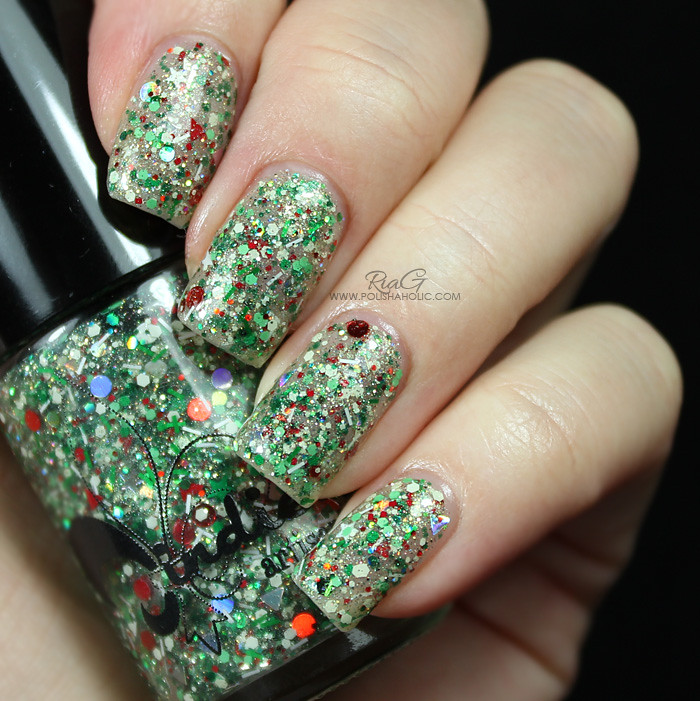
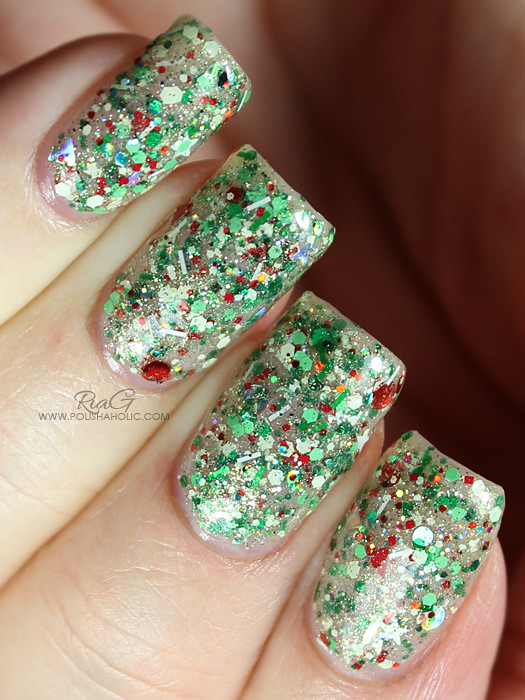
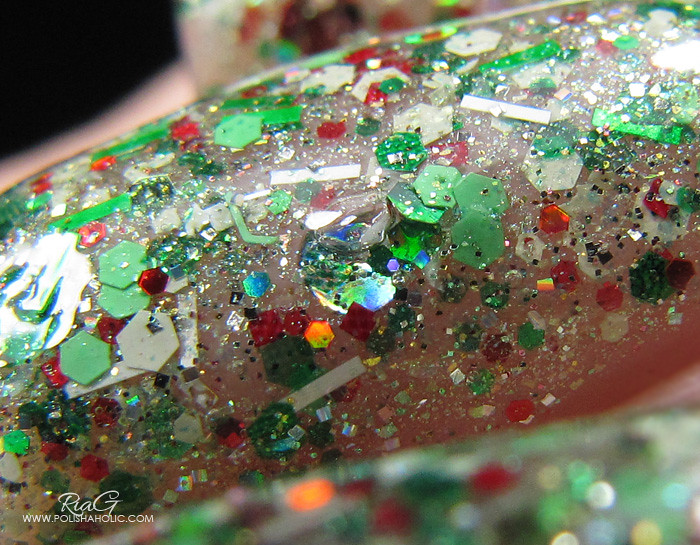
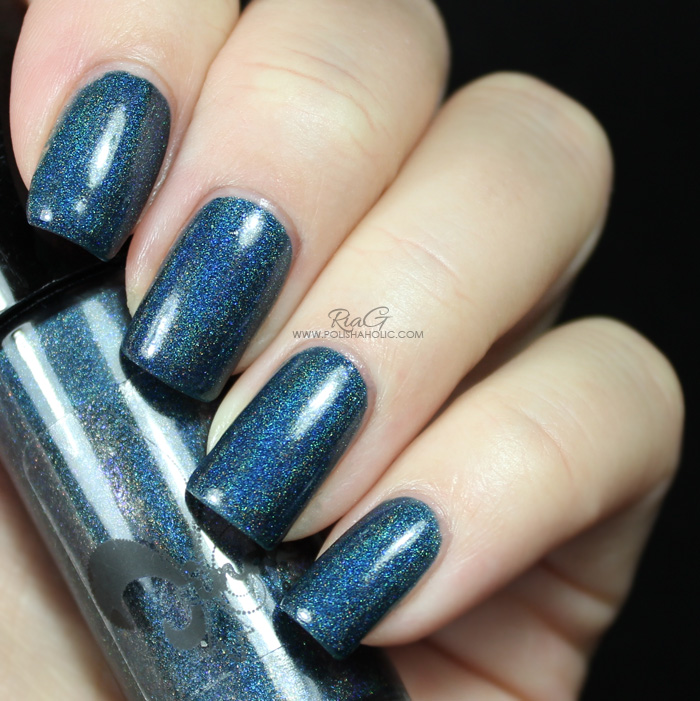
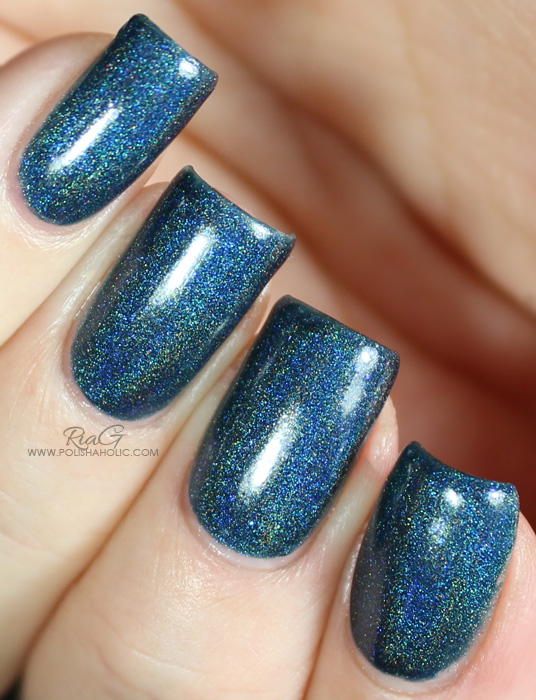
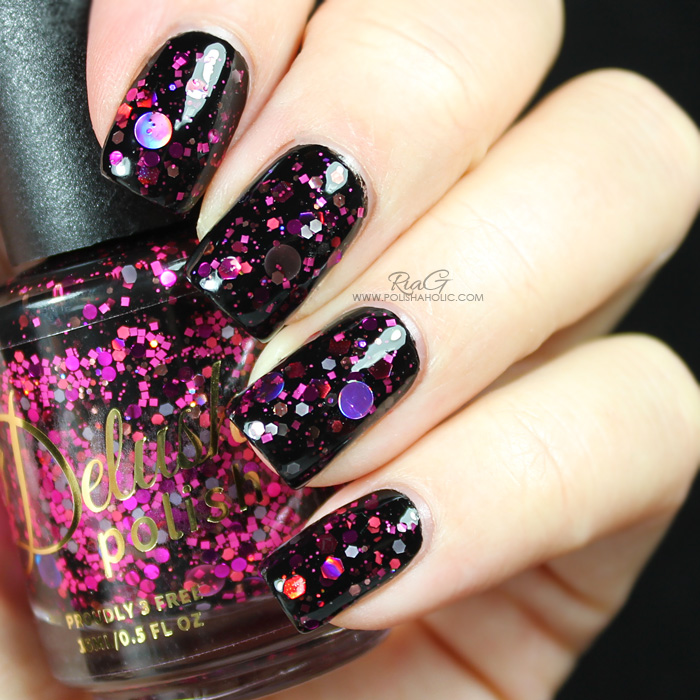
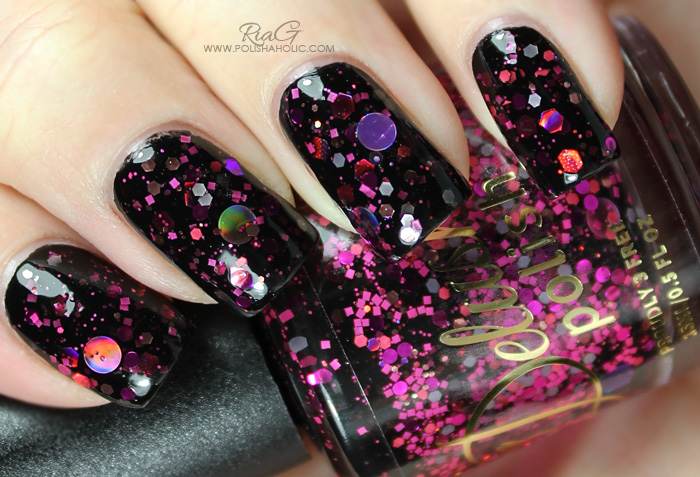
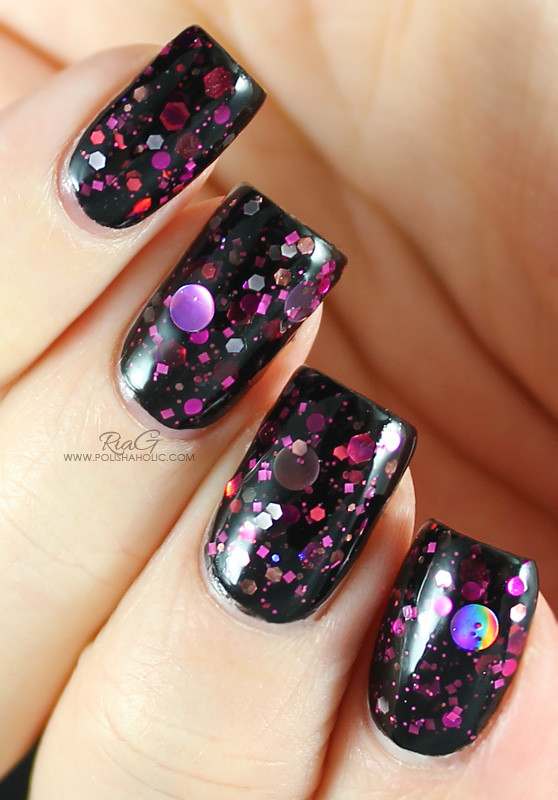
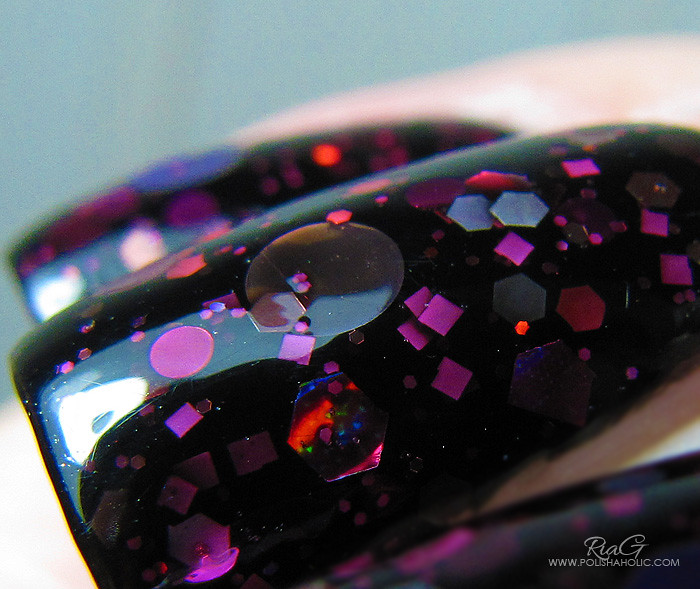
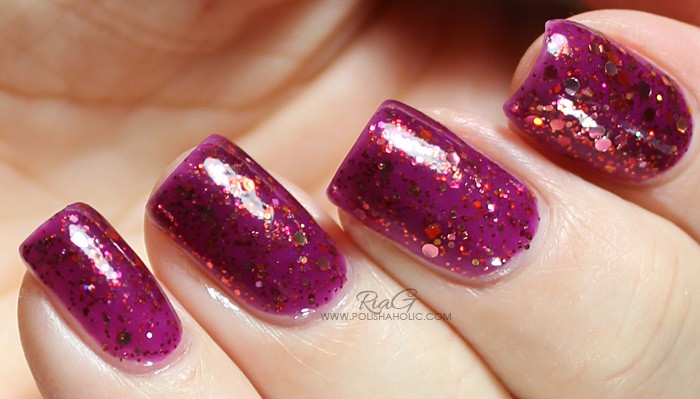
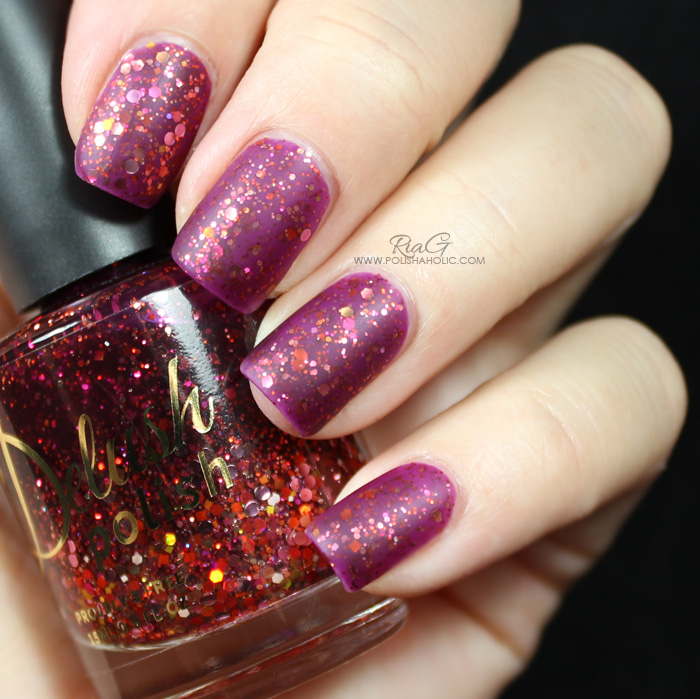
So my choice for today’s makeup look was based on Delush Polish Time To Kill from the Slice Of Life Collection. This is a stunning plum jelly that can be worn on it’s own or over a base color. The formula is flawless. It applies nice and thin. Glitters spread evenly without having to place or dab them on. Dry time is also pretty fast. It’s just perfect!

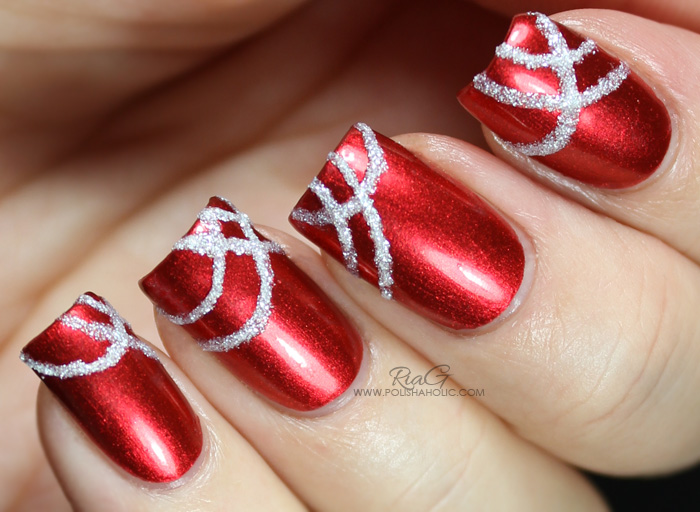
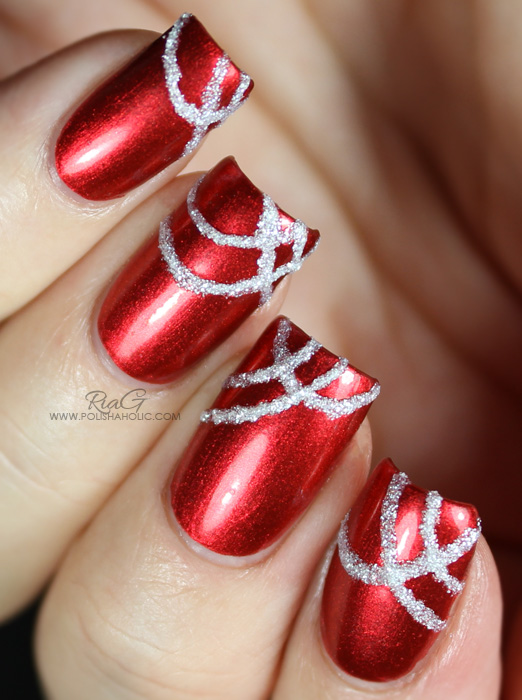
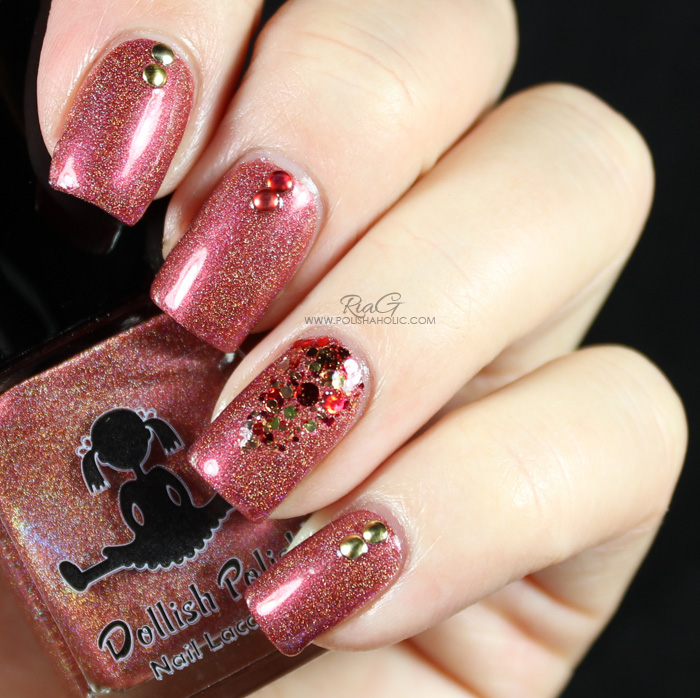
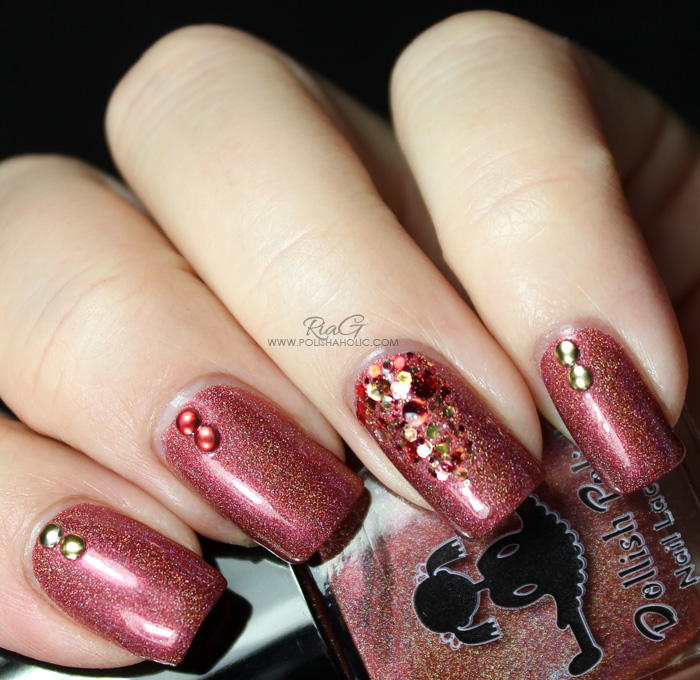
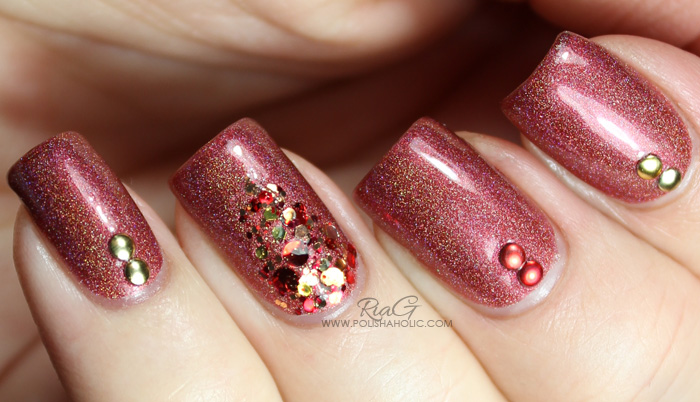
For this manicure I used a coat of Sally Hansen Nail Rehab treatment, a coat of Glisten & Glow Stuck On Blu! base coat, a coat of Essie Sugar Daddy, two coats of Time To Kill and HK Girl top coat. I also added a matte top coat (This matte top coat is from Born Pretty Store and I’ll have a review coming up for it later on. You can use the code NZL91 for -10% off your order).


Gorgeous! Right?

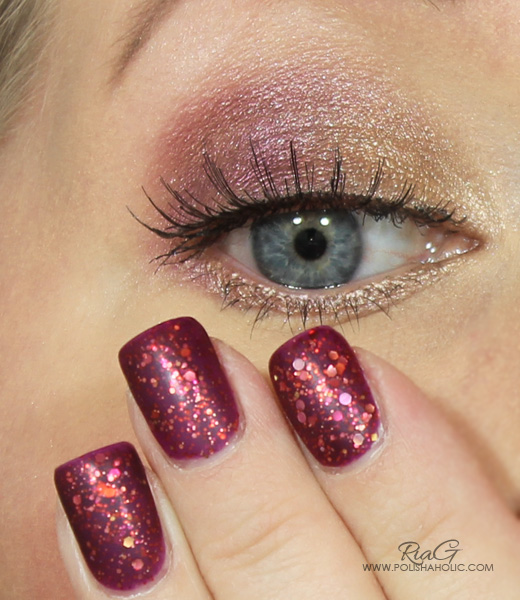
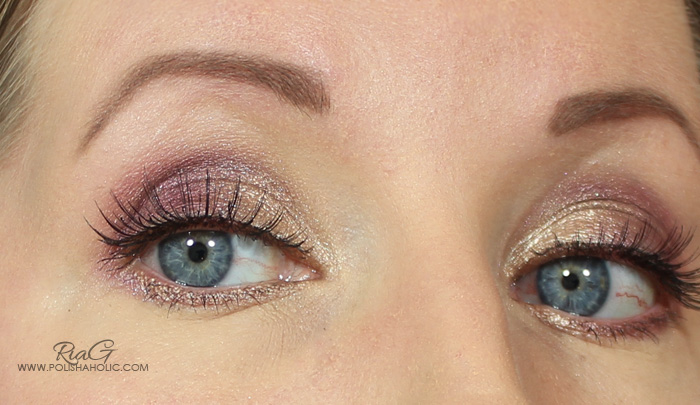
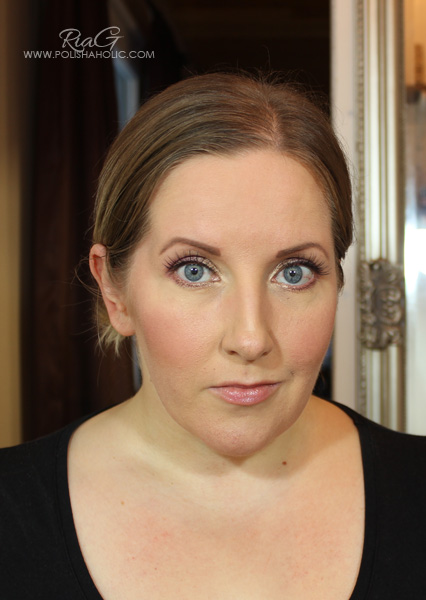
So it was easy to create a makeup look for this manicure. I used purple, plum and gold eyeshadows this time but orange would also go great with this if you want a bolder, more colorful look that really makes blue eye color pop. For the eye makeup I used Sleek Make Up Vintage Romance palette. I really like this  palette. The colors are perfect for fall and it’s also good quality for an affordable price. I really need to get more of these :)


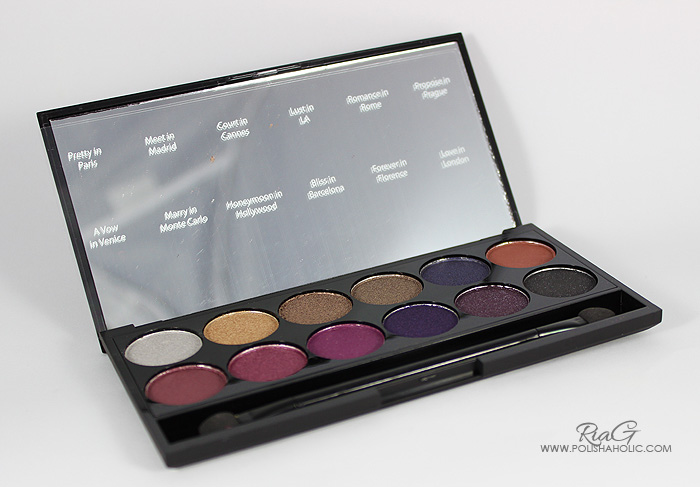
For this look I used gold Meet in Madrid and the three purple shades from the left side of the bottom row. These look quite shiny on the lid so I tried not to blend the shadows too high up. I have a lot of area to cover on my lids and if I’m not careful the makeup can end up making me look like a clown.I added false lashes cos the last pregnancy totally messed up my lashes and I have like half of them left and they are much shorter than usual. Hopefully they’ll return to normal soon enough. Till then I’ll be faking it ;)
 This look is pretty subtle and natural with a hint of color on the eyes. Good every day look that could  easily be turned into a darker nighttime look by adding dark eyeliner and creamy eyeshadow as a base to make the eyeshadows more visible.

I hope you liked this post and the idea of matching nails with makeup. I really enjoyed doing a makeup post. It’s been so long since the last one. This was fun for me at least :D


***Time To Kill was sent for review. Matte top coat was gifted to me. All the makeup products were purchased by me. I don’t benefit from clicking any of the links on this post.