Hello lovelies! I’ve been spending past couple of months trying to grow my nails to almond shape and getting over a flu plus yet another kidney infection (pyelonephritis). I feel like the whole family has taken turns being sick for the past three months. After everyone is healthy again the round starts from the beginning. Now that I have mostly recovered from the kidney infection the kids are snotty and have fever again. Fun times!
(more…)

Tag: Nail growing
Growing my nails to almond shape
On my last post I talked about my summer and here’s how my nails are doing at the moment.
They are very short. Much shorter than I’d like them to be and I’d be lying if I told you I haven’t considered going for the UV-gel to help me grow some length again. But the thing is that I removed the gel layover cos of health reasons and the fact that I just didn’t have energy or time to fix the layover every two weeks cos I can’t stand the visible growth line. So I just have to keep reminding myself of those reasons and keep going.
(more…)
Back to natural nails 2016 – Second IBX treatment
On Monday it was time for my second IBX treatment. You can read about my first experience here. The first treatment took away all the sensitivity and that stayed away too. Also my nails did feel stronger and healthier just after one treatment.
(more…)
Back to natural nails 2016 – First IBX treatment
So the nail growing project continues. All the UV-gel is off my nails now and they are thin as paper. I’ve been hearing great things about IBX treatment when it comes to damaged nails so I decided to give it a try. I had my first appointment the other day and this post is about my first impressions with IBX.
Back to natural nails 2016 – Nail growing project begins once again
So here we are again with yet another nail growing project. I just got tired of fixing the gel layover and I simply miss the feeling of natural nails. I filed all the length off my nails so I can get used to these nubbins and I still have the gel layover on them, for now. Next weekend I’m going to remove all the gel and I’m going for my first ever IBX treatment on Monday, a week from now.
(more…)
Back to natural nails – The result
About 6 months ago I decided to get rid of my gel nails and grow my natural nails back. I removed the gel completely from my right hand nails and grew it out from my left hand nails. It was a long process and now I’m finally at the point where my nails are healthy and they are not peeling or breaking.
During this nail growing project I found some new products that work great for me and also tested some that don’t work for my nails. At the moment my nails are growing fast but I’m keeping them at this length and not trying to grow them longer. Right now the perfect shape is more important to me than length. I also have 2,5 months old baby and weather is getting colder. So also for those reasons I’m not even trying to have longer nails.
I’m quite happy with the way they look now. My nails feel strong and healthy and they are actually in the best condition they’ve ever been before. Biggest thanks I owe to Bliss Kiss Pure Nail Oil and nail care tips I’ve read from NailCareHQ.com. I’m working on a blog post about my current nail care routines and products I use so I’m not going to go in to details here. I just want to show you the results this time and the nail care post will be up soon enough.
I know that some of you out there might be fighting with peeling and weak nails right now or you might be growing out acrylics/gel nails. By showing you my result I hope I can give a little extra kick to your nail growing project and show you that in the end your patience and taking good care of your nails is rewarded with beautiful and healthy natural nails :)
So this is where I started from at the end of May:
Yeah, I know. Looks like a mission impossible and if you thought that was bad, take a look at this next photo taken about a week later, right after nail polish remover. (Duri Rejuvacote was one of the products that did not work for my nails at all. It caused peeling and breaking which is what most nail strengtheners do for my nails).n.
Dry, damaged, weak nails and horrible cuticles. I had a looooong road ahead of me growing these nails back to being healthy.
And here’s were I’m now:

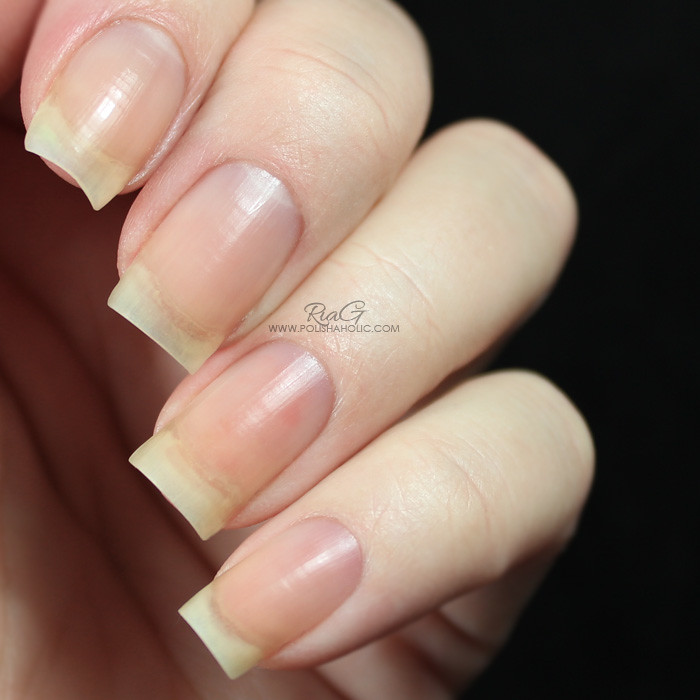

I’m so very proud of myself for having the patience to do this and not go back to gel nails. My nails are naturally very thin and they peel and break easily. Bliss Kiss and Ana’s nail care tips have changed everything for me. As I said earlier I have a post coming up soon about my nail care routines and on that post I explain how I keep my nails looking like this.
*** I don’t benefit from clicking the link on this post.
Back to natural nails – progress on both hands
Today I’ll show you how my “Back to natural nails” project is going. On the photos you can see about month and a half of growth on my right hand nails and 3 weeks progress on growing out the gel layover on my left hand nails. This is always such a long and patience requiring project but so far so good. Naturally I’d like to have strong and long natural nails instantly but unfortunately it doesn’t work that way :P
So here’s where I started from 29th of May. Ultra short nubbins damaged by removal of the gel layover.

And here’s how they looked yesterday 15th of July. There’s still a tiny bit of the damaged part left on my pinky, ring and middle finger nails. Another week of growing and then filing them shorter again should do the trick with those nails and then they are all my natural nails and all healthy.
Index finger nail is another story though. It had some gel left on it since it was fixed one more time later than the other three so there’s still some growing to do. Now the gel layover is gone due to a moment of “Do as I say, not as I do” action. The layover started to lift a bit and in all my wisdom I decided to just rip it of. NEVER do that!! Always file the layover off GENTLY and CAREFULLY without damaging your natural nail! So now I have a very thin and damaged part of the nail to grow out for the next few weeks *sigh*
So let’s move on to the left hand. Here’s how the nails were doing 21st of June.
And here’s the situation yesterday, 15th of July. So on the photo you can see about 3 weeks of growth. The gel layover is still perfectly attached and I’ll leave it be for now on. I keep filing these nails shorter once a week and now there isn’t a huge difference between my right and left hand nails. Both thumbs are in the same point with these ones. About half of the nail plate showing and the rest still has the gel layover on it.
Then let’s talk a bit about the products I’ve been using.
I’m still using Bliss Kiss Pure Nail Oil daily and my opinion about that hasn’t changed. It’s simply amazing and my nails love it! It has made the world of good for my cuticles and my nails always look nice and well moisturized.
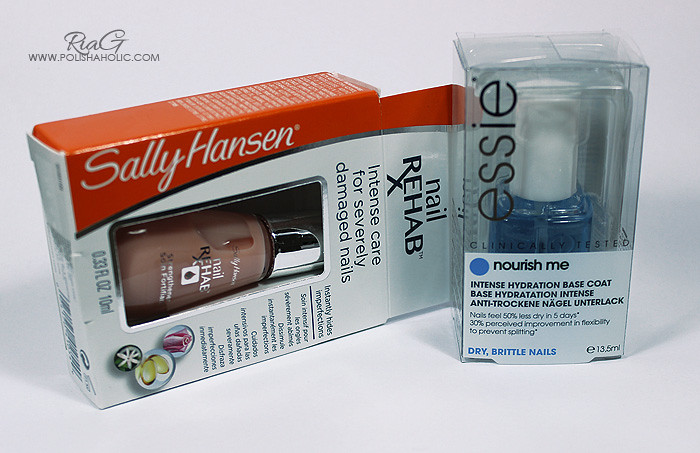
I have also been testing Duri Rejuvacote and I’m afraid it does the same to my nails as most nail strengtheners do, it makes my nails peel. If I use it for three or more manicures in a row my nails start to peel. I switched to Essie Nourish Me but that didn’t stop the peeling completely so I took a few days break from nail polish and just kept applying Pure Nail Oil several times a day. Then I filed off all the length and peeling parts and kept using the oil.
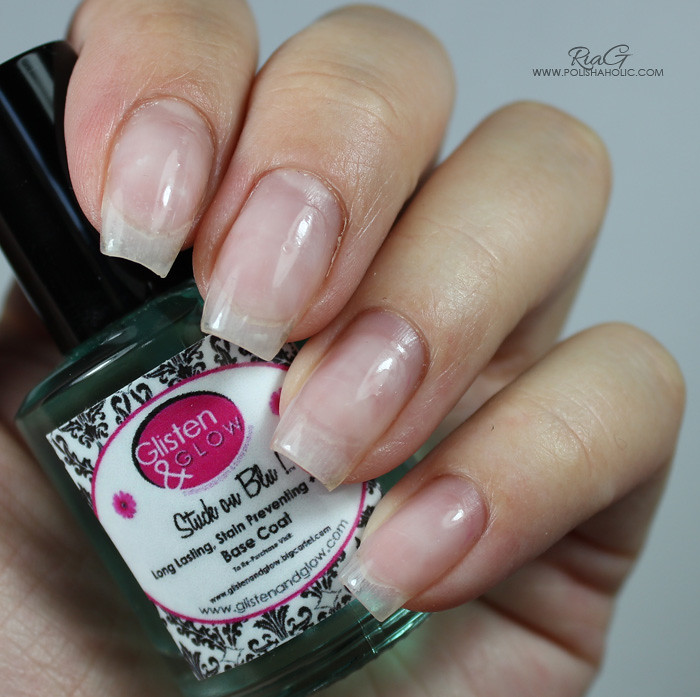
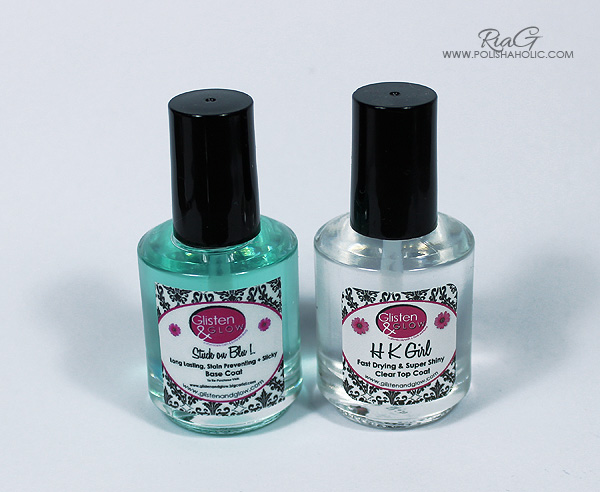
Now I’m going to test Sally Hansen Nail Rehab treatment and see if that works for me. I’m really dying to find a good base coat/treatment for my nails. I always use Glisten & Glow Stuck On Blu! on top of the treatments, before the polish to prevent staining. I also like the sticky base it creates for the polish.
So all in all the nail growing project is moving along nicely. I’m happy to have my natural nails back and very excited to see if I can find the right products to keep them healthy too.
***Bliss Kiss Pure Nail Oil and Essie Nourish Me were purchased by me. Duri Rejuvacote and Sally Hansen Nail Rehab were sent to me for free.
Back to natural nails – Bliss Kiss Pure Nail Oil
Less than three weeks ago I received my first Bliss Kiss Pure Nail Oil order and I’ve been using it daily since then. I ordered the Starter/Refill Kit and grip pads for opening the oil pen. I’ve seen so many convincing photos and read so many great reviews that I was very excited to try this product myself.
As you probably know, I’m going back to natural nails after having gel nails for over a year so my nails are not in a best possible condition and I can use all the help I can get. On this blog post you can see two week result on my left hand cuticles after using Pure Nail Oil.
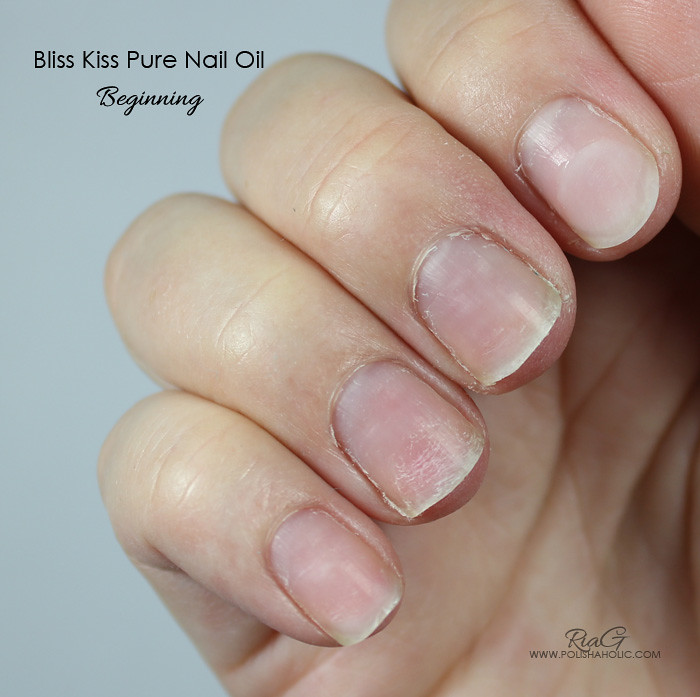
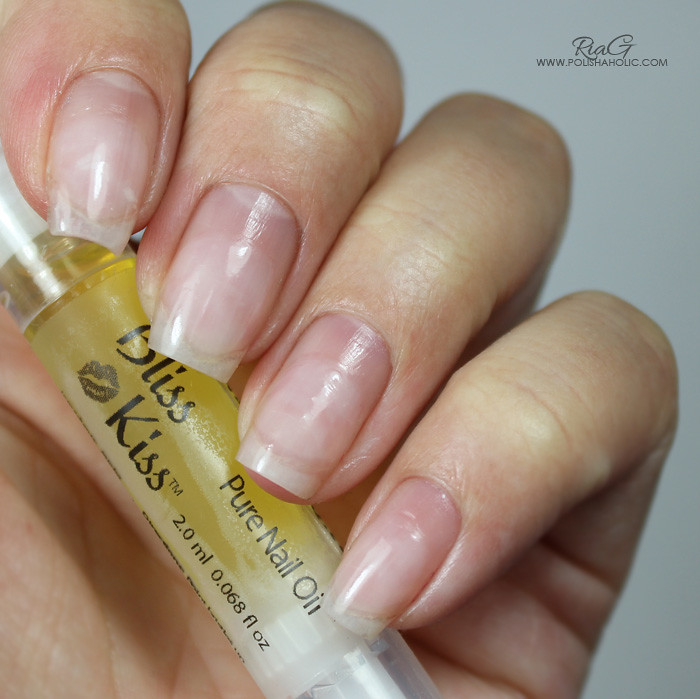
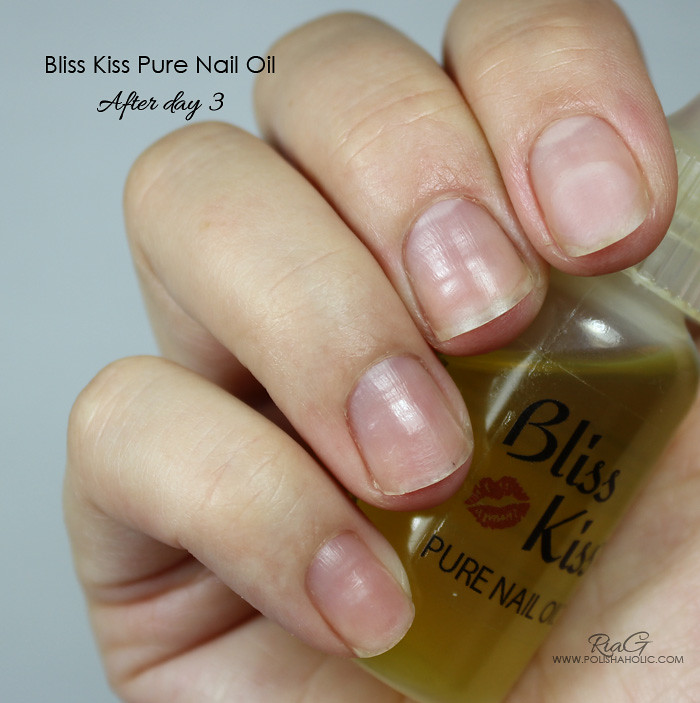
Today I’ll show you the before photo along with the first three days of using Pure Nail Oil on my right hand nails. After I received the package I immediately removed my manicure and went for naked nails for three days. Pure Nail Oil comes with good instructions and I tried to follow those as well as I could.
The before photo is taken right after I removed my manicure so the nail polish remover probably added some extra horror dryness on my cuticles. I also hadn’t used cuticle remover for a bit and that shows as well. You can see the damaged part really well on my ring finger nail and it really looks like it could use a serious amount of moisturizing. That is what I’m trying to grow out and have healthy nails. There’s also some gel left on my index finger nail. These photos were taken over two weeks ago and this coming Sunday I’ll show you one month of growth on my right hand nails and you can also see the condition they are in now after using Pure Nail Oil for three weeks. But that is for Sunday’s post :)
Regardless of how bad my nails and cuticles look in the “Beginning” photo they were moisturized daily using lotions and CND Solar Oil. This is just how easily drying my skin and nails are. Use nail polish remover once and all the moisturizing goes out the window.
So here is the horror I started with…
Pretty, eh? :P
No, not really ;) So you can imagine how much Pure Nail Oil my nails and cuticles took in during these first three days. During day one I kept applying the oil like once an hour and it all went in so fast. After a couple of minutes my fingers and nails didn’t feel oily at all. So I kept adding the oil all the time and I was stunned how fast it absorbed. I didn’t use a huge amount at a time, just a drop.
The difference between Pure Nail Oil and Solar Oil was clear to me from the first application. Compared to Solar Oil this one absorbs super fast. Solar Oil also make my skin and cuticles feel kinda rough during application where as Pure Nail Oil makes them feel nice and smooth. Pure Nail Oil also makes my finger tips silky smooth. With Solar Oil I always need to use cuticle balm/cream to get the soft result. Pure Nail Oil is enough alone.
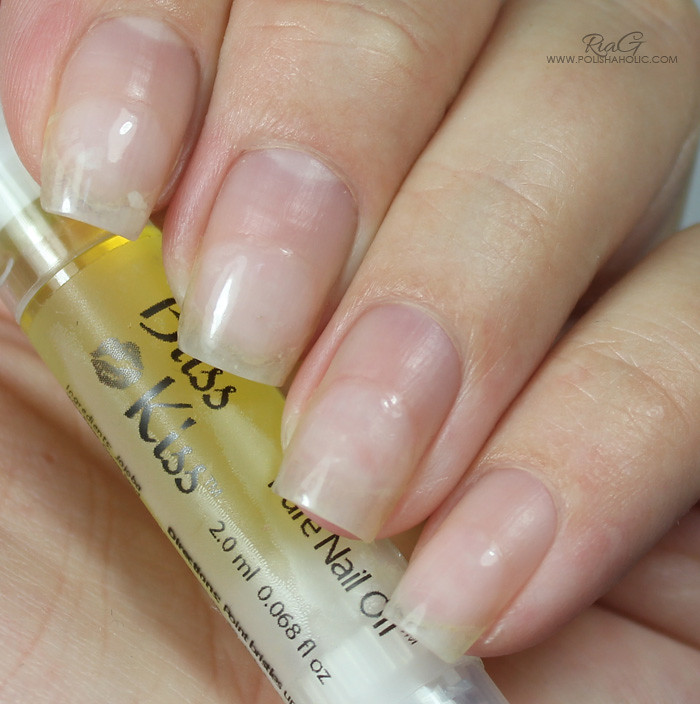
So needless to say I was excited already after day 1. The next morning I took “Day 1” photo before applying the oil. So in this photo it’s been about 12 hours since the last application of Pure Nail Oil and I have washed my hands at least a couple of times.
Quite a difference! My nails and cuticles looked different and they felt so smooth and well moisturized. During day two of naked nails I kept applying the oil quite often. Not as many times as the previous day but it was quite a few times then too. Still the oil kept absorbing fast and it was obvious my nails and cuticles still needed some extra care.
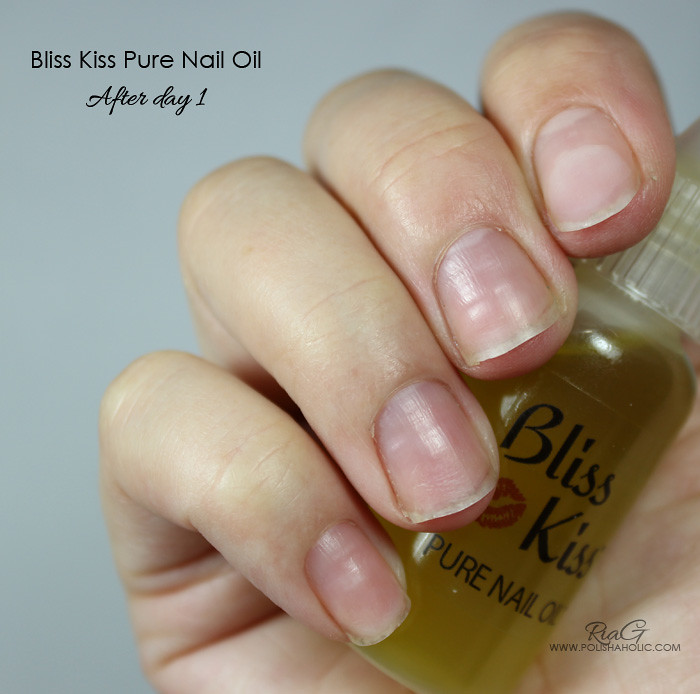
So here’s the result on the morning after “Day 2”. Naturally not such a dramatic change anymore but I was still able to see and feel improvement. This photo was also taken in the similar situation as the previous one, about 12 hours after the last application of Pure Nail Oil.
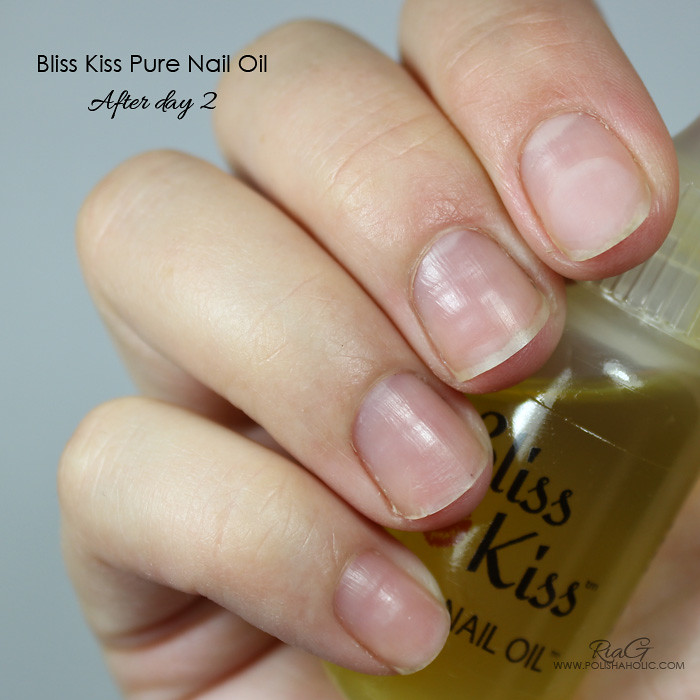
So I continued applying the oil for the third day. Now I didn’t really need to apply the oil as often as day one and two. I used just a drop of oil for each hand and massaged it in a few times during the day. I left my nails naked for the night so I could take my third and final photo the following morning.
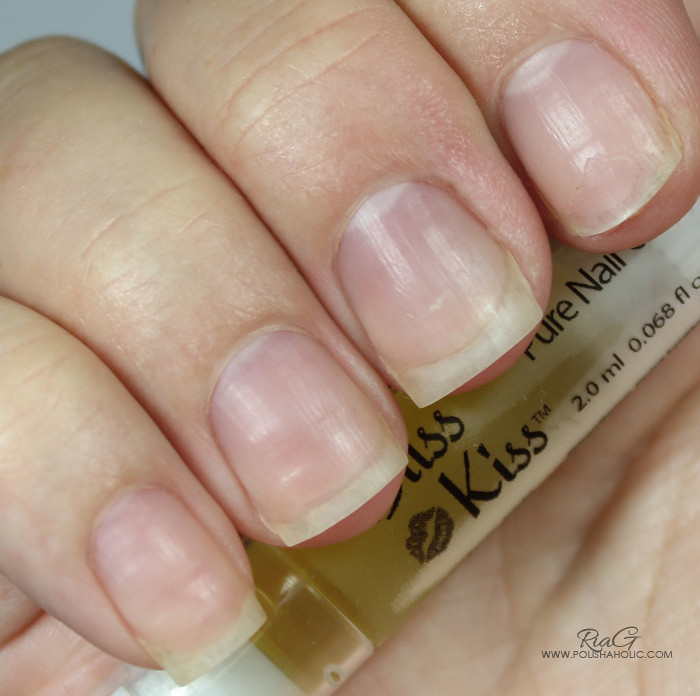
And here’s my three days result of using Bliss Kiss Pure Nail Oil. I can still see clear improvement on the condition of my cuticles and compared to the “Beginning” photo the change in just three days is HUGE!
Since the three days of nail nakedness I’ve been keeping my nails polished and I’ve applied Pure Nail Oil on my cuticles a few times a day. I drop a tiny bit of oil on my thumb and then press my other thumb against it. Now I have a small amount of oil on both my thumb finger tips and I just rub it on all of my cuticles. So a little drop few times a day takes you a long way with Pure Nail Oil.
My manicures on my right hand now last up to three days which is long enough considering the condition my nails were in. The tips still have damaged part to grow out too. After I remove the manicure I apply oil on my nails and massage my nail beds and cuticles till the oil is absorbed. Sometimes I add another drop and repeat the massage. After all the oil is absorbed I wipe my nail with Cleaner liquid (alcohol) and do my next manicure.
Only time will tell if Pure Nail Oil is the answer I’ve been looking for to help my easily peeling and breaking nails. I will know for sure after all the gel and damaged parts have grown out. Right now I’m extremely happy with Bliss Kiss Pure Nail Oil and it’s hands down the best nail oil I have ever tried. NailCareHQ.com has a sale coming up first week of July and I really need to stock up on this oil so I never run out of it :D
***Pure Nail Oil was purchased by me. I don’t benefit from clicking any of the links on this post.
Back to natural nails – Growing out the UV-gel layover
Wow! It’s been 3 weeks since my last post. I’ve been battling some minor health issues and low hemoglobin level. Cos of that I’ve been extremely tired. After taking my antibiotics and iron supplements I’m feeling a lot better again and I’m almost back to normal. I’ve still been posting photos on my IG and FB so some of you might know what I’ve been up to anyways :)
Today I’m going to show you how the nail growing project is going on my left hand. I still have the gel layover on my left hand nails and I’ll leave it be till it grows out or falls out, which ever comes first. I keep filing the length off once a week so I can keep them nice and short and have minimal stress on the gel layover.
Two weeks ago I also received my Bliss Kiss Pure Nail Oil order and I’ve been using it ever since. You can see a nice improvement on my cuticles and the part of my natural nails that is showing is looking nice and moisturized too. This is most definitely the best nail oil I have ever used and there will be a whole post about it coming soon.
So here’s the three week progress on my left hand. This first photo was taken June 1st.
And this photo was taken today, June 21st. You can see a good amount of growth (could always be more and faster if you ask me) and I’m happy with the way things are going at the moment.
So this is how my left hand is doing. I’ll have a post up about the right hand and one month growth next weekend. Next week I’ll also have a review of Bliss Kiss Pure Nail Oil for you plus some swatch photos of course!
***Kiss Bliss Pure Nail Oil purchased by me. I don’t benefit from clicking any of the links on this post.
Back to natural nails – Beginning of the nail growing project
Since I filed my nails shorter I’ve started to miss the feeling of my own natural nails. Also at the moment I find maintaining the gel layover a little bit too time and energy consuming. That lead to a decision of starting this “Back to natural nails” project. I’m going to start by growing out my right hand nails first. While they grow I keep the left hand nails in swatch photo condition and covered with gel. I’m trying not to fill the left hand nails anymore either and just file the gel layover thinner as the nails grow. I might have to use soak off gel polish to cover the growth line when I’m swatching.
My right hand nails are almost gel free now. There’s a tiny bit of gel left on the index and thumb finger nails. Those parts will either grow out or peel off, time will tell. A bit over half the length of the nail bed is now grown out (hopefully) healthy and the other part is quite damaged by gel and the removal of the layover.
Of course it’s going to be annoying for me to have ultra nubbins on my right hand and normal nails on my left hand. The polish won’t match most of the time either. I’m usually very particular about both hands having the same length and shape nails. Now I just have to believe it’ll be worth the trouble tolerating the situation for a bit and hopefully have my own natural nails back growing nice and healthy soon enough.
I’m going to be using some of the products I’ve already used before and found them working great for me and I have also received some new products to test.
I also just ordered Kiss Bliss Pure Nail Oil Starter/Refill Kit from NailCareHQ.com. I’ve heard great things about this product so I can’t wait to try it on my own nails.
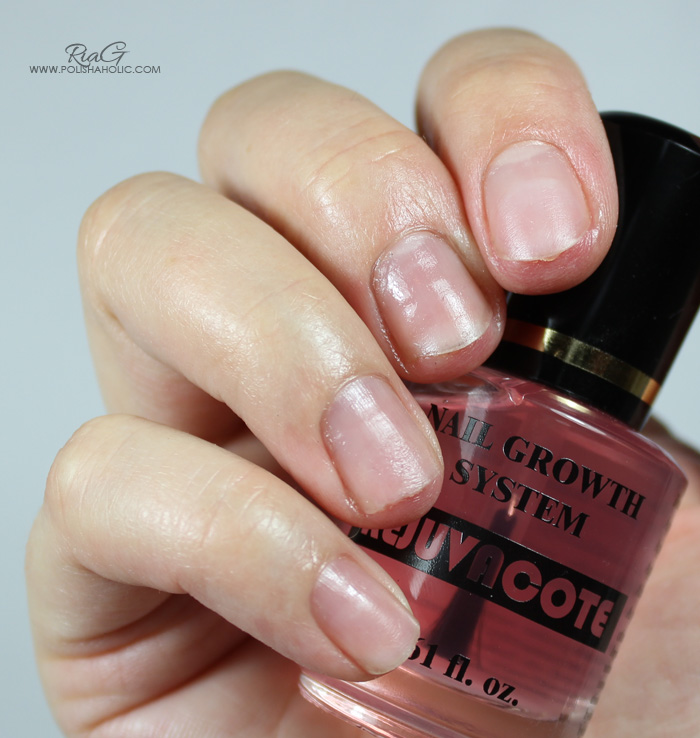
This is where I’m starting from:
As you can see, my nails are super short and not in a great condition. I’m trying to keep them as short as possible minimizing the risk of bad tears and breaks. One of the new products I’m trying is Duri Rejuvacote. I’ve read great reviews of this product and I’m pretty excited to try it. Though I’m not going to use it as the instructions recommend, as a base coat and a top coat. I don’t see a point in doing that. So I’ll use a couple of coats under my base coat, polish and top coat.
I also don’t believe there’s a base coat/treatment on this earth that will fix damaged nails. Once your nail is damaged it’ll remain so until the damaged part grows out. I’ll just hope this product, used in balance with others will help my nails grow stronger in the future. So I’m not expecting a miracle healing for my paper thin nails while using this product.
Since I’ve noticed that excessive use of nail strengtheners/hardeners will do me no good I will also use other treatments like Essie Nourish Me and Sally Hansen Nail Rehab base coat. I try to keep a good balance using different products. Most important product to try and use will be the Kiss Bliss Pure Nail Oil once my order arrives.
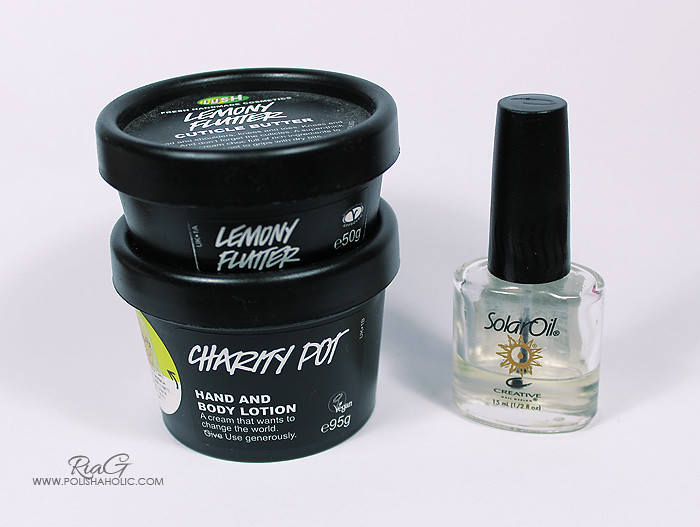
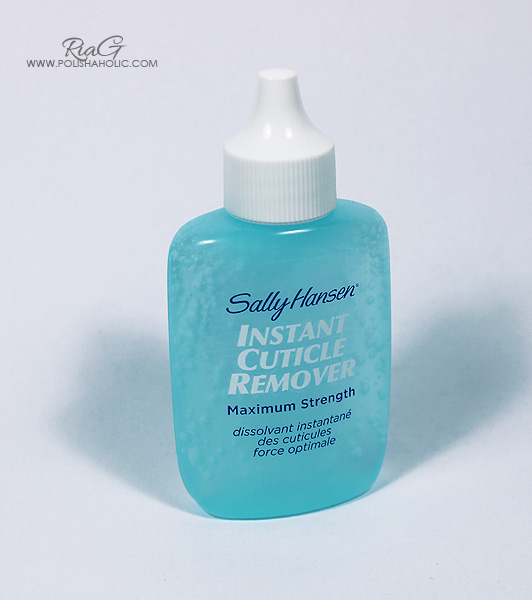
I also need to take care of my cuticles and hands so for that I’m going to rely on familiar products like LUSH Lemony Flutter and Charity Pot. For cuticle removal I like to use Sally Hansen Instant Cuticle Remover. It works great for me and I use it about once a week.
I’ll be using CND Solar Oil on my nails and cuticles until the previously mentioned Bliss Kiss Pure Nail Oil arrives.
Naturally there’s other products I use too but I’m not gonna start photographing and listing every single thing here right now. Those products will probably appear on future posts as the nail growing project moves along.
Another important thing is to always keep my nails polished to protect and give them some extra strength. First of all I will always keep my nails moisturized with nail oil. For my manicures I’ll be using 1-2 coats of Duri Rejuvacote/Essie Nourish Me/Sally Hansen Nail Rehab (switching between these three), then a coat of Glisten & Glow Stuck On Blu! base coat, 2-3 coats of nail polish and HK Girl top coat.
So this is the beginning of my “Back to natural nails” project. I’ll post regular updates with photos and info on how these products are working for me. This is a project that will take months instead of weeks and require a lot of patience so you might see some crying and whining about this on my social media sites ;) As well as nubbins swatches and possible broken nail disaster photos :P
I’ll leave you with a Dollish Polish teaser (since you can’t get this polish anymore). This is Lipstick Around Your Dipstick from Dolly Does Polish collection.
Cos them nubbins need some love and awesome nail polish too:

***Duri Rejuvacote, Sally Hansen Nail Rehab, Stuck On Blu! and HK Girl top coat were received for free. Other products mentioned on this post were purchased by me. I don’t benefit from clicking any of the links on this post.