Category: Brands

My favorite blushes at the moment

6

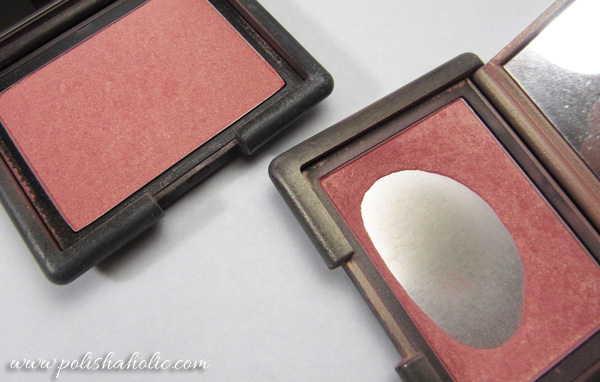
I have two blushes I use way more than any others. I use these almost every time on my everyday makeup and when I want to play it safe. Theses blushes are NARS Orgasm and Torrid. They go perfectly with my warmtoned skin. Orgasm brings on the natural glowing peachy look and Torrid adds a little more color to it. I usually wear these together.

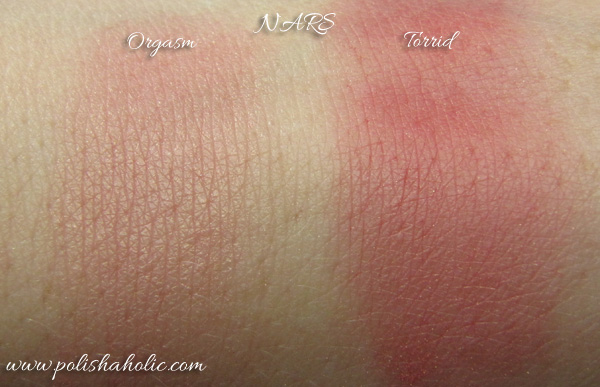
Orgasm is quite shimmery and glowing. You can’t end up with clown cheeks using this one but your cheeks can glow way too much in sunlight if you apply too heavily. Then again Torrid is very pigmented and I suggest you use a light hand applying this and check out the result in daylight before you leave home. These work together perfectly on my cheeks. First I apply contouring, then Orgasm and then the highlighter. I blend everything together smoothly and the last I add a light touch of Torrid for color.

In their pans these two look a lot alike but the swatch photo reveals the truth. Orgasm gives more of a natural glow and Torrid has a lot less shimmer and gives out a lot more color.

So these are my go-to blushes. What about you ladies, what is the blush you go for the most often?


Color Club – Cherubic

6

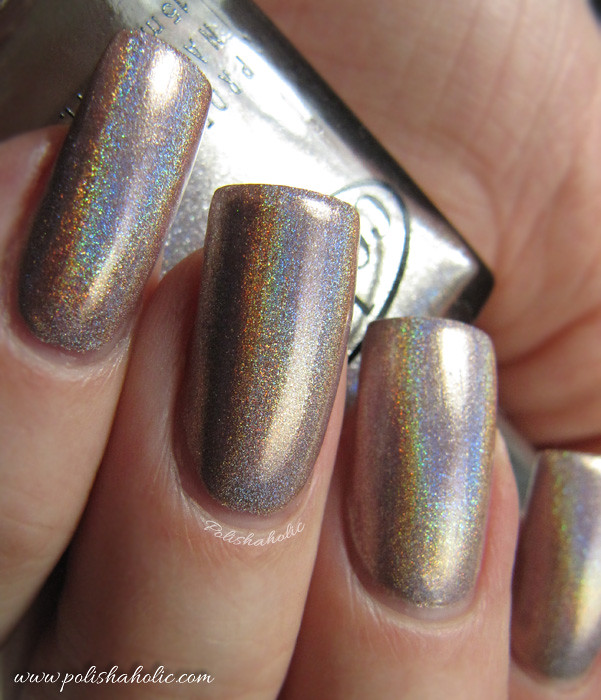
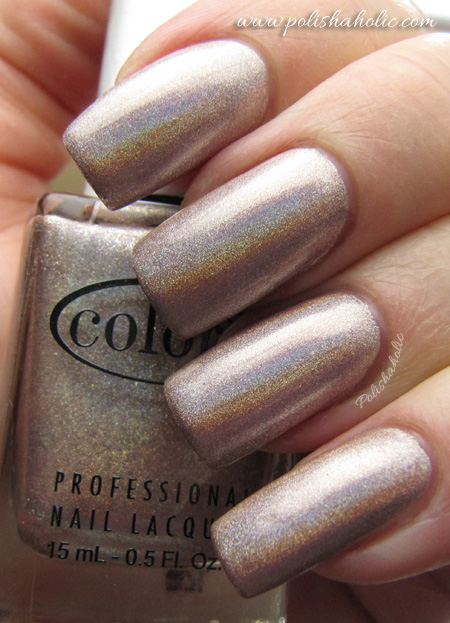
Today I have Color Club Cherubic for you. You already might have seen a photo of this on my yesterday’s post too. Cherubic is from Color Club’s 2012  Halo Hues collection. This collection had six holographic polishes. The holo effect is very strong on this one and top coat doesn’t reduce it at all. For this year Color Club is coming up with another six holoshades (YAY!) and you can have a little taste of what they look like on their Facebook-page.

Cherubic is nude/beige holo polish that applies nice and smooth. Dry time was also very fast. On this mani I used two coats of Cherubic and Inm Out The Door top coat. This time I didn’t have any base coat cos I have the UV-gel on my nails now.

I totally fell in love with this one! It’s just gorgeous and stunning! Now I’m obsessed about getting all the rest of these shades plus the ones that are coming out this year ;D


Quick UV-gel tutorial

16

This is my quick tutorial about how to use UV-gel to make your nails longer and stronger. The brand I use is Cesars Secerts and I buy it from a Finnish webstore. I’ve been using this brand for years and I’ve also gone through their training for both acrylic and gel nails. I’m not trying to teach anyone how to do their nails at home and I HIGHLY recommend going to training if you want to do your own nails. I’ll also do a quick explanation in English for each photo, but if you live outside of Finland I have no idea where you can buy Cesars Secrets products. There must be stores for at least European countries. Google is your friend :)


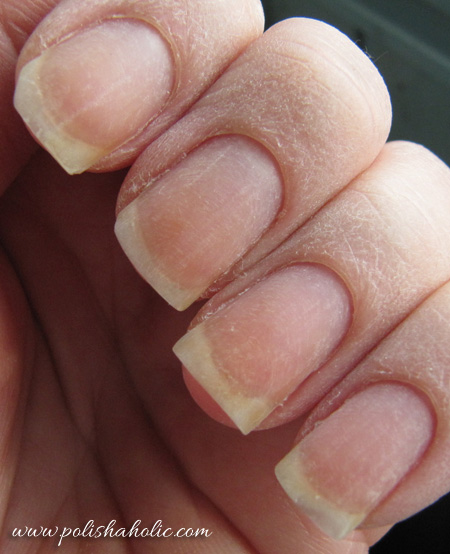
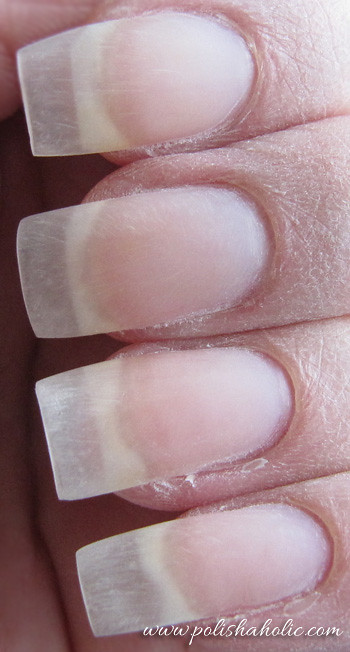
I have now prepped my nails for the UV-gel. I pushed my cuticles back and filed my nails lightly using 240 grit file. You can’t pay too much attention to this part. If you slack off and not do this properly your gel is sure to start lifting sooner than later. The super thin part on the tip of my pinky is cos of peeling and breaking, not too much filing.


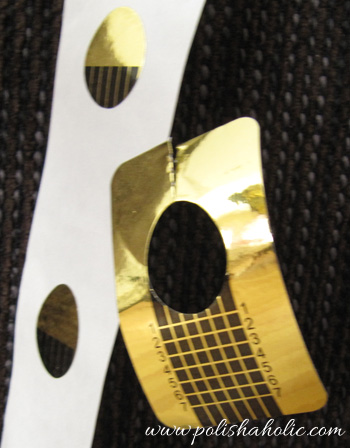
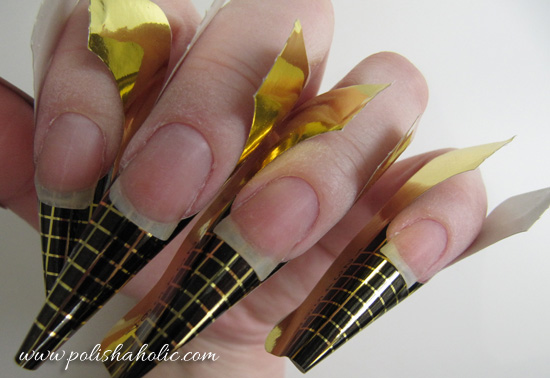
Next I wipe the dust of the nails using Cesars Secrets Cleanser liquid and I place on the nail form stickers starting from pinky and finishing with the thumb. It’s very important not to touch the prepped nails during this process.


Nail form stickers are now in place and you might want to wipe your nails with cleanser one more time just in case you touched them while placing the forms. After this I apply Cesars Secrets Primer 1 and Primer 2.


.

I applied a thin coat of gel on the tip of the nails to add some length, cured the nails under a UV-light for 2 mins and removed the forms carefully. I usually apply a thin layer of gel on the nail bed too but this time I decided to try a different way.


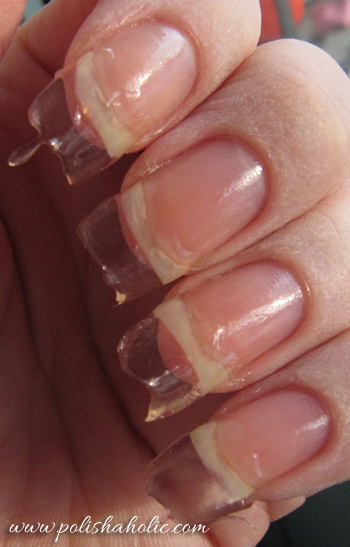
Here I have applied the gel on the whole nail. I used Cesars Secrets Builder gel  for everything and I cured my nails in UV-light for 2 mins again. After the nails are done I wipe the sticky surface using the Cleanser liquid. The tips are still a mess but the surface of the nail is nice and smooth.


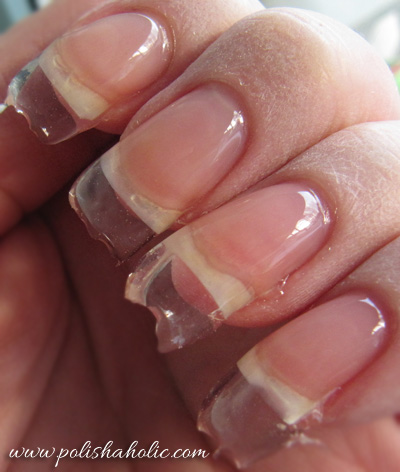
I filed my nails in shape by using 180 and 300 grit files. After this I carefully remove the dust of my nails and apply a thin layer of Sealing gel and cure that for another 2 mins.


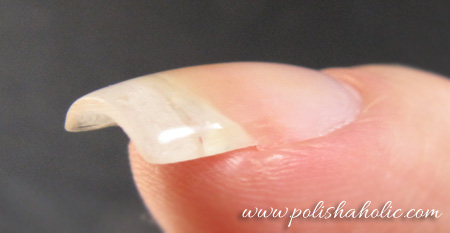
I finish my nails off by wiping the sticky surface with Cleanser liquid and my nails are done. I used an electric file under my tips to make them matte. Since I always use nail polish the clear extensions don’t bother me any and I was just too lazy to do the french tips.


I tried to keep the layer of gel thin-ish and the shape of the nail natural.


And I finished it off with an ultimate test, holographic nail polish that shows every little mistake and flaw there is to show. No pumps or dents showing, great! The polish is Color Club Cherubic and I’ll have a whole another post about it tomorrow.

So that was my quick tutorial on how I coated my nails using UV-gel and gained some extra length using nail for stickers. If you have any questions please leave a comment and I’ll be glad to answer :)


Jindie Nails – Love Conquers All

6

Happy Valentine’s Day everyone!

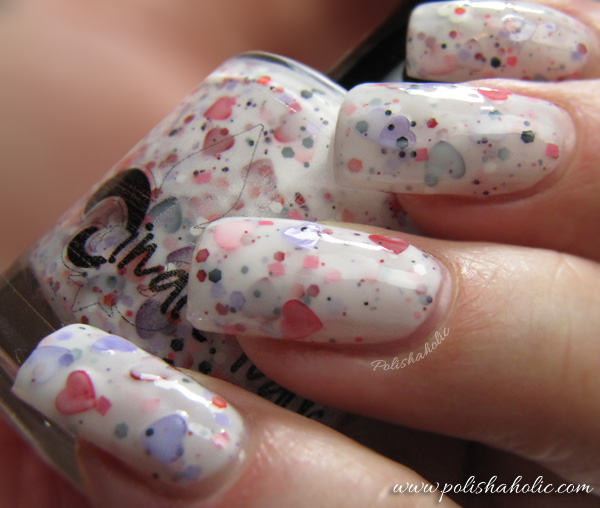
Today I have a perfect polish for the day, Jindie Nails Love Conquers All. This is a white crelly polish with a lot of different kinds of glitter including different colored hearts. This looks a lot bumpier on the photo than it was IRL. The hearts came out of the bottle just fine, no fishing needed and on the photos I have two coats of polish on my nails plus Inm Out The Door. Unfortunately I was in a hurry doing my nails and I think if I had a little more time and patience applying this polish it would’ve ended with a lot smoother result. This polish most definitely deserves a revisit and new swatch photos at some point.

You can purchase Jindie Nails polishes from their Etsy-store (which is sometimes closed) as well as LlaroweMei Mei’s Signatures and Ninja Polish. You can find the latest restock and other info from their Facebook page.

Also my nails haven’t magically grown length overnight. Like I was explaining on Tuesday’s Nourish Me report post, I used UV-gel to make my nails stronger. Of course I got greedy too and added some length. I’ll  write a post about the gel applying process tomorrow.


Nail Pattern Boldness – Glitter Food

7

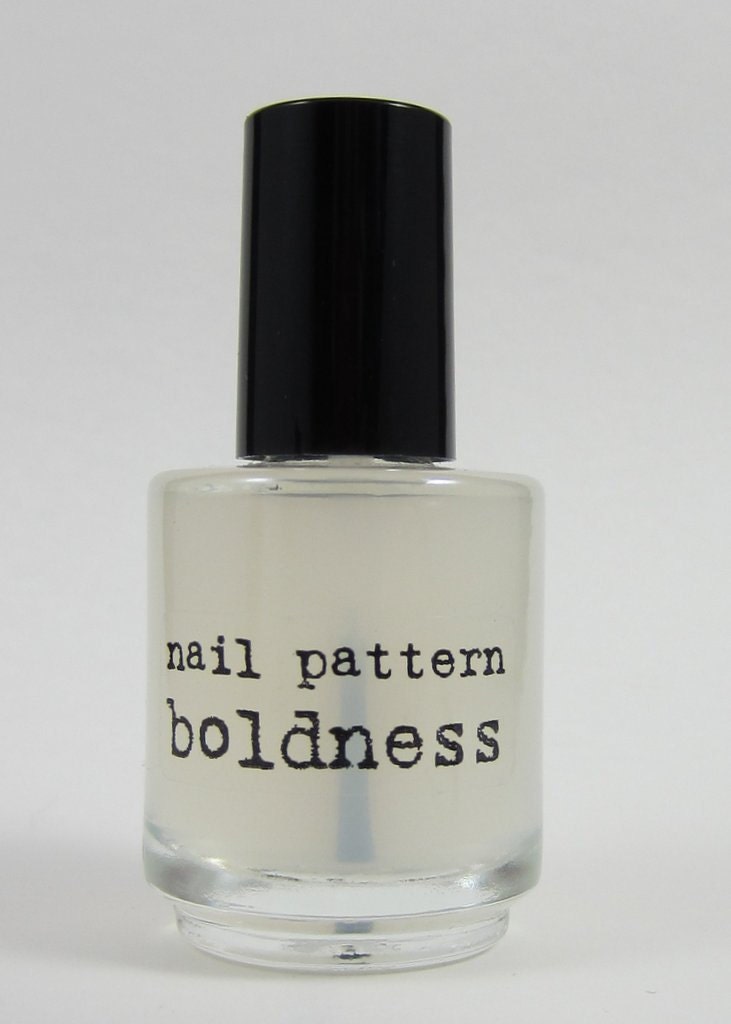
I got a bottle of Nail Pattern Boldness Glitter Food top coat to test and I’m in love! This top coat is thick and milky-ish and it smooths down even the grittiest glitter out there and creates a glass like surface. By itself Glitter Food dries a bit cloudy and matte looking but once you add a shinier top coat the sparkle is all there.

You can also use this to fix your glitter polishes that have gone flat while sitting there in your polish drawer. Add some Glitter Food in to the bottle, shake and it’s all good again. Glitter Food restores the needed thickness to the base of your glitter polish. Third way to use this is to help you create your own glitter or pigment frankens. Sometimes the clear base just needs that added thickness and suspension and that’s where Glitter Food comes in. This product is so worth it’s price!Over at Nail Pattern Boldness they have also begun to test this as a base coat for those polishes that need a perfectly smooth surface to be applied on. I myself will definitely try this as a base coat for acrylic/gel nails to see if this can hide the growing line that becomes visible even through your nail polish after a couple of weeks from your nail fix. I hate that visible line and that is one of the reasons why I’m still fighting with my peeling nails and keeping them natural instead of coating them with gel. I’d be a very happy polishaholic if Glitter Food could fix that problem for me.


Only the glitter polish. You can see how the glitter is not totally smooth.


I have now applied a coat of Glitter Food and you can see how it dries matte-ish.


This is a little blurry but you can still see the smooth surface on the left side compared to plain polish on the right.


Now I have added Inm Out The Door on both nails. You can see the shiny and sparkle is back on the left side nail and it also has this added depth that is missing from the nail with only Inm on it.


Surface of the nail is silky smooth and shiny.


Again a little blurry but you can clearly see the difference between the left side Glitter Food+Inm nail compared to the right side only Inm nail. Glitter Food rocks!


Photo from Nail Pattern Boldness

I’m totally addicted to Glitter Food now that I’ve gone glitter polish crazy lately. I will need to order a couple of more bottles of this so I can try it on frankening too. I can’t make myself  “waste” the only bottle I have on that right now.

For these photos I also used Nail Pattern Boldness Is Someone Loving You? from their new Hello? collection. You can find more photos and my review of it here

You can buy Nail Pattern Boldness Glitter Food from their store. You should also follow their Facebook-page and blog to get the latest info on new products and restock dates.


***This was sent to me for review.

Rainbow Honey – XOXO

2
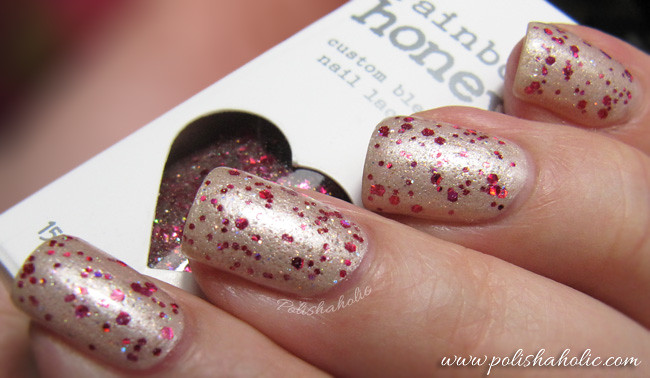
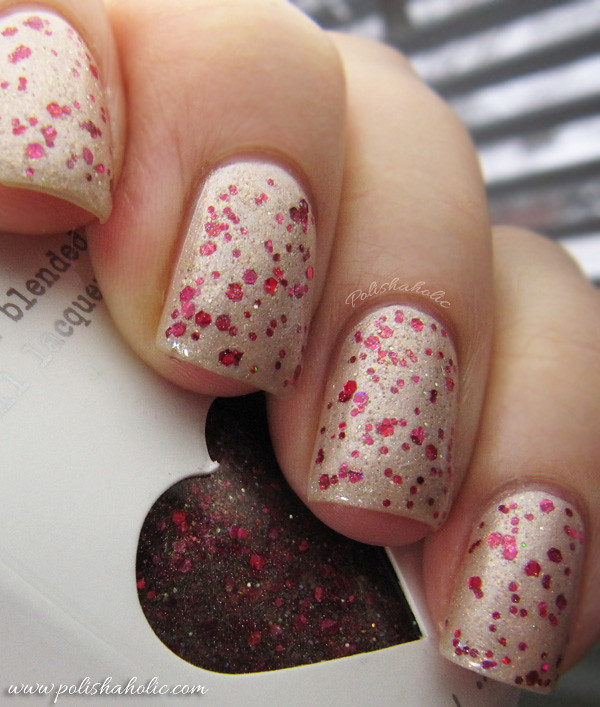
I ordered my first Rainbow Honey nail polish a while ago and chose to get XOXO from their new Sweet Talk collection.

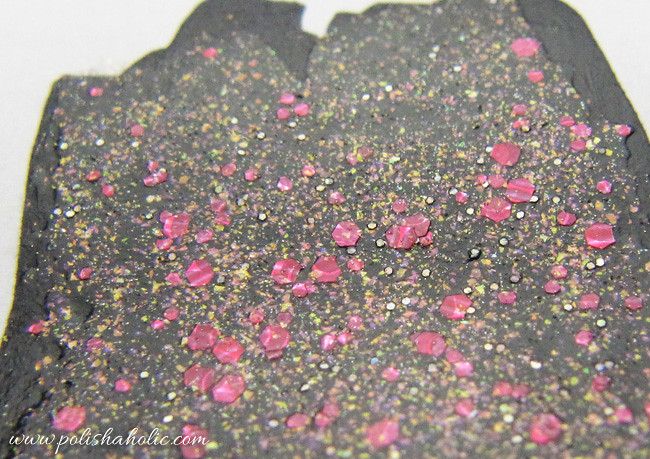
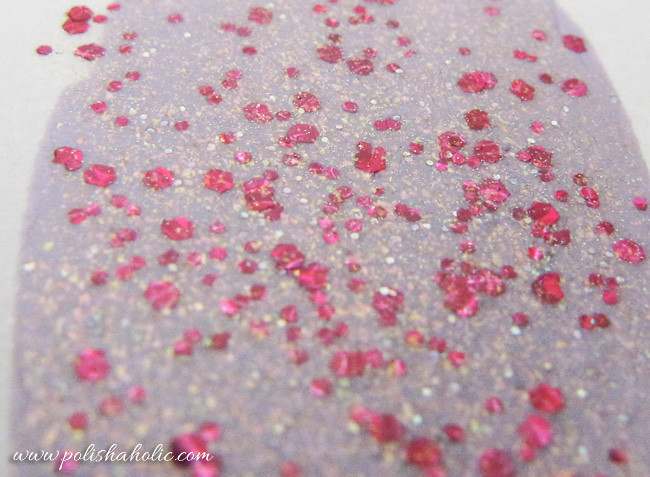
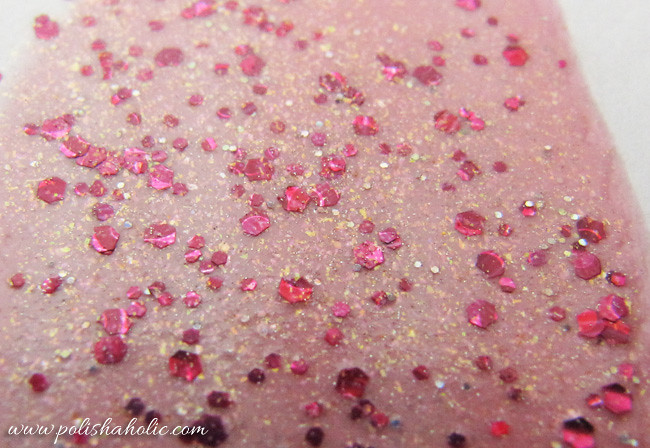
XOXO has golden and holographic micro-glitter and bigger different sized red hex glitters on a clear base. This is at it’s best when layered with another polish. The red glitter pieces remind me of rose petals. This is a very beautiful glitter polish that can be used with a lot of different colors.

I have two coats of base coat, two coats of nude Color Club Linen & Silk and one coat of XOXO plus Inm Out The Door top coat on my nails. The formula is a little on the thick side, even a little gel-ish but very easy to apply and the glitter spreads out evenly without any tricks.

I tested this out on a white paper and four different colors just to see how it looked with other polishes. Turns out this looks especially sweet with pink and white polishes.

I bought this from Mei Mei’s Signatures along with another polish and it was my first order from them. Customer service was just excellent and shipping was quick. You should also follow their Facebook-page for further information about restocks and new products.


XOXO over Color Club Where’s The Soiree?
XOXO over Essie Lilacism
XOXO over OPI Alpine Snow
XOXO over Color Club I Believe In Amour


Jindie Nails – Barney Blew Up

10

Surprise, surprise it’s indie glitter polish time again! Lately I’ve gone head over heels crazy over indie brands and especially glitter polishes. I hope you like to see these as much as I do :)

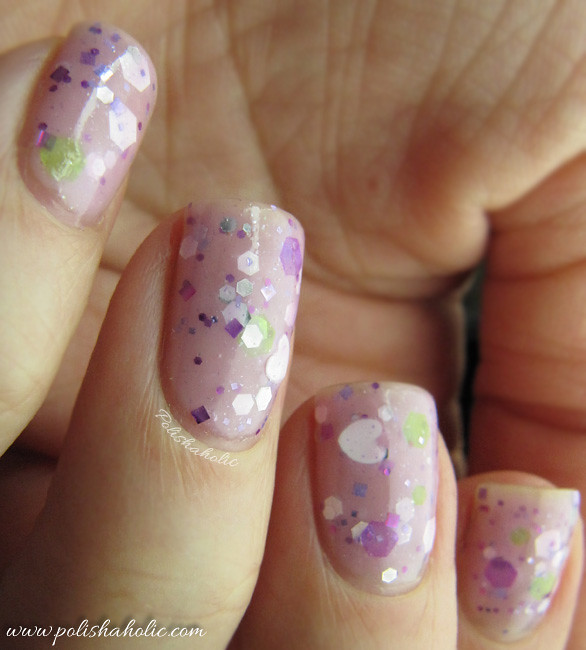
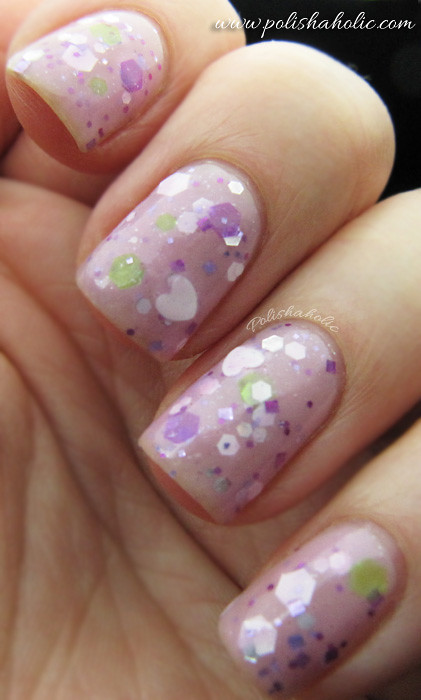
This amazing glitter overdose polish is Jindie Nails Barney Blew Up. Just the name was so cute and appropriate that I just had to have this and it is unlike anything else in my collection. Very pale lilac crelly base has a ton of different kinds of glitter pieces. There’s squares, hex glitter, bigger hex glitter, hearts and what not. It’s a wonderful, cute and spring-y glitter explosion on your nails. It might be the green hex glitter that makes me think of spring.

This is your typical indie glitter, a bit on the thick side but not impossible at all to apply. I started by applying one normal coat of Barney Blew Up on top of my base coat and let it dry for a bit. I turned the bottle upside down while waiting so it would be easier to fish out the bigger glitter pieces. After the first coat had dried for a bit I went hunting for the bigger hex pieces and the hearts. I placed those on my nails and added a coat of Nail Pattern Boldness Glitter Food and Inm Out The Door top coat.

Jindie nails is quite a popular brand and you can purchase their polishes from their Etsy-store (which is sometimes closed) as well as Llarowe, Mei Mei’s Signatures and Ninja Polish. You can find the latest restock and other info from their Facebook page.


ABC Challenge – E is for Editorial

40

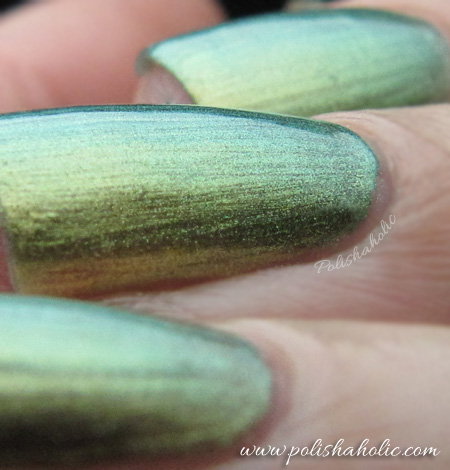
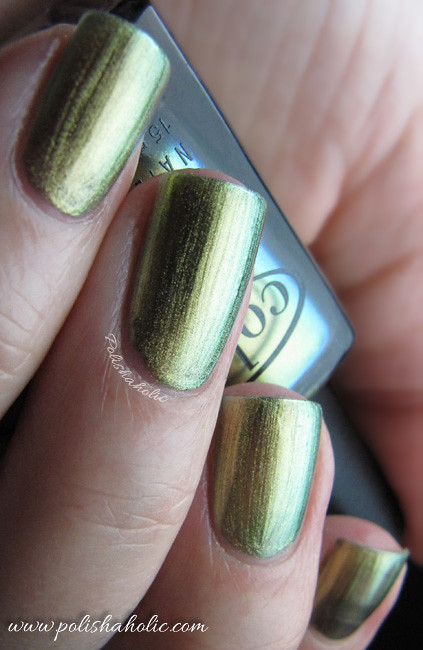
It’s time for letter E this week and for that I chose Color Club Editorial. I didn’t have anything cool for E so I just took the easy way out ;) I actually bought something but it didn’t make it here in time :( Editorial is one of the eight thousand Chanel Peridot dupes out there. I can actually still find Peridot from the local stores here but I can’t justify paying almost 30 euros for the shade I kinda already have. So I’m sticking with Color Club’s much more affordable version instead.

Editorial is gold and green duochrome. For this I only applied one coat. The first time I tried it I got a lot of bubbles. It could’ve been the base coat though. This time I used one coat of Essie Nourish Me and had no issues. As you can see it looks a bit brushstroke-y on the photos but not so much IRL. This one is definitely worth getting if you’ve been thinking about getting Chanel Peridot but the price gets in the way and you don’t already own one of the dupes.

So this was my entry for the letter E.


Sugarpill Reckless Loose Eyeshadow Trio

0
Happy Sunday! I hope everyone is having a great weekend :) It’s been a lazy and slow weekend for me.
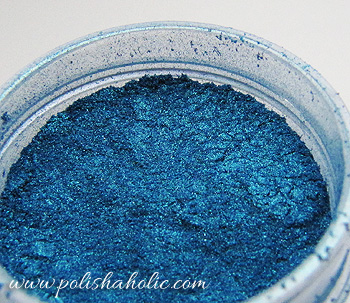
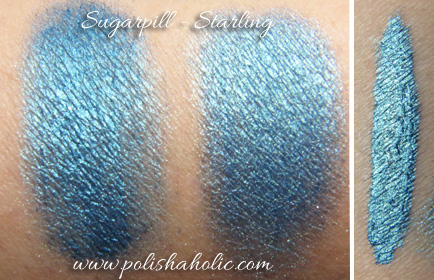
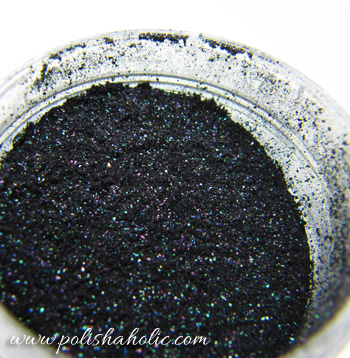
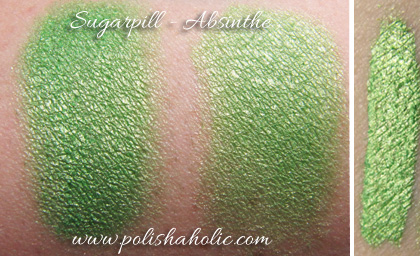
This time I have swatches of Sugarpill Reckless Loose Eyeshadow Trio for you. This package has Absinthe, Starling and Stella eyeshadows. I swatched these over Urban Decay Primer Potion Original on the left and GOSH cream eyeshadow stick on the right. Separate swatch on the right side is with Make Up Store Mixing Liguid which can be used to make your loose eyeshadow work as an eyeliner. UDPP seemed to work better than the cream eyeshadow and brought out the best in these shadows. These apply silky smooth and the result is very shiny.

You can buy these as a trio or one at a time from Sugarpillshop.


Sugarpill Absinthe
Sugarpill Starling
Sugarpill Stella

Nail Pattern Boldness – Is Someone Loving You?

6
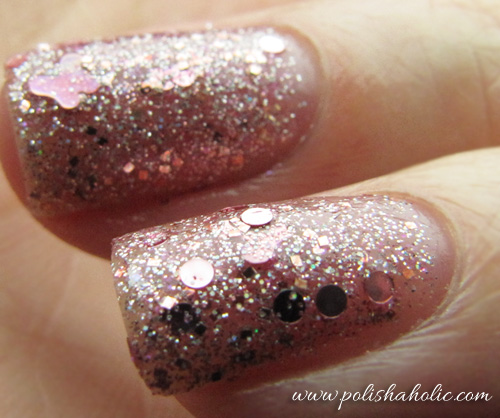
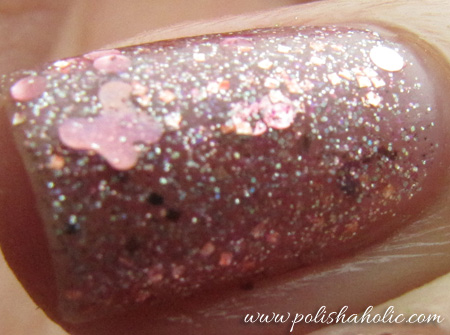
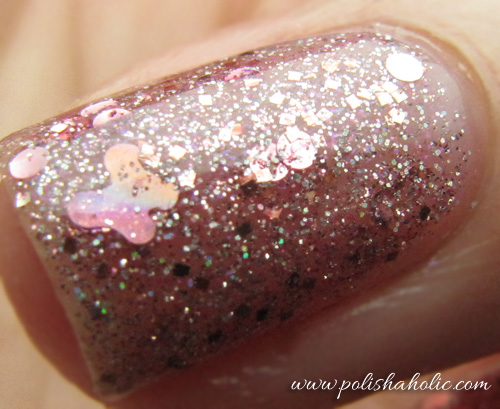
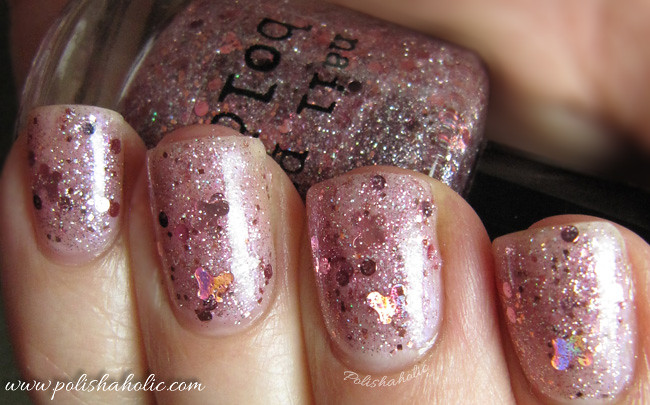
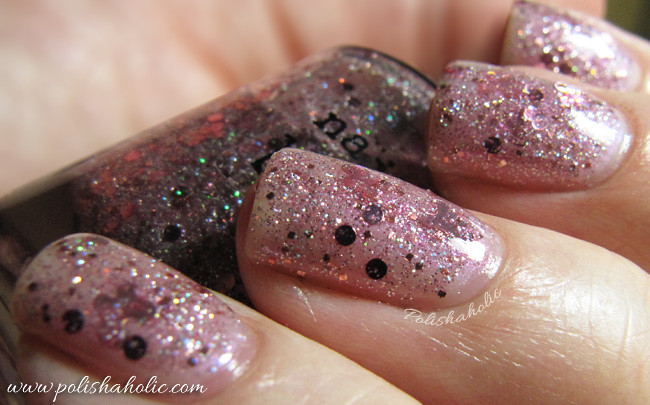
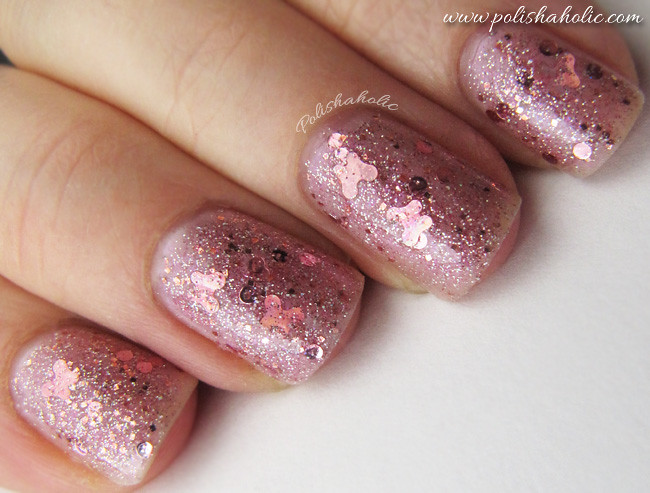
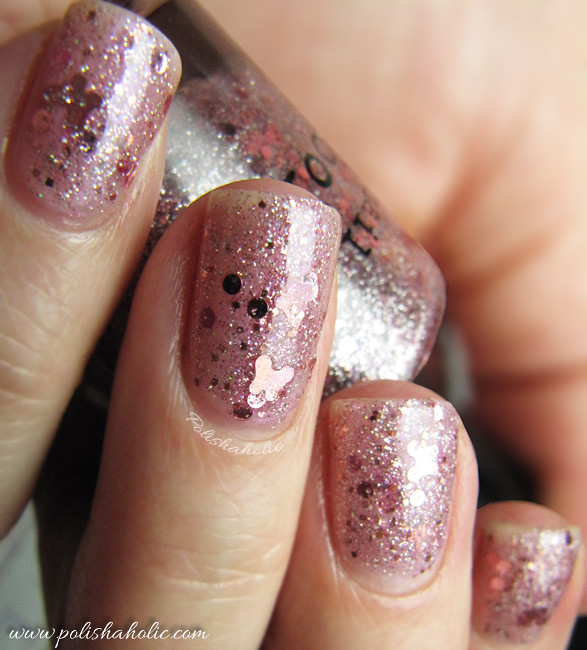
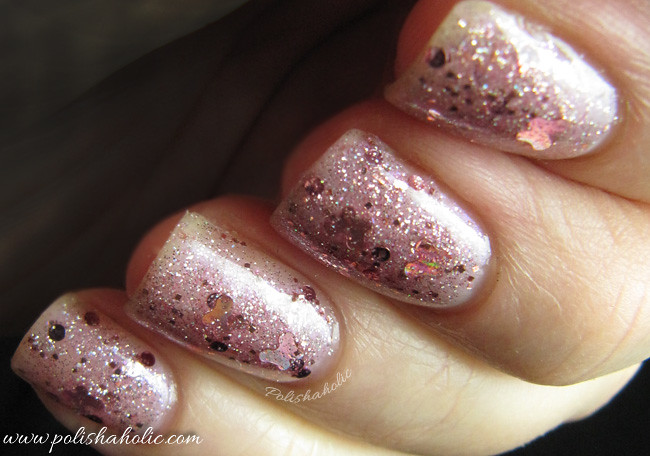
I got this stunning glitter polish from Nail Pattern Boldness indie brand. Is Someone Loving You? is one of the four polishes from their brand new Valentine’s collection called Hello?. This polish has a lot of pink and holographic microglitter, bigger pink circle glitter, smaller square glitter and holographic butterflies (OMG!!!) on a clear base. This polish is STUNNING! So delicate and beautiful! I’m bummed out about my nails being so short at the moment. How gorgeous would this look on longer nails *deep sigh*
I also got their highly praised top coat Glitter Food. Many bloggers are totally in love with this top coat and for a good reason. I’m going to test this out with few more glitter polishes and then write my review of it with some example photos. I can already tell you it really works though. I tried it with this polish and only used it on my left hand nails with a coat of Inm Out The Door on top of everything. On the right hand I only used Inm Out The Door and the difference is noticeable. Left hand Glitter Food nails have much more depth in them, glitter is shinier and the surface is smooth. Right hand nails look flat, duller and you can feel the glitter through Inm alone. Using Glitter Food also didn’t make the dry time for the manicure any longer.

In this mani I used Essie Nourish Me x1, Essie Beam Me (whitening base coat) x1, Color Club Sugar Rush (sheer pink with a cold toned pink flash), Nail Pattern Boldness Glitter Food x1 and Inm Out The Door super fast dry top coat.

You can buy Nail Pattern Boldness polishes from their Etsy store. You should also “Like” their Facebook page to get the latest news and restock info. At the moment the Hello? collection is sold out but I believe there is going to be a restock next week. I’m sure the dates and time will be announced on their FB page.


***This was sent for a review.