Category: Brands

Jindie Nails – You Can’t Turn a Ho-lo into a Housewife

4

Well I thought I had already shown you all the swatch photos that I still had gel on my nails in. Turns out I was wrong. Yesterday I found these photos. I took them last summer, moved them from the camera to my computer, put them in the wrong folder and forgot about them.

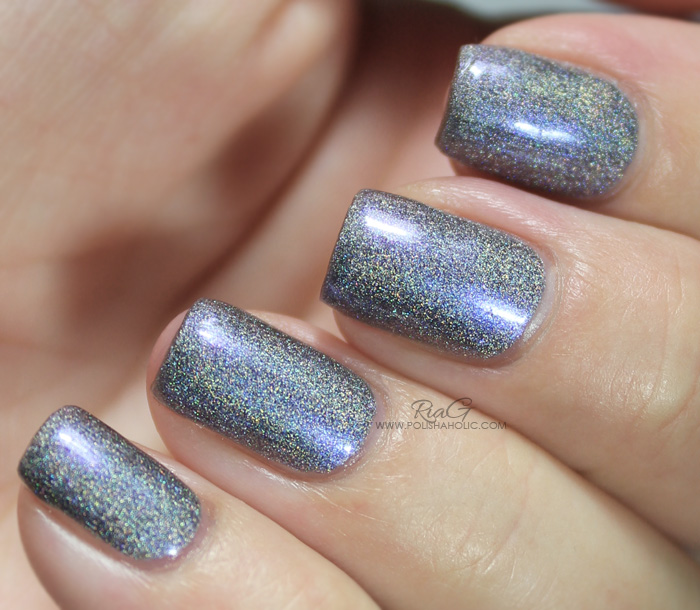
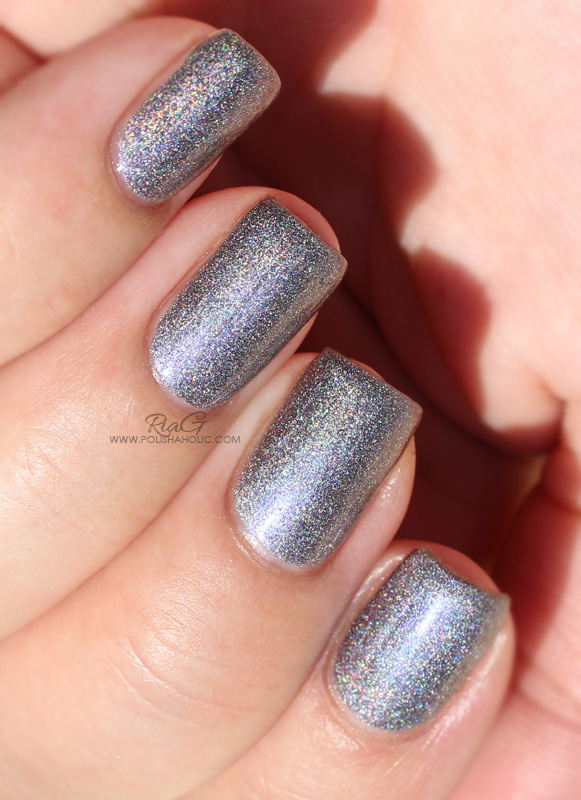
But now they have been found so here you go, Jindie Nails – You Can’t Turn a Ho-lo into a Housewife. A polish that has one of the most awesome names ever :D

“A gorgeous multi-chrome and linear holographic polish. The colors in this one include red to blue and all shades in between”.


Formula was perfect and I had no issues with the application. This was opaque in two coats and dried fast. I did a full manicure with this polish and I remember it didn’t chip but I have no clue how long I kept it on my nails. It was at least for two days, that I know.

For this manicure I used Sally Hansen Nail Rehab as a base coat, two coats of You Can’t Turn a Ho-lo into a Housewife and HK Girl top coat.


Jindie Nails – You Can’t Turn a Ho-lo into a Housewife – photo taken with daylight bulbs.
Jindie Nails – You Can’t Turn a Ho-lo into a Housewife – photo taken in direct sunlight.


***This was sent for review.


Sally Hansen Nail Rehab nail treatment

2

Since I grew out the gel nails I needed to start looking for good base coats and treatments for my natural nails. I also got an opportunity to test Sally Hansen Nail Rehab treatment. Usually nail strengtheners are not good for me and instead of making my nails stronger they make them break and peel.

Nail Rehab bottle does have the word “Strengthener” on it but I still decided to give it a try and I’m glad I did. Usually if something doesn’t work for my nails they start peeling and looking dry very fast. That happened with Duri Rejuvacote just after the third time I used it. I have now used over half a bottle of Nail Rehab and there is no peeling or any other problems at all.

To make sure it was a good product for me I only used Nail Rehab on my manicures for almost two months. On top of it I apply a coat of Glisten & Glow Stuck On Blu! base coat before the polish and top coat. Between manicures I use Bliss Kiss nail oil to hydrate my nails before applying the treatment again. I only keep my nails without polish on them for an hour max at the moment since I have to wash my hands all the time cos of the new baby.

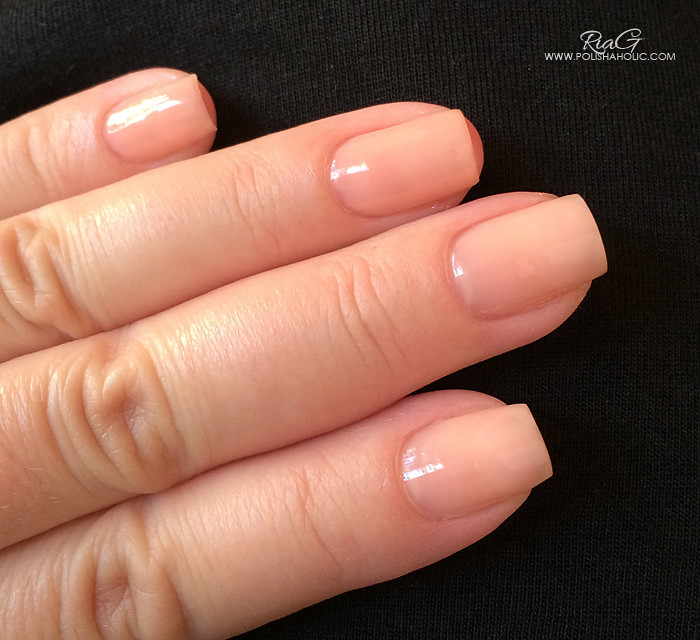
Nail Rehab has a thick-ish formula and it also smooths out your nails like a ridge filler. On the photo below I still have a gel layover on part of my nails and two coats of Nail Rehab hides the growth line almost perfectly. The color is also just lovely natural looking peachy shade. It hides possible stains on your nails when you apply two coats of it. If you have a busy day you can just apply two coats of Nail Rehab and have perfect looking nude nails.

While using Nail Rehab my manicures have stayed good at least for 2 to 3 days without chipping. I could probably go for a few days longer but I get tired of looking at the same polish ;)


So all in all this treatment works perfectly for my nails. Doesn’t make them peel or dry. Makes a good base for a manicure and doesn’t cause the polish to chip faster than usual. I can’t say if this makes my nails stronger but it doesn’t cause peeling or drying for my nails like so many other base coats and treatments do and that’s enough for me.

Only thing I’d change about this is the brush. The bristles are really short and stiff. It took some time to get used to it but after a while I didn’t have issues with the application and the brush anymore.

If you’re looking for an affordable treatment for your nails I recommend you give this one a try too. Works great for me!

***This was sent for review.

Some Mavala Techni-Color’s collection swatches

2

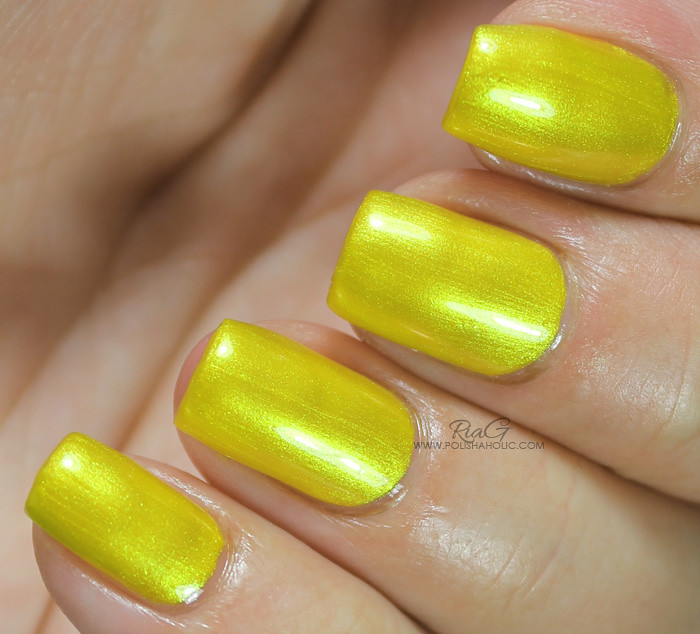
This summer I got an opportunity to try some Mavala polishes. It’s been forever since I had a bottle of Mavala polish and I have to say my experiences with them have been more or less average. So I wanted to test this summer collection just of curiosity and I was so pleasantly surprised! The polishes had a good, highly pigmented formula. Application was smooth and easy and drying didn’t take forever. Some of these were almost one coaters. I also LOVED the colors! Not amazingly unique but bright and vibrant colors that go well with any time of the year.

Some of these are also so pigmented that they work for stamping. I haven’t tried stamping with them but I’ve seen it done by other bloggers.

This was a summer collection but at least where I live I’ve still seen it been sold a few days ago. So if you never paid attention to these I suggest you check them out while you can.

Today I have swatches of three colors out of the six on this collection. Again these photos were taken during summer when I still had gel on my nails. I think that this is it though and next photos are gonna be all natural nubbins swatches ;)


102 Cyber Yellow – Two coats with Glisten & Glow Stuck On Blu! base coat and HK Girl top coat 
 Bright yellow with green-ish shimmer and glow. Amazing application for a yellow polish. This one has a tiny bit of visible brush strokes in it but it’s really not too noticeable in real life.
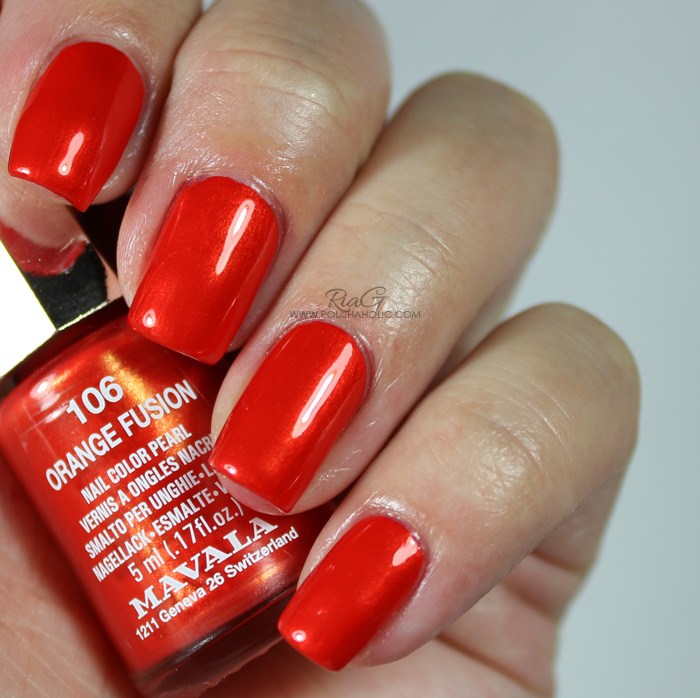
106 Orange Fusion – Two coats with Glisten & Glow Stuck On Blu! base coat and HK Girl top coat 
Really fierce orange shade that looks like it’s on fire. Amazing application and this is a one coater even if I applied two. Yes, this came out in a summer collection but how perfect is this color for fall too!
103 Cobalt Blue – Two coats with Glisten & Glow Stuck On Blu! base coat and HK Girl top coat 
Very vibrant blue creme that is a borderline crelly if you ask me. Very glossy and bright! Again, amazing application and very well pigmented formula. This instantly became my favorite blue and I think I need to get a backup bottle while I can still find one. Love, love, love it!!

***These polishes were sent for review.

CND Vinylux swatches

8

Today I have more older swatch photos to show you. Again these were taken during summer when my nails still had some gel layover left on them. So the nail shape is a little weird and you can see the gel growth line on some of the photos.

Now all the gel is grown out so that won’t be a problem anymore on the newer photos. Though now my problem is that my nails are nubbins. I’m never totally happy :P

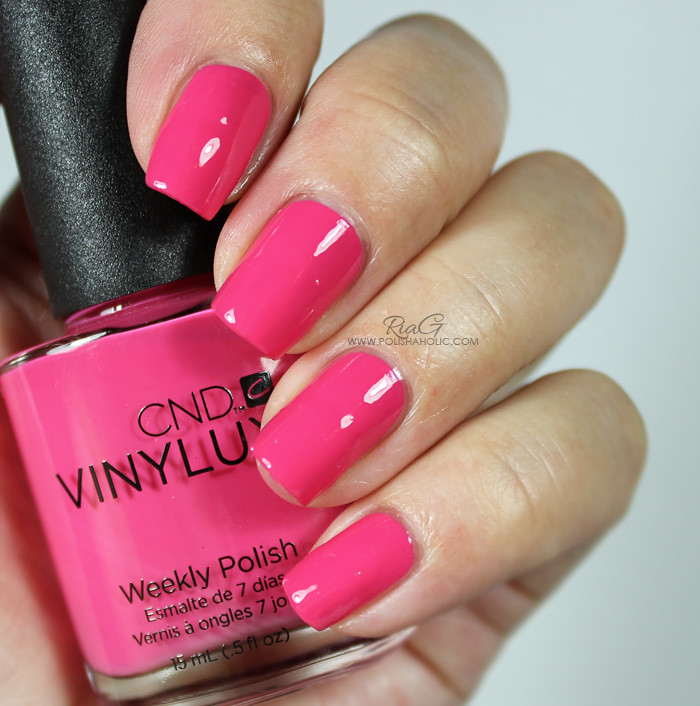
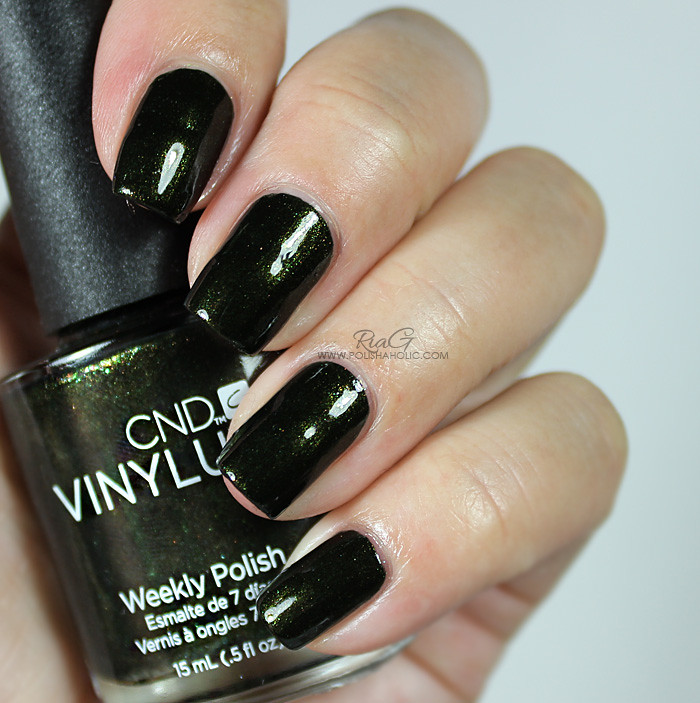
So today I have some random CND Vinylux swatches for you.

“VINYLUX™ is a breakthrough polish system that endures a week of fashion perfection…without a base coat! Exposure to natural light secures the patent-pending technology, creating an enduring, long-lasting polish. While ordinary polishes become brittle and deteriorate over time, VINYLUX dries naturally to a flawless finish and strengthens its resistance to chips over time. VINYLUX is available in 71 fashion-forward polish colors and 60 colors that match popular CND Shellac™ shades.”


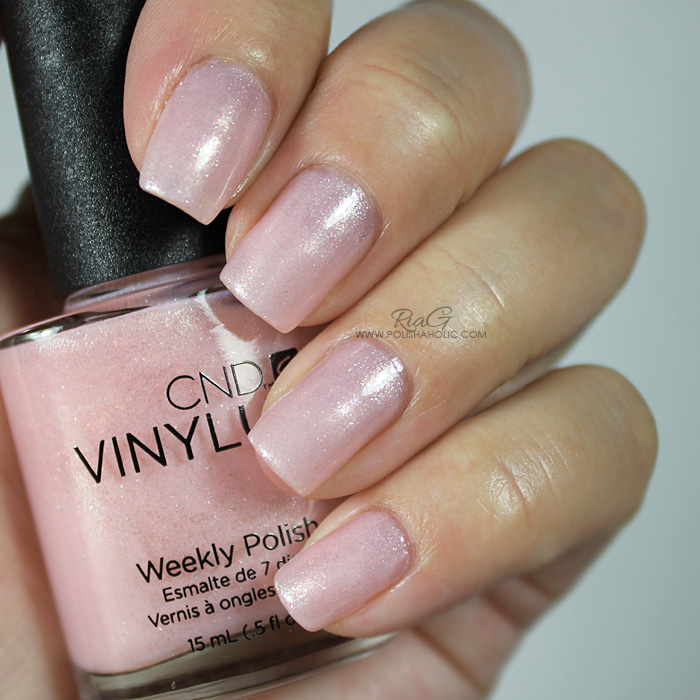
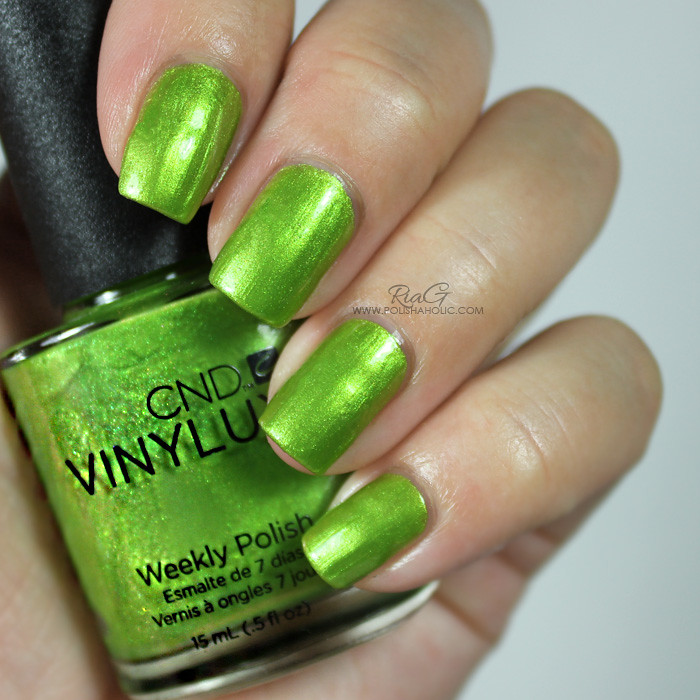
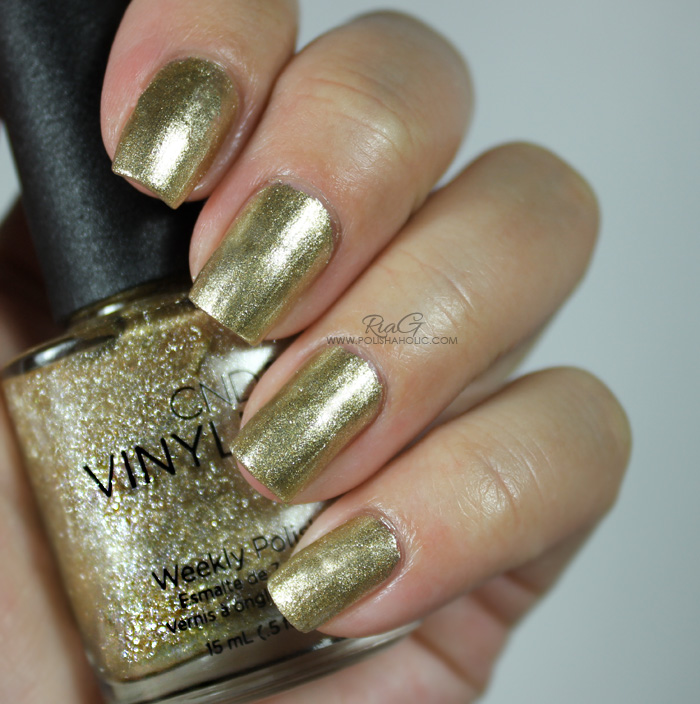
All of the swatch photos are taken without a base coat and using Vinylux Weekly top coat. All the polishes applied well and were opaque in 2-3 coats.


Studio White (3 coats and Vinylux Weekly Top Coat)
Grapefruit Sparkle (3 coats and Vinylux Weekly Top Coat)
 
 
Limeade (3 coats and Vinylux Weekly Top Coat)
 
 
Locket Love (2 coats and Vinylux Weekly Top Coat)
Pink Bikini (2 coats and Vinylux Weekly Top Coat)
 
 
Pretty Poison (2 coats and Vinylux Weekly Top Coat)

***These polishes were sent for review. I don’t benefit from clicking any of the links on this post. 

Dollish Polish Got Snow Cones? and Murky Dismal

6

It’s about time I show you some of the swatch photos I took during the summer and never posted here on my blog. So let’s start it off with two Dollish Polish pretties. On these photos I still have some gel left on my nails and they are longer than my nails are at the moment.


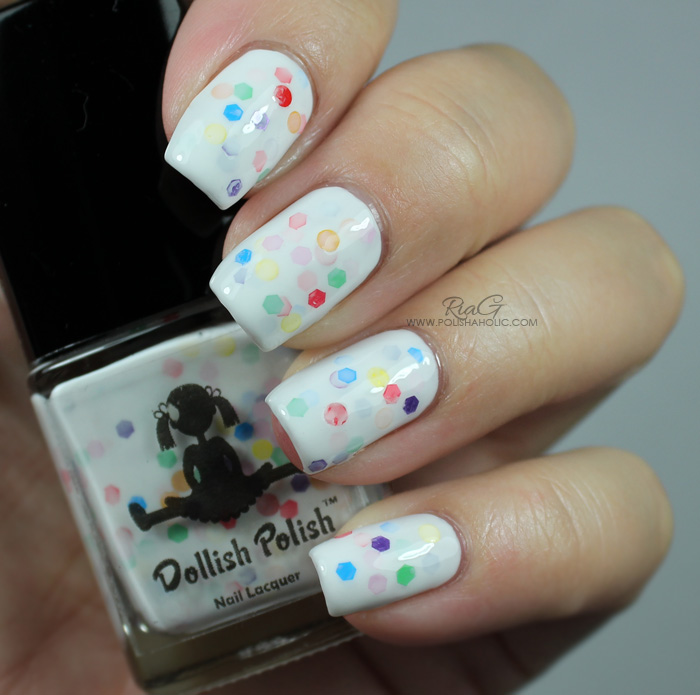
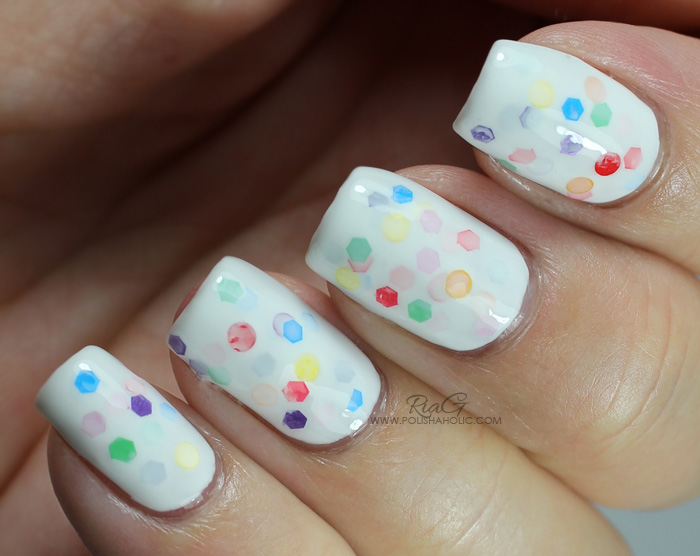
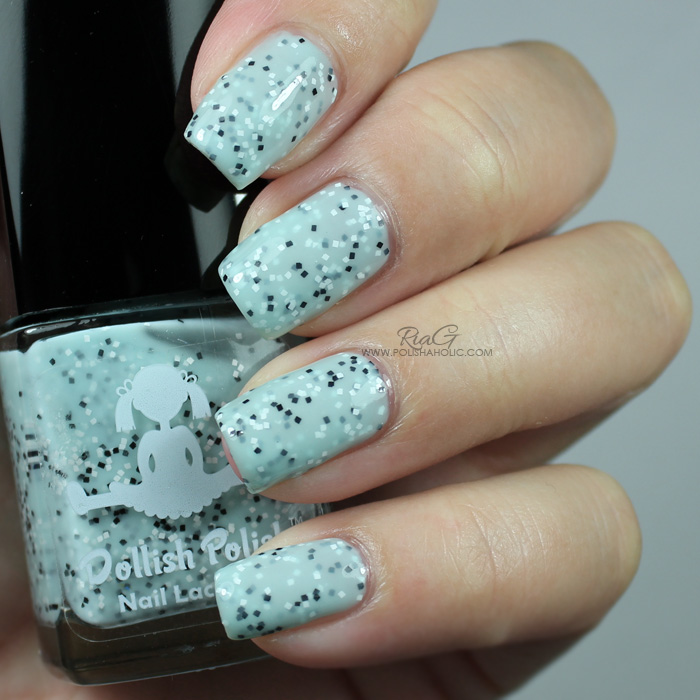
Got Snow Cones? (Glisten & Glow Stuck on Blu! base coat, two coats of Got Snow Cones? and two coats of HK Girl top coat).

Application is easy when you use a very light hand to prevent the glitter pieces from dragging bald spots on the white base. It also helps to let the first coat dry well before applying the second one. I placed some of the glitters to get a more even looking result. This is such a cute and fresh looking polish!


Murky Dismal (Glisten & Glow Stuck on Blu! base coat, three thin coats of Murky Dismal and a coats of HK Girl top coat).

This has a very good formula and application is really easy. I used three thin coats to achieve a good sandwich effect.


***These were sent for review.

IsaDora Gel Nail Lacquer

0

I’m still in one piece so I’m trying to get a few posts written before the baby decides to arrive :) I’ve taken these photos quite a while ago and just haven’t had time or energy to write the post. So next few posts will still show my nails with some gel layover on them. Now all the gel is gone and my nails are all natural. Just gotta get these few posts out of the way and then I can show you what my nails look like now.

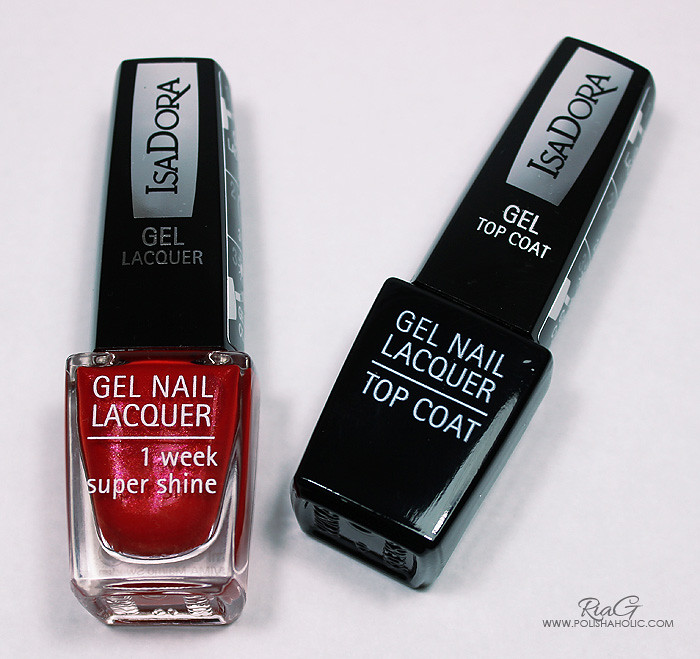
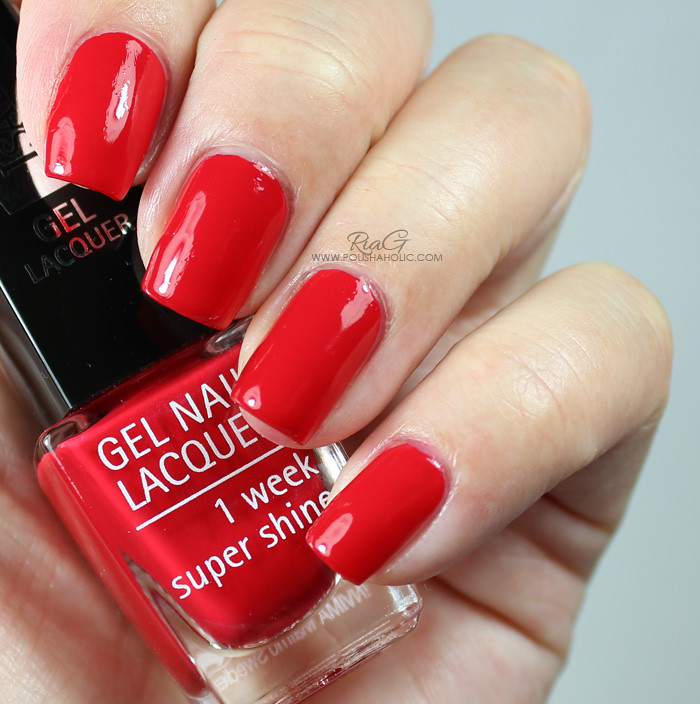
So lets get this party started with IsaDora Gel Nail Lacquer review. This is a polish that dries in sunlight and doesn’t require UV-lamp to cure it like regular gel polish. I received a limited edition shade 224 Scarlet Red for testing and I was quite happy with it.

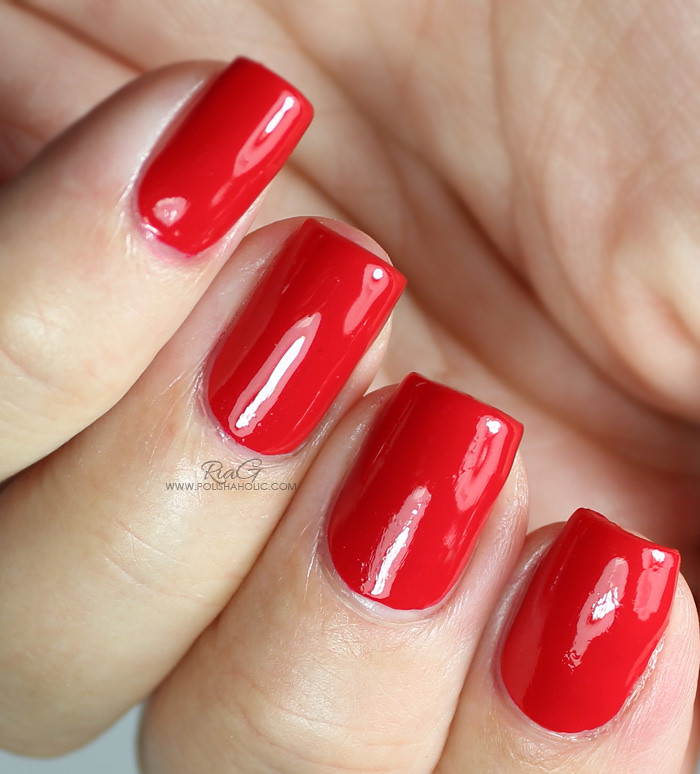
This polish doesn’t require a base coat but it is recommended that you use your preferred base coat at least with darker colors so they won’t stain your nails. After the base coat you apply two coats of gel polish and let it dry for 3 minutes. Then add a coat of IsaDora Gel Nail Lacquer Top Coat. The application of Scarlet Red was flawless. The polish was very well pigmented and with two coats it was perfectly opaque. Top coat is a bit thicker and I took a good amount of it on the brush. The top coat was still easy to apply and it gave my nails a very nice, gel like glossy finish.


I tested this polish on a pedicure first and the result was impressive. I used Glisten & Glow Stuck On Blu! as a base coat and then followed the application instructions that are also printed on the bottles. The manicure dried within minutes and looked really shiny. I kept this manicure on my toe nails for 3 weeks before it started chipping. The polish stayed very shiny for the first two weeks and was still pretty good when I removed the pedicure after 3 weeks. For me this was a good result. Usually my pedis stay good two weeks max before they start chipping. Naturally there was minor tip wear but not noticeable enough that I needed to do something about it.

After that I did the manicure test. IsaDora promises up to 7 days of wear time for these Gel Nail Lacquers. I only had an opportunity to test this for four days though. I already mentioned the flawless application and for my manicure I used the same base coat as I did for the pedicure. Where the pedicure stayed excellent for over two weeks the result wasn’t the same for the manicure. I did not expect it to be either though. The shine started to fade a bit after 3 days and day 4 there was the first chip. My test wasn’t perfect though since my nails were still very thin and I was growing out the gel nails removal damage. Also left hand nails still had some gel layover left. So on healthy nails I probably would’ve gone more than four days without chipping.

As said the shine and glossy look stayed perfect for over two weeks on my pedicure but started fading from the manicure after three days. This is mostly caused by the fact that I have to wash my hands a lot. I wash dishes without gloves and so on. So all the soap and chemicals that I expose my hands to during the day definitely took their toll on the shine.

Removal of this polish was very easy with non-acetone nail polish remover and there was no staining since I used a base coat.


I’m very happy with the wear time on the pedicure and I think this performed well on the manicure too. Quick dry time makes these Gel Nail Lacquer perfect for everyone who wants easy to apply, simple and quick manicure that lasts for more than one day. Color range is pretty and there’s also shades for creating a full french manicure using these polishes.

I will definitely be using this polish and buy a few more shades to use on my pedicures and on the days when I need something reliable and quick to apply for my manicures.


***IsaDora Gel Nail Lacquer and Top Coat were sent for review.

Some Dollish Polish pretties

4

Here’s some Dollish Polish swatches that I’ve been sitting on for a while now. I absolutely love Dollish Polish polishes and lately I’ve been making my collection bigger a couple of polishes at a time :)


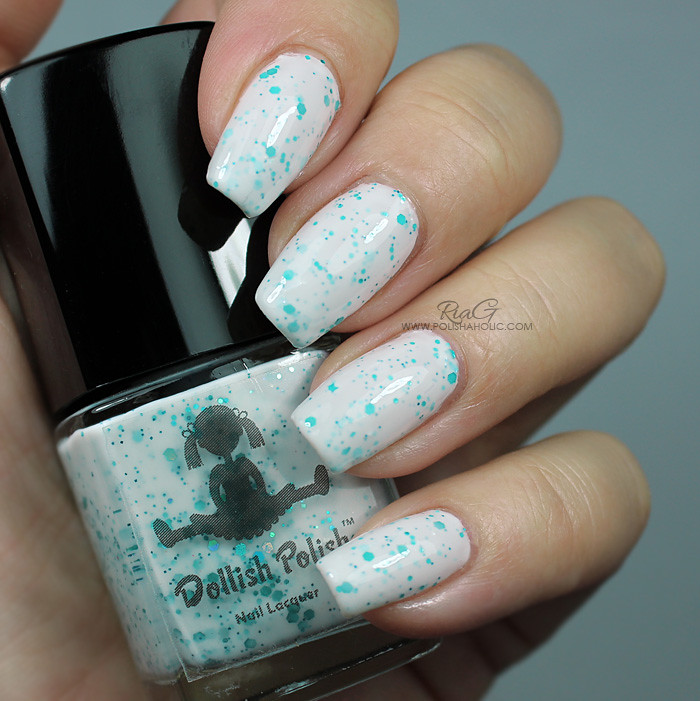
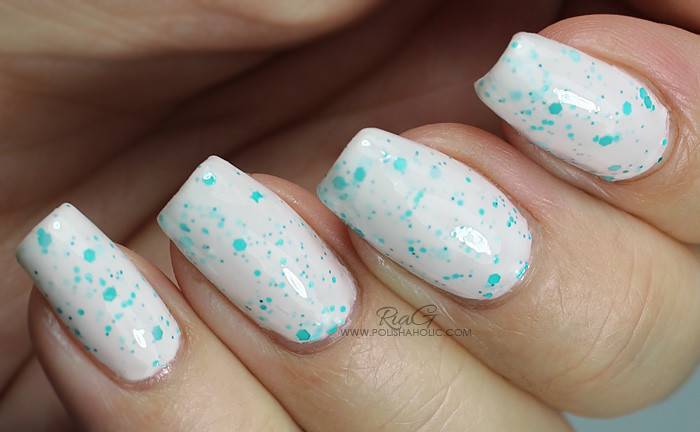
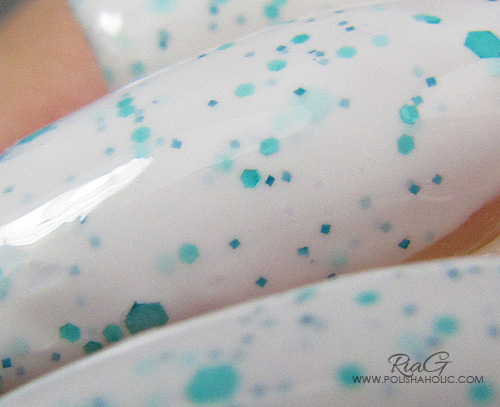
EXPECTO PATRONUM


“This is a milky white crelly polish with a hint of Mint Green, has iridescent flakies and varying size Teal Green holographic glitters for a magically enchanting manicure worthy of Hogwarts!”
 
This polish is like a breath of fresh air! I love the simple color combination and quality on this. Application was smooth and easy. No need to fish or place the glitters. This is two normal coats and HK Girl top coat.
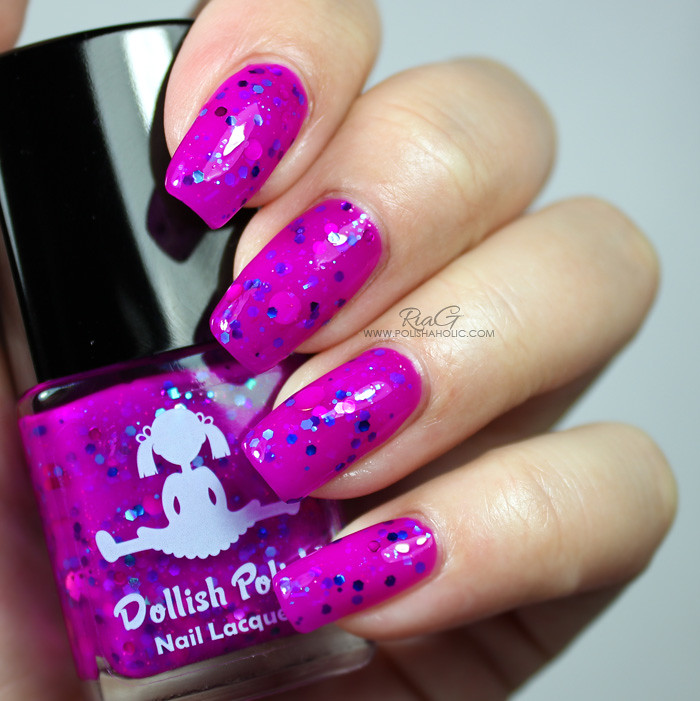
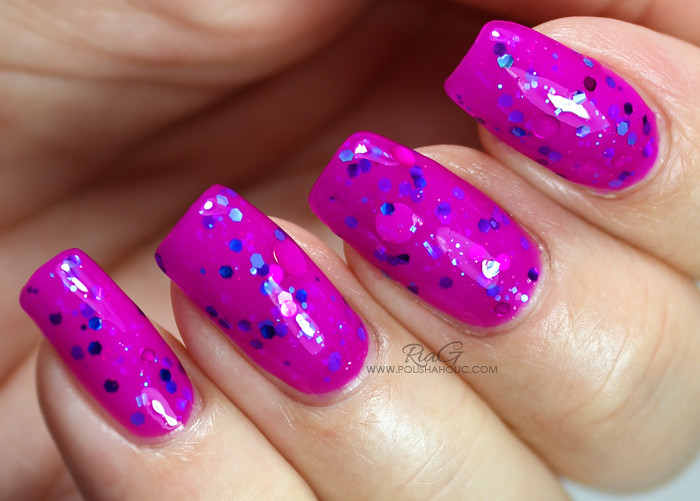
PURPLE NURPLES
 
“Inspired by the Cartoon Network’s Chowder, this neon purple jelly has tons of glitters, ranging from hexagons, squares, and circles, all in varying shades of periwinkle, purples, pinks, magenta, and blue/green iridescent glitters.”
 
This awesome jelly is so juicy and squishy! Such a vibrant purple glitter bomb, a jelly polish at it’s most perfect form! The formula is quite sheer so if you’re not a fan of multiple coats of jelly goodness like I am I suggest you layer this on top of a creme polish. The application is flawless and you can apply this so thin that four coats seen on the photos really weren’t a problem at all. Just created amazing depth and squishy-ness (yes, that must be a real word :P). This is four very thin coats and HK Girl top coat. (This was a hard one to photograph accurately so I did adjust the colors on the photos to make the polish look more like it does in real life).
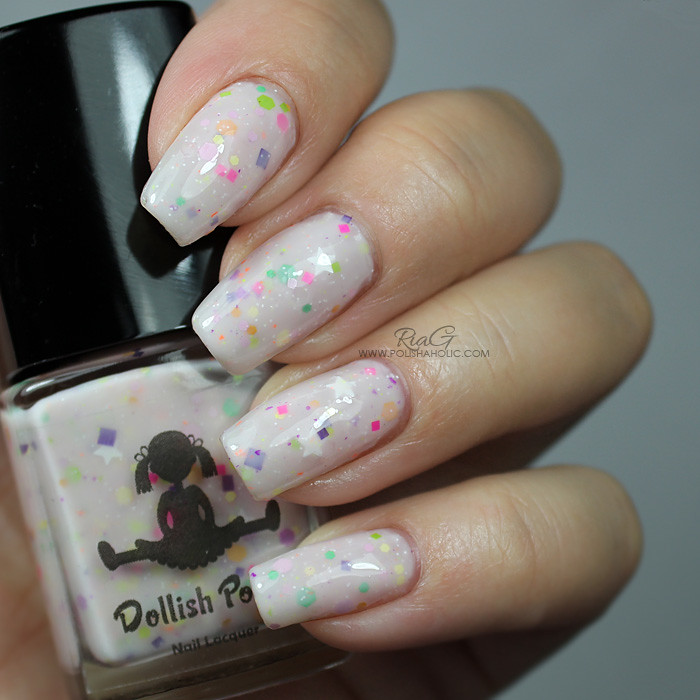
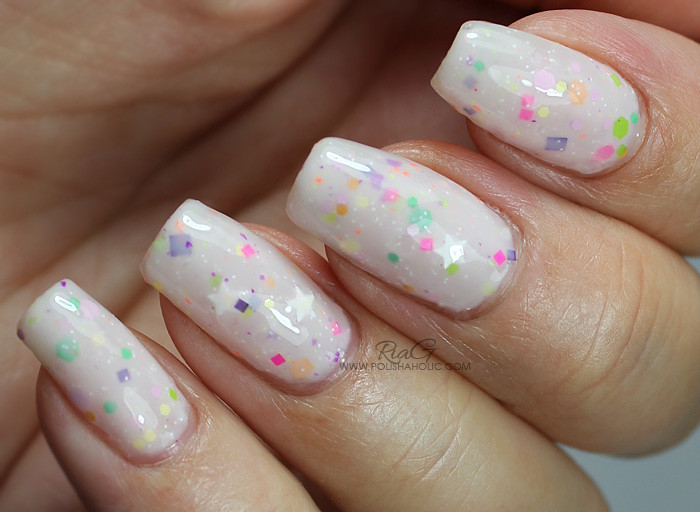
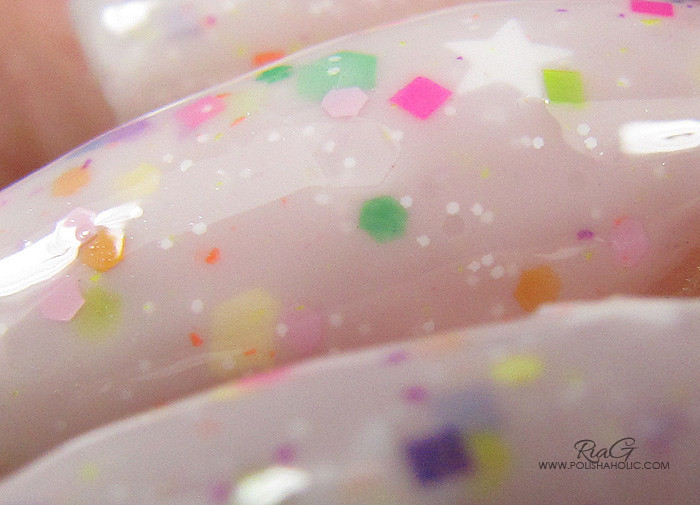
ROCKIN’ RAINBOW SHERBET
“A pale pink crelly, jammed with tiny white squares, white stars, and a mix of neon pink, green, purple and orange hexagons and squares.”
This one has such a delicious color combination, perfect for summer! One of those cheerful fun polishes that put you in a good mood :) Application was good and this was easy to apply thinly so you can layer it for a nice sandwich effect. I suggest you turn the bottle upside down before application to help get the stars out of the bottle. This is three thin coats and HK Girl top coat.

***These were sent for review. I don’t benefit from clicking any of the links on this post.

Back to natural nails – Bliss Kiss Pure Nail Oil

2

Less than three weeks ago I received my first Bliss Kiss Pure Nail Oil order and I’ve been using it daily since then. I ordered the Starter/Refill Kit and grip pads for opening the oil pen. I’ve seen so many convincing photos and read so many great reviews that I was very excited to try this product myself.

As you probably know, I’m going back to natural nails after having gel nails for over a year so my nails are not in a best possible condition and I can use all the help I can get. On this blog post you can see two week result on my left hand cuticles after using Pure Nail Oil.

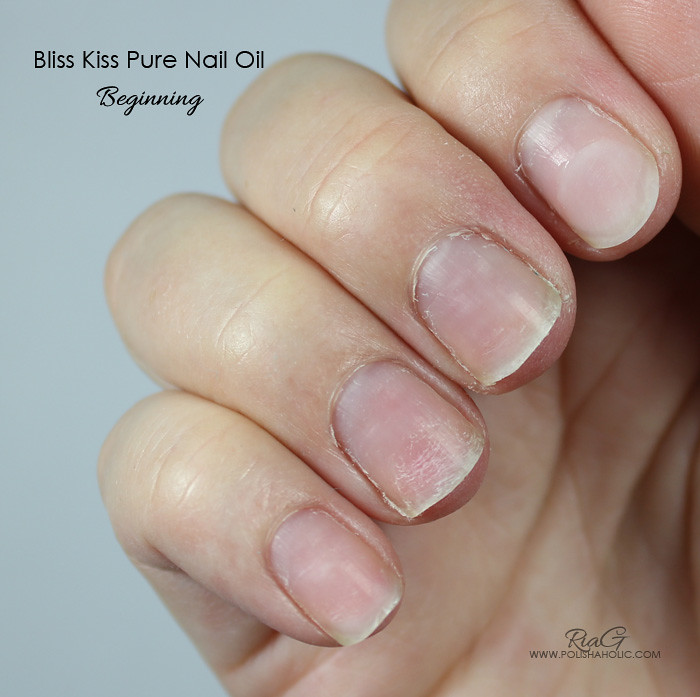
Today I’ll show you the before photo along with the first three days of using Pure Nail Oil on my right hand nails. After I received the package I immediately removed my manicure and went for naked nails for three days. Pure Nail Oil comes with good instructions and I tried to follow those as well as I could.

The before photo is taken right after I removed my manicure so the nail polish remover probably added some extra horror dryness on my cuticles. I also hadn’t used cuticle remover for a bit and that shows as well. You can see the damaged part really well on my ring finger nail and it really looks like it could use a serious amount of moisturizing. That is what I’m trying to grow out and have healthy nails. There’s also some gel left on my index finger nail. These photos were taken over two weeks ago and this coming Sunday I’ll show you one month of growth on my right hand nails and you can also see the condition they are in now after using Pure Nail Oil for three weeks. But that is for Sunday’s post :)

Regardless of how bad my nails and cuticles look in the “Beginning” photo they were moisturized daily using lotions and CND Solar Oil. This is just how easily drying my skin and nails are. Use nail polish remover once and all the moisturizing goes out the window.

So here is the horror I started with…


Pretty, eh? :P
No, not really ;) So you can imagine how much Pure Nail Oil my nails and cuticles took in during these first three days. During day one I kept applying the oil like once an hour and it all went in so fast. After a couple of minutes my fingers and nails didn’t feel oily at all. So I kept adding the oil all the time and I was stunned how fast it absorbed. I didn’t use a huge amount at a time, just a drop.
The difference between Pure Nail Oil and Solar Oil was clear to me from the first application. Compared to Solar Oil this one absorbs super fast. Solar Oil also make my skin and cuticles feel kinda rough during application where as Pure Nail Oil makes them feel nice and smooth. Pure Nail Oil also makes my finger tips silky smooth. With Solar Oil I always need to use cuticle balm/cream to get the soft result. Pure Nail Oil is enough alone.
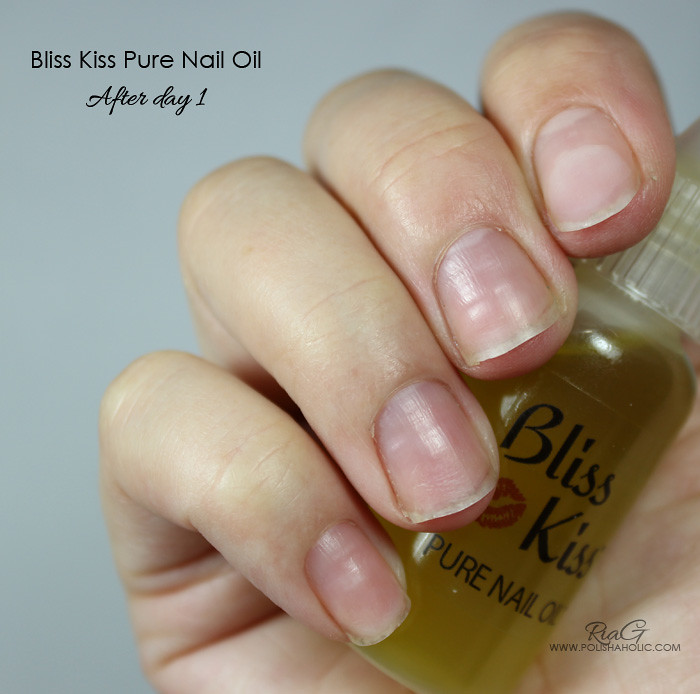
So needless to say I was excited already after day 1. The next morning I took “Day 1” photo before applying the oil. So in this photo it’s been about 12 hours since the last application of Pure Nail Oil and I have washed my hands at least a couple of times.

Quite a difference! My nails and cuticles looked different and they felt so smooth and well moisturized. During day two of naked nails I kept applying the oil quite often. Not as many times as the previous day but it was quite a few times then too. Still the oil kept absorbing fast and it was obvious my nails and cuticles still needed some extra care.

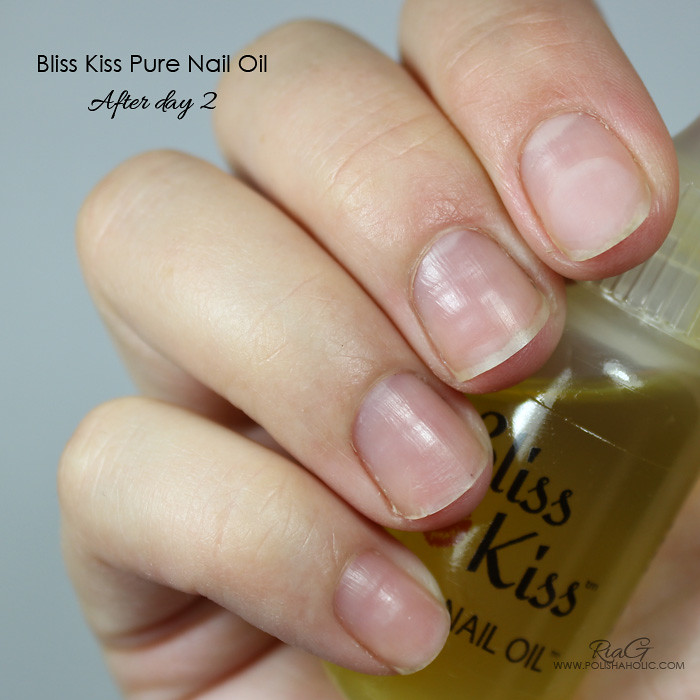
So here’s the result on the morning after “Day 2”. Naturally not such a dramatic change anymore but I was still able to see and feel improvement. This photo was also taken in the similar situation as the previous one, about 12 hours after the last application of Pure Nail Oil.


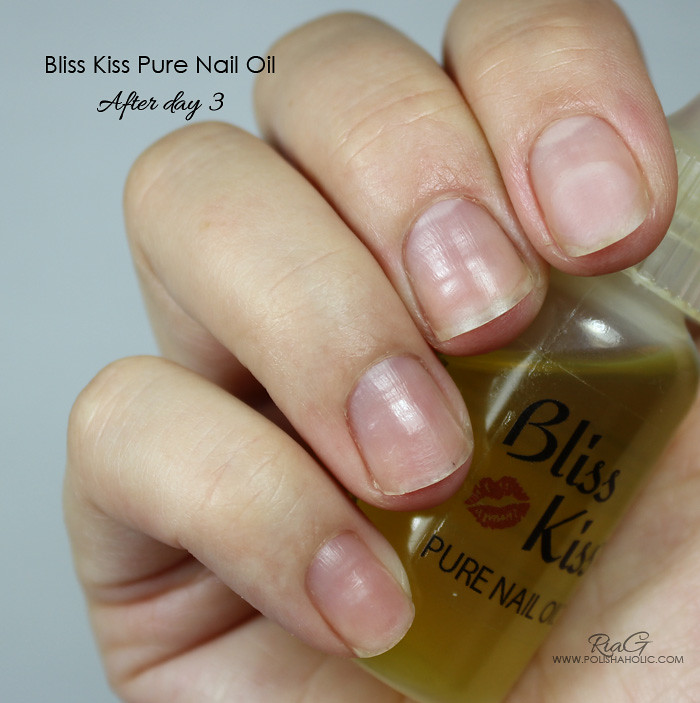
So I continued applying the oil for the third day. Now I didn’t really need to apply the oil as often as day one and two. I used just a drop of oil for each hand and massaged it in a few times during the day. I left my nails naked for the night so I could take my third and final photo the following morning.

And here’s my three days result of using Bliss Kiss Pure Nail Oil. I can still see clear improvement on the condition of my cuticles and compared to the “Beginning” photo the change in just three days is HUGE!


Since the three days of nail nakedness I’ve been keeping my nails polished and I’ve applied Pure Nail Oil on my cuticles a few times a day. I drop a tiny bit of oil on my thumb and then press my other thumb against it. Now I have a small amount of oil on both my thumb finger tips and I just rub it on all of my cuticles. So a little drop few times a day takes you a long way with Pure Nail Oil.

My manicures on my right hand now last up to three days which is long enough considering the condition my nails were in. The tips still have damaged part to grow out too. After I remove the manicure I apply oil on my nails and massage my nail beds and cuticles till the oil is absorbed. Sometimes I add another drop and repeat the massage. After all the oil is absorbed I wipe my nail with Cleaner liquid (alcohol) and do my next manicure.

Only time will tell if Pure Nail Oil is the answer I’ve been looking for to help my easily peeling and breaking nails. I will know for sure after all the gel and damaged parts have grown out. Right now I’m extremely happy with Bliss Kiss Pure Nail Oil and it’s hands down the best nail oil I have ever tried. NailCareHQ.com has a sale coming up first week of July and I really need to stock up on this oil so I never run out of it :D


***Pure Nail Oil was purchased by me. I don’t benefit from clicking any of the links on this post.

Love, Angeline – Lunar Love

2

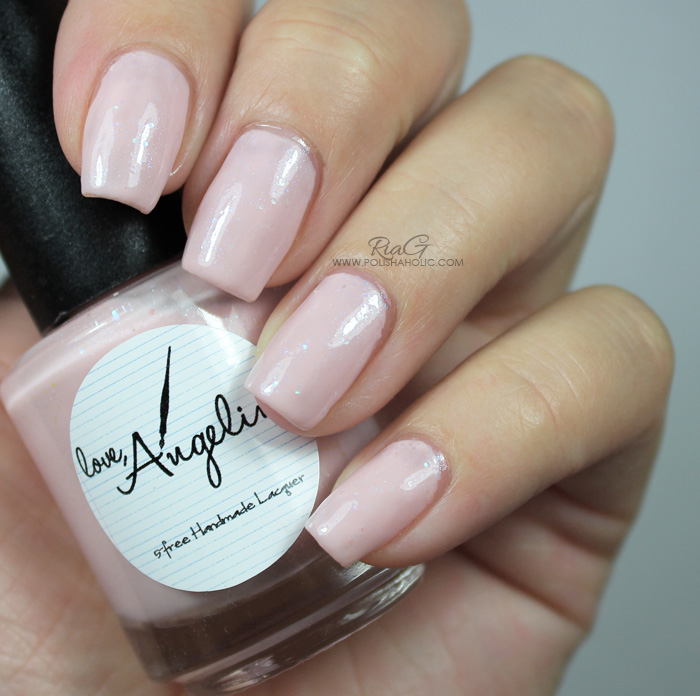
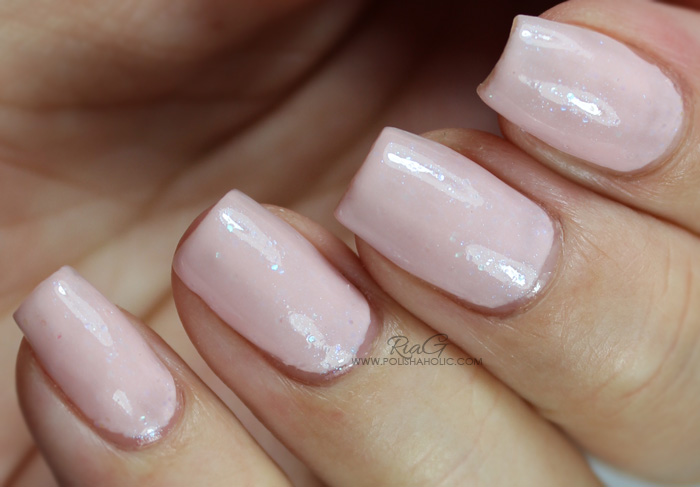
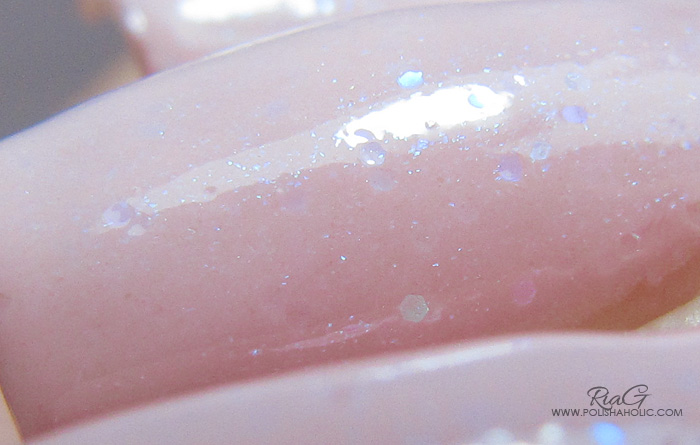
Today I have my first Love, Angeline polish to show you. I’ve seen some beautiful swatches of this around the internet and I just needed to add this bottle to my collection. I have to say Lunar Love is just as beautiful as I thought it would be. This is a very pale pink crelly with light blue shimmer and iridescent glitters.

Formula was a bit on the thick side but not too thick, no need for thinner or anything like that. I applied two normal coats and I noticed that if I tried to be too particular with the application the polish started dragging a bit. So I got the best result by applying this fast and not paying attention on the possible unevenness of the first coat. The second coat smooth everything out perfectly anyways. You also want to have enough polish on your brush instead of trying to make the coats too thin. Dry time was very quick with HK Girl fast drying top coat.

Lunar Love is such a beauty!

On the photos my nail shape is starting to be a little funny cos the gel layover growth line shows through the polish. There’s not much I can do about that right now since I’m trying to grow that layover out. I’m hoping to start swatching on my right hand soon. I’m also thinking about different nail art options for this kind of situation where you might want to hide the gel/acrylic growth line on your nails.

So for this manicure I used a coat of Essie Nourish Me, two coats of Lunar Love and HK Girl top coat.

I bought my bottle from Norway Nails.


***This polish was purchased by me. I don’t benefit from clicking any of the links on this post.
Dollish Polish – Things Are Looking Very GRIMM

6

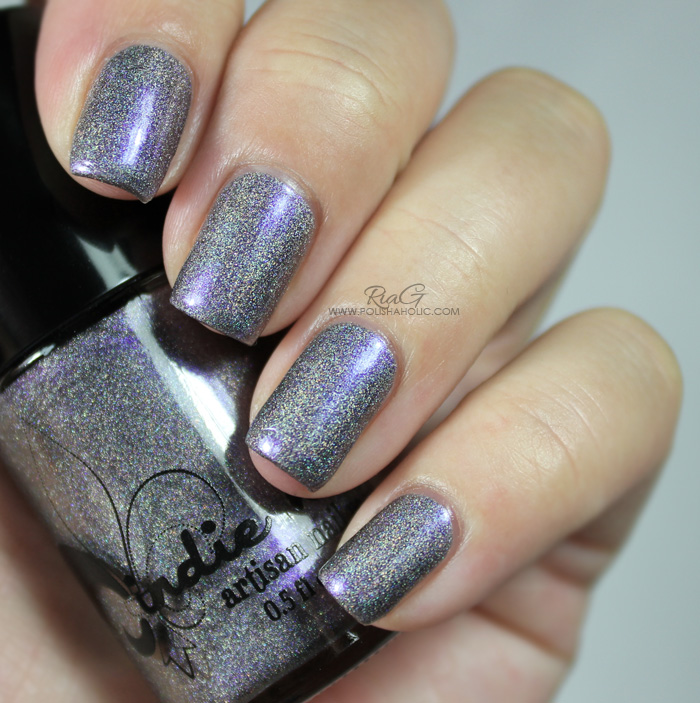
It’s a dark and rainy Sunday here in Finland so this is a perfect polish to show you today ;) Dollish Polish Things Are Looking Very GRIMM is inspired by the TV show Grimm. If you haven’t watched that show maybe you should cos … ummm … well cos Detective Nick Burkhardt is pretty easy on your eyes (and it’s a good show) :P

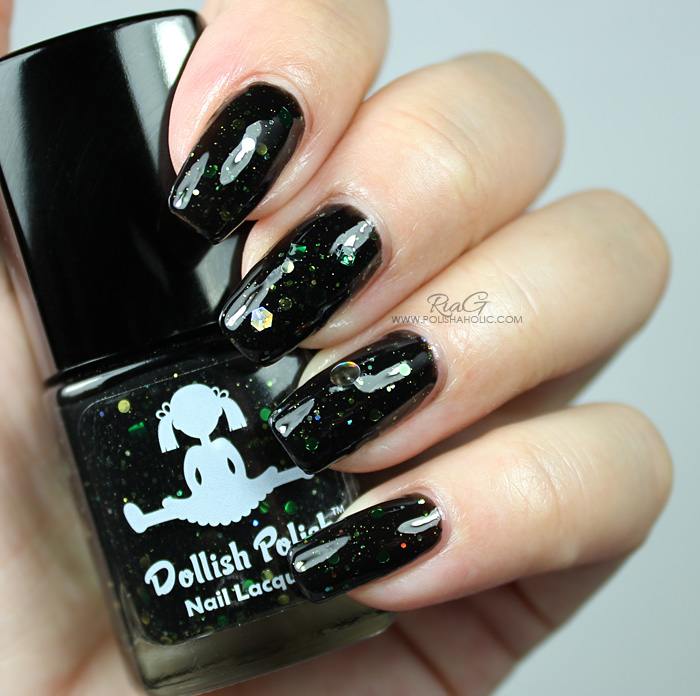
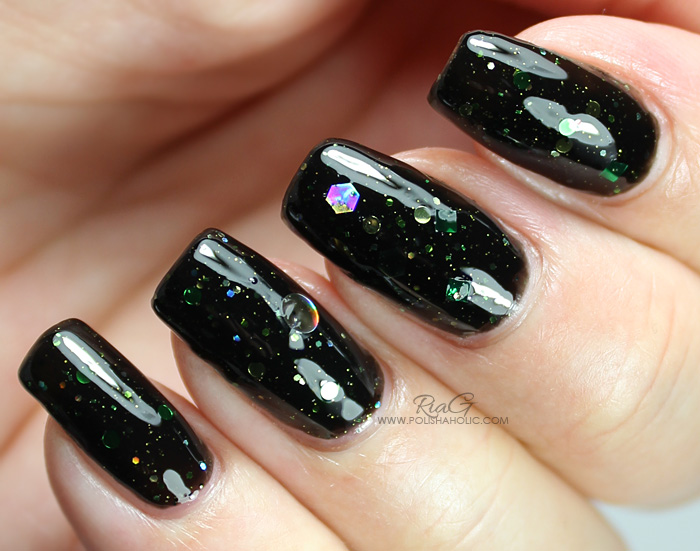
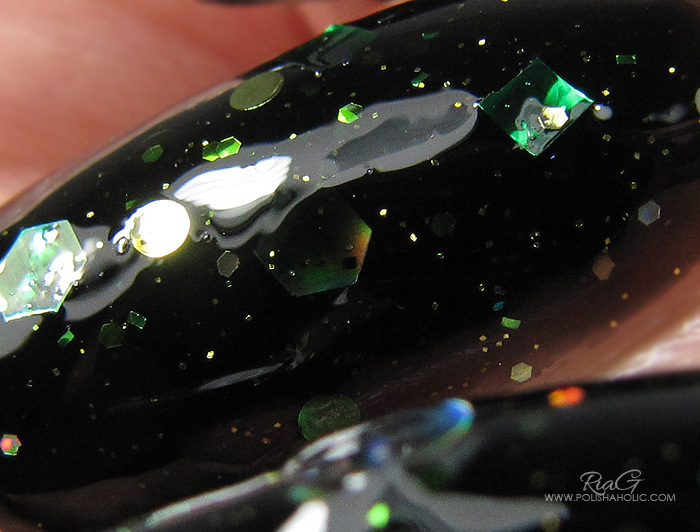
Things Are Looking Very GRIMM “blackened forest green jelly is loaded with varying shaped glitter, all in shades of green giving it a very mythical and forest like feel. It’s a perfect fit for the chaotic life of Detective Nick Burkhardt and his endless hunt for Wesen!”

Formula is good and easy to apply. Since this is a jelly it takes at least 3 coats for good result but you can always layer this over black or dark green polish too. I love the depth that comes with multiple coats so I hardly ever layer polishes like this over another color. This one is definitely worth the three coats. Just wow!! Amazing glow and depth! Totally as drool worthy as Detective Burkhardt is ;)

On this manicure I used three thin coats of Things Are Looking Very GRIMM with HK Girl top coat. Remember to turn the bottle upside down for a bit before application. That will help getting the bigger glitter pieces out easier.


***This polish was sent for review. I don’t benefit from clicking any of the links on this post.