It seems that nowadays people feel like it’s ok to say anything that comes to mind when commenting on photos, blog posts, news stories etc. on internet. You hear a lot about body shaming. People are called too fat to wear a bikini, morbidly obese, you name it. Or in someone’s opinion you are so skinny that they feel free to tell you that you look like a coat hanger and tell you to go get a burger. When ever I see a makeup related post in FB I already know what half the comments are going to be like. “Ewww! Way too much makeup!”, “You look like a clown”, “You know natural women are the best”, “You know men don’t like that much makeup, right?”, “You must have such low self-esteem” and the list goes on and on…..
(more…)

Category: Uncategorized
Welcome to my new home!
Hi everyone!! The move is finally done and my blog has a new home! Yay!!

This is how my blog looks like now and I really love it. My husband did all the design and coding work and I just sat here and made demands :D
You can use the navigation bar to get around and find what you’re looking for. You can also find archives and search from the right side bar. On the “Home” page we have the six latest posts on the top of the page and below those you can find more latest posts. If you don’t know what you’ve read the last just click on the “Select a month” dropdown box on the right side bar and choose what ever month you want to read. We tried to build this site so that it’s easy to navigate. If you’re here just for the nail polish posts. Go to “Nails” on the navigation bar, then nail polish and choose “all”. If you want to see my indie swatches choose “indie polish” under nail polish and so on. Very simple :) All my old posts from Blogger were moved here too.
So welcome again and I really hope you guys like it ♥
Changes to my social media pages
My blog is going through some major changes and I have started the process from my social media pages. I have decided to drop the Polishaholic part from my name and now only go as RiaG. As a result for this my social media account addresses have changed to RiaGBeautyBlog. This has affected my Instagram, Twitter, Pinterest and Tumblr pages. I have also created a brand new FB page.
So here are the new addresses and they have also been updated on the side bar icons.
INSTAGRAM *** http://instagram.com/riagbeautyblog/
TWITTER *** http://twitter.com/RiaGBeautyBlog
PINTEREST *** http://www.pinterest.com/riagbeautyblog/
TUMBLR *** http://www.tumblr.com/blog/riagbeautyblog
Also here’s my NEW FB PAGE address
http://www.facebook.com/RiaGBeautyBlogger
Please go like my new page and feel free to also unlike the old page since I will be posting the same content there until all the changes are done and the old page will be deleted.
Sick leave
I got off to a good start with regular posts but I haven’t been able to get the posts ready for when life happens yet so I have to take a few days off. Our little guy has rs-virus and he is quite sick so he needs all my attention right now. I will be back when he feels better.
New things happening with my blog
This spring I plan to re-design my blog a bit. I’m (read my husband is) going to find a way to write my posts separately in English and Finnish so that they’ll look less messy. I’m also going to try a new schedule for my posts. I’m going to start posting every weekday starting from tomorrow and take the weekends off. I’m going to schedule the posts early morning Finnish time (EET/Eastern European time) so they’ll be published at the same time every day. With three kids life happens sometimes so there might still be short breaks every now and then but right now I’m working on having posts ready for at least two, three weeks ahead.
I’ll try and have two to three nail posts a week and the rest will be makeup and other cosmetics products related posts. I’ve been wanting to make my blog more of a beauty blog than just a nail blog for a while now. So that is where I’m headed at the moment and we’ll see how that goes. I have worked as a MUA and a nail tech before staying home with the kids so I have professional experience on both nails and makeup.
I intend to focus on the fact that I’m not in my early twenties anymore with a silky smooth, flawless skin. Instead of that I’m 38 years old. I’m going to post about products that I find working great for my skin. Though age is also not going to be limiting anything either and I’ll be breaking the so called rules with colorful makeup looks and nails. I hope that women can come to my blog and find good product tips and ideas on how to use colors in their every day makeup and nail styles.
I might also include posts about my weight loss project and trying to learn to eat and live healthier.
So I hope everyone will still stick around even if it’s not going to be all nails anymore :)
Happy Holidays!

A little update again!
Just wanted to write a quick update here too. From my social media sites some of you have already seen that the baby finally arrived two weeks after the due date. They actually had to induce the labor and in the end the situation got a little crazy. They literally pulled him out in less than 10 mins cos the machines were giving them a lot of warnings and it was either that or an emergency c-section. But in the end all was well and baby was unharmed and healthy little boy. Cos of all that it’s taking me somewhat longer than I expected to recover but I’m getting there.
Baby boy is now three weeks old and along with his two big sisters he is keeping me pretty busy. Today I was actually able to paint my nails for the second time after giving birth :D I’ve only been wearing Essie Fill the Gap on my nails for three weeks now. I’m really trying to get back to some kind of normal day rhythm and have some time to blog again too.
I’m really nail polish deprived right now and I’m dying to get back to business :D

Just letting you know I’m still alive!
So it’s been quiet here on my blog lately as well as in my social media too. I have no intention to stop blogging or anything like that. This has just been an unplanned break. I have 9 days to go till I’m due to have a baby and I’ve just been dead tired as well as quite busy lately. We had to do a little house renovation to get a bedroom for the baby and so on. It’s also been a hot summer here in Finland and everything’s been left to last minute (as usual :P ) cos no one felt like working in that heat too much. My husband is freaking out cos I haven’t even packed my hospital bag yet (I’m the worst procrastinator there is) LOL But hey, at least I trimmed our dog today. Gotta have priorities ;D
Another reason for the blogging break has been the fact that most of the time my fingers are insanely swollen and red. Can’t really take nice swatch photos with the fingers looking like they are. There’s an example photo on my IG. I have some photos ready and blog post ideas too. Gotta try and write those posts asap. Hopefully even before the baby is born.
My nail growing project is going well too. I have no gel left on my nails but there’s still gel damaged parts on some of the nails. Report coming up about that soon.
So all is good here and I’ll try and get some posts up as soon as possible :)
Break is almost over
Like some of you might have seen from my FB, IG or Twitter, I’ve been suffering from neck pain and migraine like head ache. I tripped a little and hurt my back and neck about three weeks ago. It was just an innocent little lost of balance after stepping on a piece of wood buried in sand at kids play park. Didn’t feel like much when it happened. My back got better pretty fast but my neck has been getting increasingly worse. Now I’m taking a combination of pain meds and they seem to be helping. So fingers crossed that I can get back to swatching and blogging soon enough!
Here’s a lovely pile of pretties that are going to show up here hopefully sooner than later. On that pile there’s also my first collaboration polish!! :D So excited to show you swatches of that one!

Geelikynnet Nailfix tuotteilla
***This post is only in Finnish but you can still see from the photos what I did to my nails. Instead of natural nails with a UV-gel layover I now have gel nails with plastic tips. These nails are also a bit longer than before. I quite like how these turned out. Google Translate might help you with some of the text and if you have any questions feel free to leave a comment here, FB or IG. Thanks for visiting!***
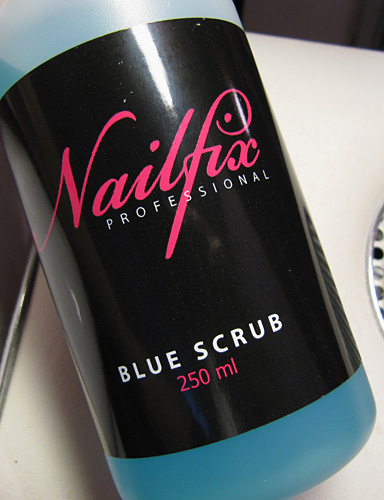
Edellisessä postauksessa esittelin pikaisesti CesarsShopin Nailfix sarjaa. Tänään jatketaan samalla aiheella ja katsotaan millaiset geelikynnet tein itselleni noita tuotteita käyttämällä.
Aiemmin minulla oli oman kynnen geelaus Cesars Secrets geeleillä ja jonka nyt poistin kokonaan. Lyhensin omat kynnet minimiin ja tein siis ihan uudet kynnet. Tähän päätökseen päädyin talven kuivattamien kynsieni halkeiltua ja repeiltyä niin, että olisin muutenkin joutunut lyhentämään kynsiä tai vahvistamaan geelausta reippaasti. Kumpikaan vaihtoehto ei houkutellut ja päätinkin tarttua tarjoukseen kokeilla Nailfix tuotteita.
Lisään tuotteiden kohdalle suoran linkin kauppaan. Linkkien klikkaaminen ei hyödytä minua mitenkään ja lisään ne siis ainoastaan auttamaan teitä löytämään tuotteet sekä hinnan ja muut mahdolliset lisätiedot nopeammin.
Pahoittelen kuvien laatua. Huono valaistus ja ihon normaalia punakampana kuvannut pokkari tekivät tehtävänsä, mutta eiköhän noista kuitenkin tule asia esille.
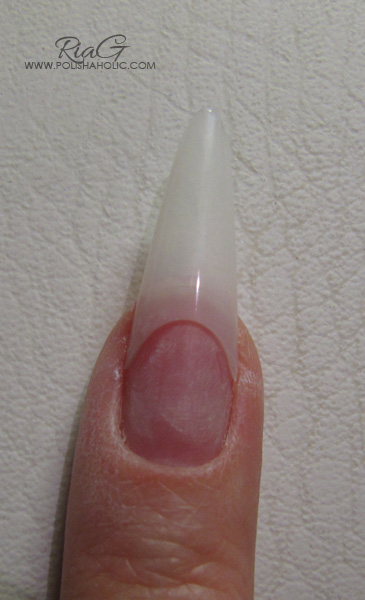
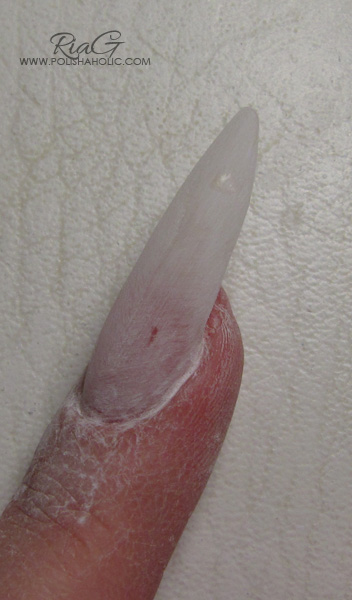
Lähtötilanne oli siis geelauksen poiston ja kynsien lyhennyksen jälkeen seuraava ja voin kertoa, että oudolta tuntui olla noin lyhyillä kynsillä. Näppiksen käyttökin oli lähes mahdotonta, kun sormista tuntui puuttuvan pari senttiä pituutta. Nimettömän pullottava sormenpääkin pääsi pitkästä aikaa näyttäytymään ;)

Seuraavaksi valitsin Nailfixin Russian Style tipeistä sopivan kokoiset tipit. Ihastuin näihin tippeihin suuresti. Muoto on todella kaunis! Tipit eivät kaarru alaspäin ja ovat valmiiksi kuin hieman pinssattuja. Tippien liimaukseen käytin Nailfixin omaa liimaa, jonka olen jo aiemmin hyväksi todennut. Ennen liimausta pyyhkäisin kynnet Blue Scrubilla.
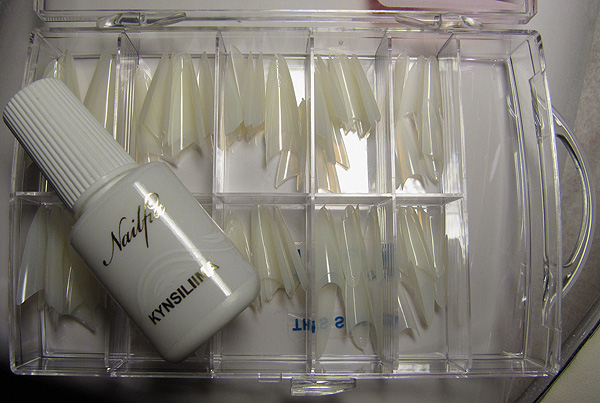
Nämä tipit ovat siis luonnollisen väriset eikä näissä ole erillistä liimapintaa. Tipit ovat sopivan joustavia ja mukautuvat helposti oman kynnen muotoon. Tippien liimaamisen jälkeen karhensin tipin pinnan kevyesti viilaamalla ja häivyttelin hitusen tipin ja oman kynnen rajaa. Häivyttämisen olisi voinut tehdä huomattavasti huolellisemmin kuin minä nyt tein. Tein kuitenkin kynnet itselleni ja käytän aina kynsilakkaa, niin en katsonut tarpeelliseksi nuhjata tuon yksityiskohdan kanssa tällä kertaa sen enempää. Viilasin tippiä myös hieman kärjeltä kapeammaksi. Pituutta en lyhentänyt pois ollenkaan koska halusin pitkät kynnet.
Tämän jälkeen putsasin pölyt kynsiltä ja pyyhin ne Blue Scrub nesteellä joka puhdistaa kynnen ja valmistaa sen pinnan seuraavaa vaihetta varten.
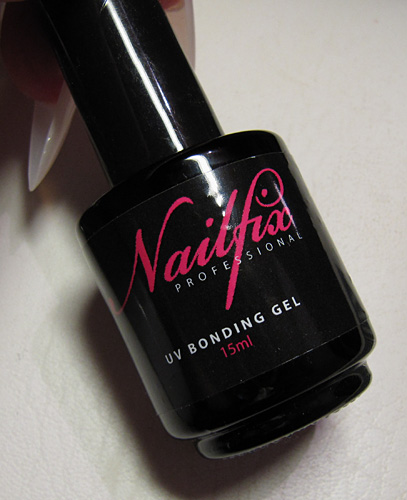
Blue Scrubin jälkeen kynsille levitetään UV Bonding Gel. Tämä on ohut pohjustusgeeli johon rakennegeeli tarttuu. Tahmaa ei siis pyyhitä pois pinnalta vaan jatketaan suoraan rakennegeelin levitykseen. UV Bonding Gel on todella ohutta ja onnistuinkin ensimmäisellä yrityksellä laittamaan tätä kynnelle hitusen liikaa ja kynsinauhoillehan se heti valahti. Eipä muuta kuin kynnen puhdistus ja uusi yritys. Seuraavaksi osasin jo varoa ja olin huolellinen levityksen kanssa. Otin geeliä siveltimeen hillitysti ja työskentelin tarkasti kynsinauhojen läheisyydessä. Levitys oli siis helppoa, kun ei heti liiotellut geelin määrän kanssa. Tätä kuivatetaan uunissa 1 minuutti jonka jälkeen siirrytään rakennegeelin levitykseen.

UV Bonding Gelin jälkeen kynsi näyttää siis tältä ja seuraavaksi siirryin rakennegeelin levitykseen. Minulle tuli sekä Natural Pink, että Clear geelit ja testasin molemmat. Koska kynsistä tuli näin pitkät on parempi levittää geeli kahdessa osassa. Ensin levitin koko kynnelle ohuelti Natural Pink geeliä joka on kauniin haalean vaaleanpunaista ja tuo kynnelle luonnollisen sävyn. Nailfix rakennegeelejä kuivatetaan UV-lampun alla 3 minuuttia.
Koska pidän kapealinjaisista kynsistä kokeilin myös pinssausta geelikynsiin vaikka sitä ei yleensä tehdä. YouTubesta löytyy videoita jos aihe kiinnostaa. Itselläni on pitkät, akryylikynsien pinssaukseen tarkoitetut pinsetit joilla pinssasin nämä kynnet nopeasti muotoonsa kuivatuksen ensisekuntien aikana. Tämän tein siis tietenkin kuivattaen yksi kynsi kerrallaan ja tässä puuhassa täytyy olla todella nopea. Pinssaus onnistui ja sain kynsiin melko jämäkän ja kauniin C-kaaren. Pinssasin siis kynnet Natural Pink geelin avulla.
Tämän jälkeen levitin kynnelle kerroksen Clear geeliä ja rakensin sillä kynteen oikean muodon. Tämäkin vaatii kolme minuuttia UV-valossa.
Nailfix geelit ovat paksuja ja koostumus olikin minulle aluksi hieman hankala koska olen tottunut Cesars Secrets Builder geeliin joka taas on lähes juoksevaa. Alun takkuamisen jälkeen alkoi tekniikka löytyä ja viimeistä kynttä tehdessä lopputulos oli jo huomattavasti ensimmäistä tasaisempi. Harjoittelua näiden käyttö vielä omalta osaltani vaatii. Jos olet vasta-alkaja näiden käyttö tuntuu varmasti helpolta koska geeli on jäykkää ja se ei valahda heti kynsinauhoille. Näillä saat muotoiltua kynteen kauniin muodon huomattavasti helpommin kuin ohuilla geeleillä.

Kuivatuksen jälkeen pyyhin kynnet puhtaaksi tahmasta UV Cleanser nesteellä. Tietysti minä näppärä unohdin ottaa kuvan tässä vaiheessa, joten hypätään suoraan kynsien muotoonviilaukseen. Koska levitystekniikkani näiden geelien kanssa oli puutteellinen oli myös geelin pinta kuivatuksen jälkeen epätasainen. Geeli tuntui viilatessa hieman kovemmalta kuin Cesarin geelit, mutta viilaus oli silti helppoa.
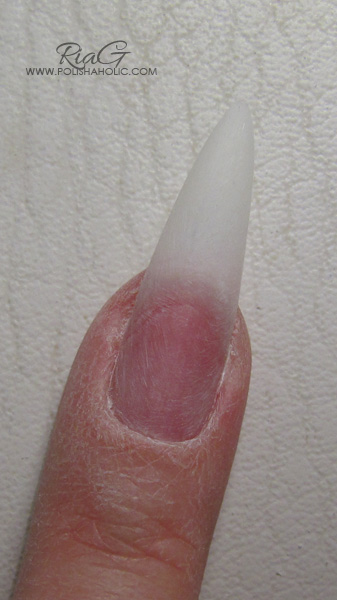
Seuraava kuva onkin otettu kesken viilauksen ja toimii esimerkkinä siitä millaiseksi kynsi ei saa jäädä. Eli jos kynnessäsi on viilatessa vastaavia kirkkaita kohtia se tarkoittaa sitä, että kynsi ei ole tasainen ja viilausta pitää jatkaa kunnes kynnen pinta on täydellisen sileä. Geeliä levitettäessä kohoumat ovat huomattavasti parempi vaihtoehto kuin kuoppa. Täytä siis kaikki kuopat huolellisesti ennen kuin kuivatat kynnet, pyyhit tahman ja alat viilaamaan. Jos kuoppa on liian syvä voit joutua viilaamaan koko kynnen liian ohueksi ennen kuin kynnen pinta on sileä ja kuoppa on kadonnut.
Jatkoin siis kynnen viilaamista muotoonsa. Kavensin kärkeä ja viilasin alalinjan täysin suoraksi. Tarkastelin kynttä joka suunnasta ja hienosäädin muotoa kunnes olin tyytyväinen lopputulokseen.

Kynnet olivat nyt muodossaan ja sitten olikin aika loppusilaukselle. Kynsistä puhdistetaan huolellisesti kaikki pöly ja niille levitetään ohut kerros UV Top Sealer geeliä. Tämäkin on todella ohutta ja helposti kynsinauhoille valahtavaa tavaraa. Koska kynteni ovat näin pitkät aloitin levityksen kynnen kärjestä ja etenin varovasti kynsinauhaan päin. Pidin kättäni kasvojeni edessä, kynsien kärjet alaspäin. Näin levitys onnistui todella helposti ja minkäänlaisia valahduksia ei tapahtunut. Sitten vielä viimeinen kolmen minuutin kuivatus ja valmista tuli.


Eli tällä kertaa ihan tälläiset koristelemattomat kynnet. Tipin raja näkyy geelin läpi, mutta se oli ihan tahallinen juttu, kuten jo aiemmin mainitsin. Lakkaan kynnet ja sieltä lakan alta eivät enää mitkään rajat näy.
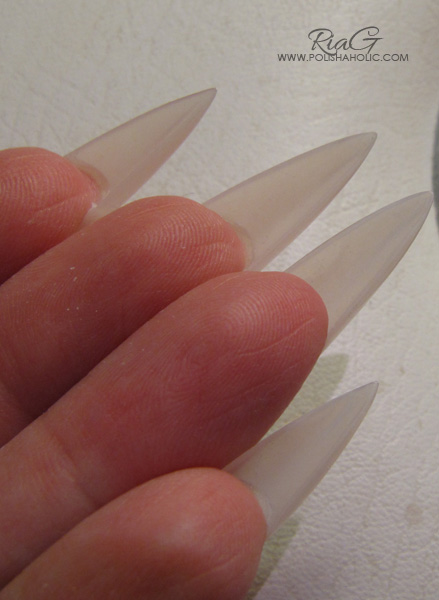
Sivuprofiilikuvasta näkyy hyvin kuinka suora tämä Russian Style tippi on. Tälläinen muoto miellyttää omaa silmääni erittäin paljon. Kynsien alapuolelta otetussa kuvassa näkyy hyvin kynnen muoto ja varsinkin etusormessa näkyy hyvin, että C-kaaren pinssaus onnistui. Asiaa helpottaa se, että omat kyntenikin ovat kaartuvat ja tippi kuin valmiiksi pinssattu. Kärkeen asti kuitenkin puristelin lisää kaarta ja mielestäni muodosta tuli hyvä. Kynnet eivät ole hurjan paksut ja näihin olisi toki voinut tehdä vahvemman stressipisteen. Otan kuitenkin paljon lakkakuvia ja liian paksu kynsi näkyy kuvissa ikävän pulleana. Hyvä C-kaari tuo lisää kestävyyttä ja tämä geeli ei tässäkään vahvuudessa turhia notkistellut tai taipuillut vaikka kynsiä testiksi vääntelinkin.
Geelin pysyvyydestä ja huoltovälistä en osaa vielä teille kertoa koska nämä ovat ensimmäiset Nailfix geeleillä tekemäni kynnet. Tulenkin jatkossa raportoimaan miten kynnet pysyvät ja teen oman postauksen huollosta. Huollossa aikomuksenani on tehdä kynsipedin pidennys Nailfix Cover Pink geelillä ja tehdä kynsiin ranskalainen manikyyri. Siitä kuitenkin lisää sitten, kun huollon aika on.
Tiedän, että nämä kynnet ovat monen mielestä aivan liian pitkät. Itse kuitenkin pidän pitkistä kynsistä ja juuri tälläisistä teräväkärkisistä. Onneksi meitä kynsibloggaajiakin kuitenkin saa ja pitääkin olla vähän joka makuun :)
Jos mieleen tuli vielä kysymyksiä niin jätä kommenttia!
***Tuotteet saatu ilmaiseksi kokeiltaviksi. En hyödy linkin klikkauksista mitenkään.
* * * * *
FOLLOW ME