Author: RiaG

Cirque – Hellebore

4

Hello my lovelies :) Today I have Cirque Hellebore for you. This is a stunning light green glitter polish with a hint of pink in it. This is so gorgeous and blingtastic! I’m in love (as usual)! All the sparkle and especially the pink was really hard to capture with the camera though. You can see the pink sparkling on the blurry parts of the photos the best. This dries textured and I actually preferred this without a top coat. I did add the top coat in the end and took photos with that too. This and Fleur est Belle have really made me want more Cirque polishes. They have some amazing colors I just have to have!

On the photos I have three coats of Hellebore, for shorter nails two coats would be enough. On the top coat photos there’s also a coat of HK Girl top coat.

I bought this from Mei Mei’s Signatures and they ship worldwide.


Cirque Hellebore without top coat
Cirque Hellebore with a top coat

Essence – Top Of The Ice-stream

2

I got my hands on the whole Essence Snow Jam collection earlier this year, thanks to lovely The Swatchaholic. This is actually the first polish out of the four I have taken swatch photos of. Top Of The Ice-stream is a sheer shimmery white with a hint of icy blue in it. I love this polish! I don’t think I can find another bottle so I’m almost afraid to use this in a fear of running out. It’s only a 8 ml bottle :/

Application was excellent and dry time was fast. This is a bit on the sheer side but I only used two coats on the photos below plus HK Girl top coat. So very pretty!


Jindie Nails – Barney Blew Up revisited

2

Barney Blew Up is the first Jindie Nails polish I bought. I managed to get it from the first restock it was available in and was sold out in a flash. I was so proud of my quick fingers :D I’ve taken photos of this one before but those are with shorter nails. So now I decided to photograph it again and now I have photos of all my Jindie polishes on my longer nails. On the pics I have three coats of Barney Blew Up, coat of Nail Pattern Boldness Glitter Food and HK Girl top coat.


Crazy Polish Lady – Blood On The Dancefloor

2

Today I have a polish from a newer indie brand for you. Crazy Polish Lady is based in Portugal and they have released two collections by far. Colors Are The Music Of My Life is a collection of eight polishes with holographic micro-glitter. The shades on that collection are absolutely gorgeous and I was sold as soon as I saw the swatch photos. Memories In Colors is the recently released collection with six shades and there seems to be a couple of must haves on that one for me too.

I bought two polishes on my first order and here’s the first one. Blood On The Dancefloor is a deep blood red jelly/crelly with holographic micro-glitter. Formula was good and application was smooth. This was opaque with two coats and dry time was short. This dries a little gritty and dull so you’ll definitely need to use a top coat. Unfortunately the sun hasn’t been showing up too much here lately so I had to take the photos with the daylight bulbs. I think the holographic glitter would’ve photographed better with some sunlight. Either way I’m very happy with this polish. The slightly muted deep blood red color is gorgeous and dramatic. I loved the black little ribbon and the bow around the cap of the bottle and the printed label was very pretty too. Seems like all the details are well thought of :)

Crazy Polish Lady doesn’t have a webstore yet but she has a blog and FB-page. To order you can contact her in FB and prices with photos are available also on her blog. She ships internationally and my package was shipped right away. So if you’re into indie polish go check out this new brand. You might find something you like!


Daring Digits – Speicher Mei Mei’s Signatures exclusive

4

Today I have another Mei Mei’s Signature exclusive polish for you, Daring Digits Speicher. All of these Mei Mei’s exclusive polishes are so pretty and feminine that I can’t help but keep buying them :D On this order I got two polishes. Those of you who follow me on Instagram have already seen a sneak peek of the pink beauty that is the other polish I bought. I’ll get back at that on another day and on another post.

On Mei Mei’s Signatures shop page  Speicher is described as “A delicate clear base polish with lots of thin gold and silver flakes in irregular size with blue iridescent flakes and blue/purple duochrome micro-shimmers”. This applies really nice and thin. I decided to layer this over white since I thought that combination would be great for spring time and it really is. This also works great over dark shades and I’ll be sure to take a swatch photo over black or dark purple later on.

On the photos I have two coats of Essence Top Of The Ice-stream (white shimmer), two thin coats of Speicher and HK Girl Fast Drying + Super Shiny top coat.

You can buy this and a lot of other gorgeous polishes from Mei Mei’s Signatures. I have nothing but good experiences with this store. Great customer service and fast shipping :)


BG Cosmetics – Ecstasy

10

I bought a couple of more polishes from BG Cosmetics and this is the first one of those two. Ecstasy is from their Party Like a Rockstar collection which includes three other amazing shades. This one is pink, fuchsia, black and gold/yellow hex glitter in a fuchsia tinted shimmery base. I decided to layer this one over my yesterday’s China Glaze No Way Jose manicure. My photos just don’t do this polish any justice. I’m definitely going to revisit this one on a sunny day and wear it alone. This one is so packed with glitter that regardless of the sheer base you can easily wear it alone and get an opaque result.

Ecstasy applied well and evenly. Glitter also came out of the bottle effortlessly. I had no issues with this polish and I love the really bling bling result that sadly didn’t transfer into the photos. On this mani I had China Glaze No Way Jose as a base color, two coats of Ecstasy and a coat of HK Girl fast drying top coat.

I bought this from the BG Cosmetics Etsy store. They have a good customer service and very fast shipping. You should also follow their FB-page for latest news and info on new shades and collections.


ABC Challenge – N is for No Way Jose

34

Wow! It’s Wednesday again and already time for the letter N. Time just flies past so fast it blows my mind! For this week I chose another oldie but goodie, China Glaze No Way Jose. This is a very shimmery light purple shade. Very beautiful and just perfect for this time of the year. This one might be HTF nowadays but at least a while ago you could still find it from eBay.

On the photos I have three coats of No Way Jose and a coat of HK Girl Fast Drying + Super Shiny top coat.

Don’t forget to visit all the other lovely ladies on this challenge :)


Polish days – 7 deadly sins

14

This is my first time doing a Polish Days theme manicure. I’m actually quite excited to do this too :) This month’s theme is 7 deadly sins. I did a quick googling on the subject and saw some inspiring images. I decided to go with pride. Pride is said to be the original and deadliest of the seven sins.

Pride also called vanity, wanting to be more attractive and important than the others. For this I wanted to do a look that was very showy. Since pride is often associated with violet color I saw the perfect opportunity to use my Illamasqua Babtiste that finally arrived. I sponged some purple glitter over it on some parts of the nails and glued on a lot of clear, different sized rhinestones. Unfortunately the photos don’t do justice to how sparkling this manicure really was.


How I apply the glitter bombs and products I love to use

4

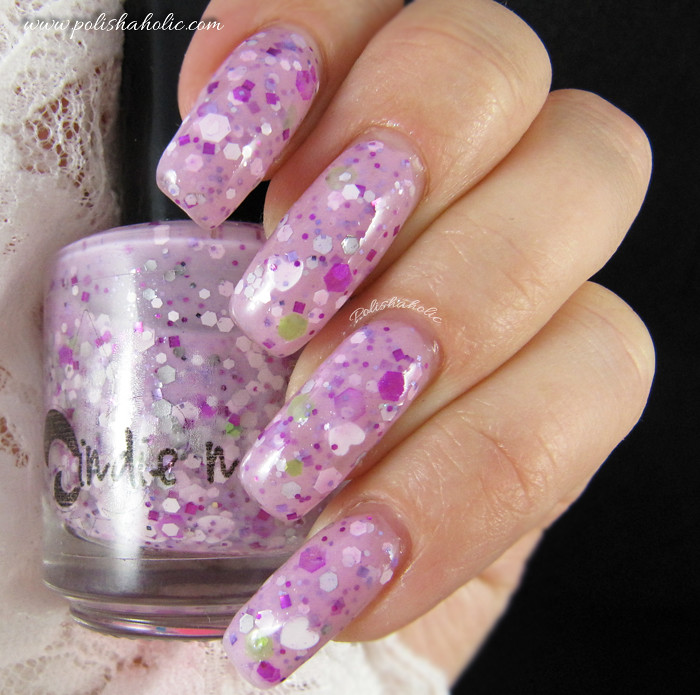
This is probably old news for many of you and if you have a ton of those chunky indie glitters this might not be interesting to you at all. I believe there’s also a few of you out there that don’t own any glitter bombs yet and for you guys this post might be useful. So here’s a little tutorial of how I apply a polish that is packed with glitter and the products I love to use to get the best possible result. Nail polish I used for this is the first bottle of Jindie Nails I ever bought, Barney Blew Up.

Before I start I usually turn the bottle upside down for a few minutes and shake it lightly.


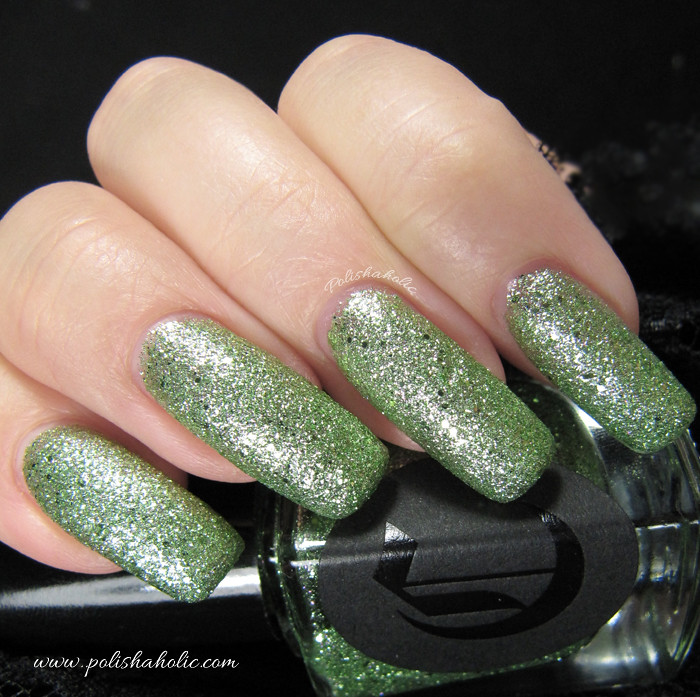
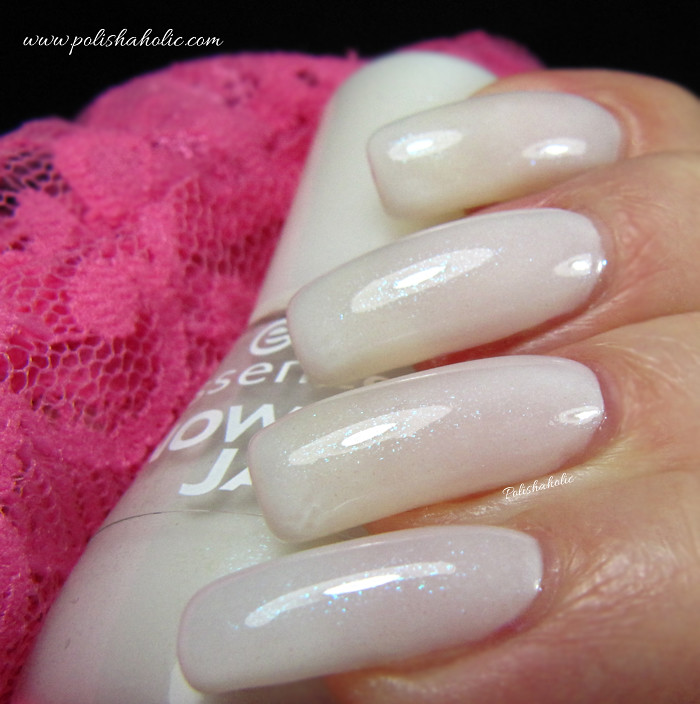
Here I have applied one coat of polish. I have a UV-gel coating protecting my nails so I don’t use any base coat. For the first coat I don’t try to get too much glitter. In fact I usually try to get as little as possible. Just apply a thin, even coat of polish.


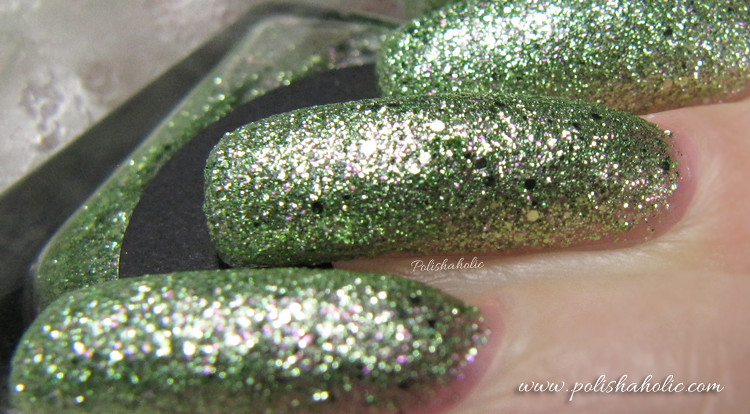
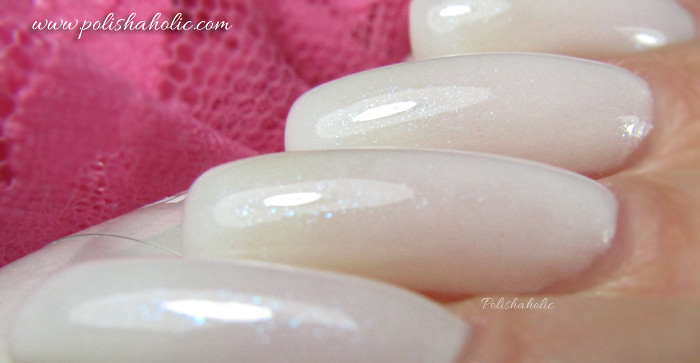
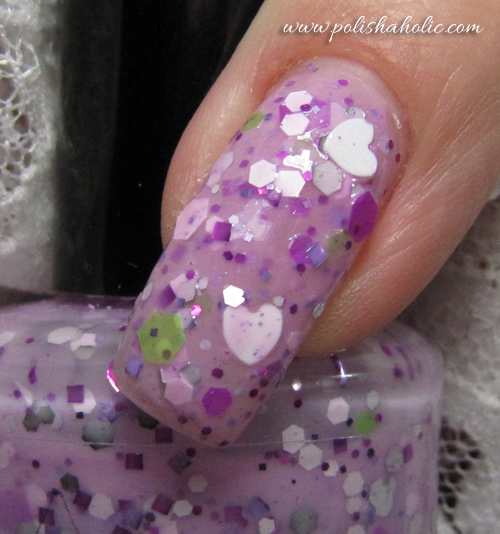
Now I’ve applied the second coat and for that I try to get a good amount of glitter too. It’s important to let each coat dry for a little bit before applying the next. If you try to work too fast you might drag some of the bigger glitters out of place. With this polish you can easily stop here, especially if you have shorter nails. I went for a third coat.


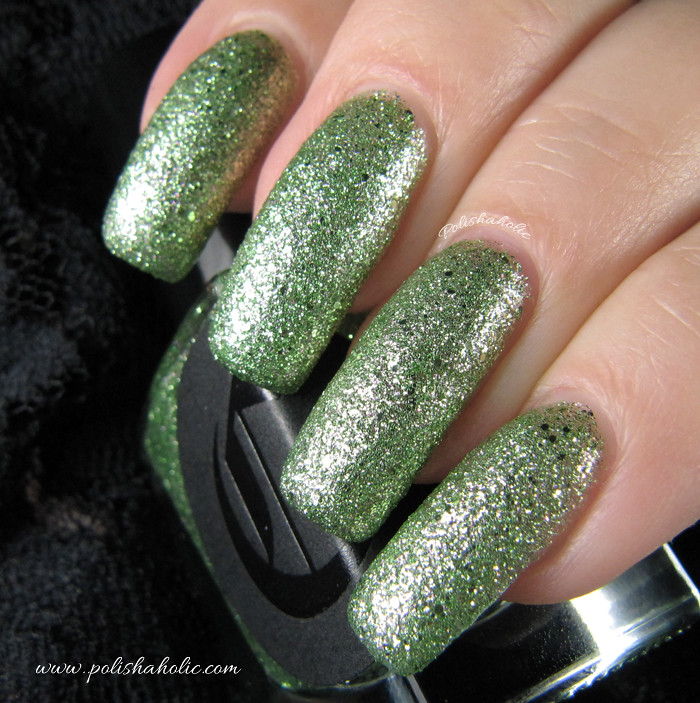
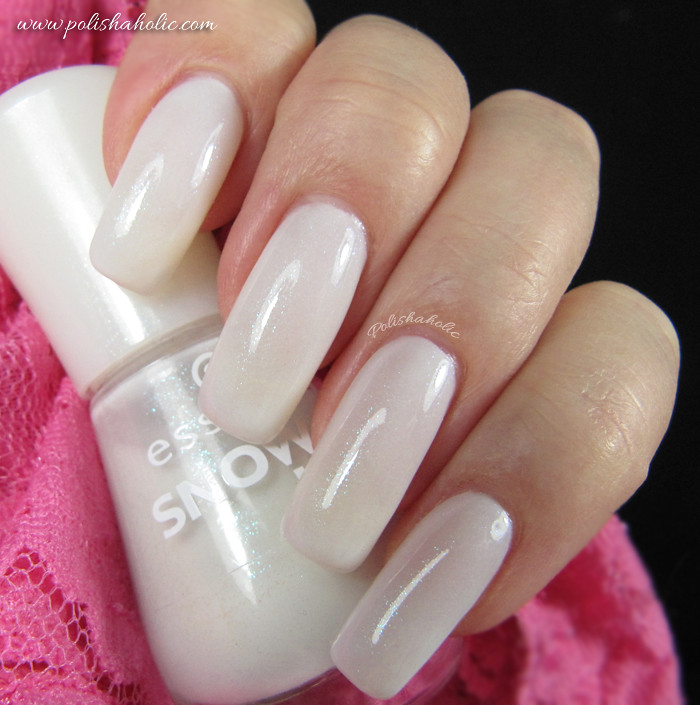
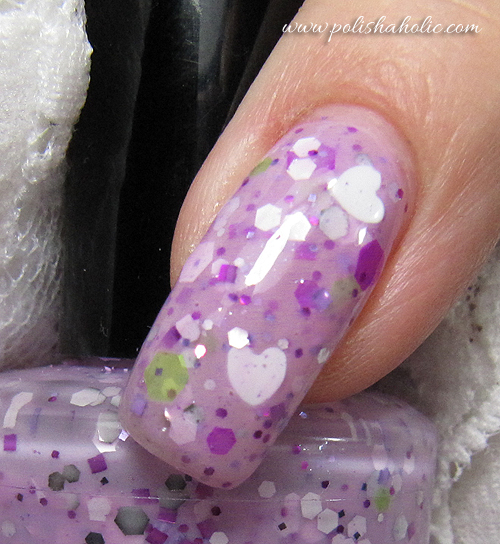
So here’s three coats of Jindie Nails Barney Blew Up. I usually apply three coats cos I love the sandwich effect that these crelly based polishes have. But as you can see three coats can be a little rough looking. It’s not that bad IRL, camera makes it look a little bumpier than it actually is. So if you don’t mind feeling some of the glitter through your top coat you can just add your top coat right now or continue to the next step.


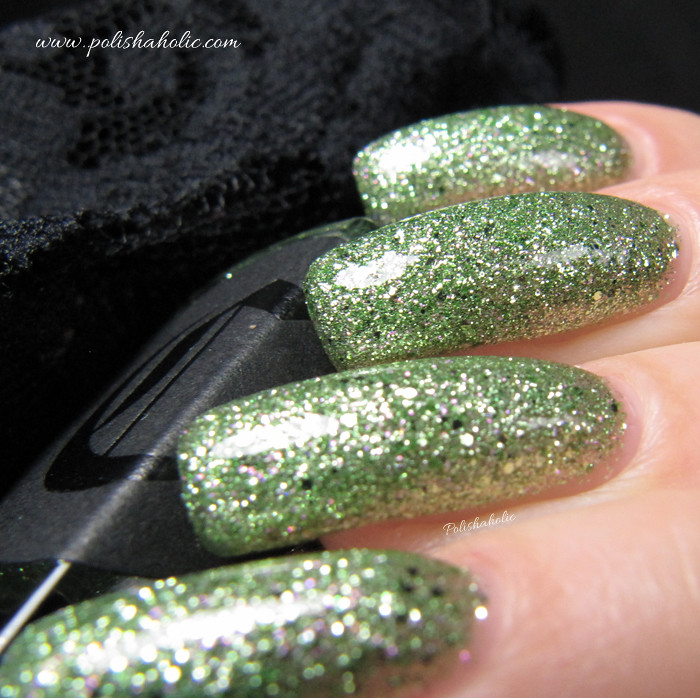
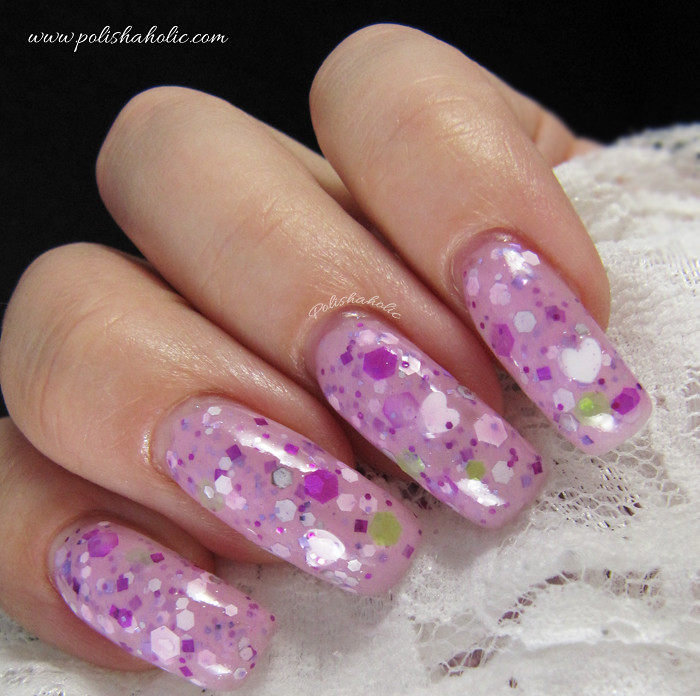
I like a smoother result myself so I use Nail Pattern Boldness Glitter Food. This stuff is AMAZING!! It smooths these glitter bombs so nicely. I can’t live without it anymore and just ordered another bottle so there’s no risk of running out of it. So here is one coat of Glitter Food on top of the glitter polish. It dries a little cloudy so you will need to use a top coat of your choice to get your manicure to shine again.


And here’s the top coat added to the nail. As you can see the shine comes right back on. I  used HK Girl Fast Drying + Super Shiny top coat. It is actually so shiny it made my camera freak out a little, hence the blurry photo :P I have a review of this top coat coming later on after I have tested it a little more. I can say though that I’m already so convinced about it’s greatness that I just ordered two more bottles ;)

So this is how I apply these lovely glitter bombs I have grown so fond of. I just wanted to share this especially with those of my readers who are interested in polishes like this but don’t own any yet. Now you know what to expect with the application. These types of polishes don’t apply like your good quality creme or shimmer polish and these take a little more patience. So when I say in my reviews that this polish applied well I mean well for a glitter bomb. This is by no means rocket science but it still has it’s own little tricks :)


***Glitter Food was sent for review/Glitter Food saatu ilmaiseksi kokeiltavaksi

Born Pretty Store Joyme nail art pen review

7

Happy Sunday my lovelies! I hope everyone’s been having a great and relaxing weekend :)

Today I have a Joyme nail art pen review for you. These are sold in Born Pretty Store for $5.99 a piece and you can choose from six different colors. Mine is pink #06.

These are really easy to use. Directions are printed on the pen itself  “Shake me – pump & use” and it is that simple. Just remember to keep the cap on the pen when you shake it or you might make a bit of a mess. I pressed the pen down a few times on the first use to get the color to come out evenly, I pressed it against paper. Don’t over pump though or you’ll get too much color and it’s going to be hard to draw detailed things. If you use it for a bigger design then you need to pump it again when ever it seems that enough color isn’t coming out anymore.

You can draw very detailed lines and tiny little things with these pens. What I really fell in love with was the tiny little dots you can do! Always the same size, perfect shape and so tiny. I just couldn’t resist using only dots to create my first nail art design with this. You can just dot-dot-dot away. No need to keep dipping a dotting tool in polish and then get uneven sized dots. This was so quick and so easy to do! I’m gonna buy at least black and white pens too.

I used Essence Top Of The Ice-stream and Flormar U02 as a base for my floral dots design. I let the manicure dry well before using the pencil. When you’re all done with your design don’t forget to use a top coat to protect your nail art! I used the pen on top of the polish cos when I tested it on top of a quick drying top coat the color didn’t apply as well and evenly as it did straight on the polish.

You can buy this nail art pen from Born Pretty Store and they also have a wide range of other nail art supplies. Born Pretty Store offers free worldwide shipping. Please use the code “NZL91” when you order and get extra -10% discount.

***This was sent for review.


www.bornprettystore.com